Hi, servus and welcome to my little creative spot today! I am so happy and thankful that you're stopping by! Today I have a quite long and picture heavy project post for you - so you might want to grab yourself a cuppa just in case you decide to read on and until the end. I promise you will learn about Seth Apter's fab new
Emerald Creek "
Baked Texture" embossing powders in more detail and also about a possibility on how to store and use paint and other media samples for your creative process.
Usually I approach projects the way that I just start with a sketchy idea in my head and let the project, the used media and effects take the lead once I've gotten "into creative flow". But sometimes there are projects that I want to fit with certain styles or colour themes...and then I like to refer to and work with colour charts and paint or texture medium samples, simply because that offers more "control" and a different way of "playing" with colour tones and mixed media effects.
Being on the Emerald Creek design team I received a bundle of Seth's amazing embossing powders to play with...and they simply knocked me off my feet. Many of my boss Kim's embossing powders have always and already been ones that make my mixed media heart sing, but Seth and Kim together really stepped that up a notch with Baked Texture! These embossing powders are incredibly beautiful , highly textural, yet delicate and subtle at the same time so they add to mixed media projects brilliantly and are so much more than embossing powders that add just a bit of "bling" to your work.
So here's my Baked Texture Sample Box with Tags!
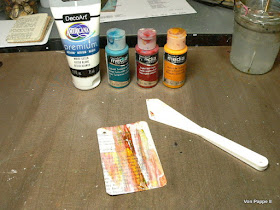
I altered a cheap cardboard box that I primed with DecoArt media black Gesso (to hide the ugly patterned paper it was covered with) and added some "monoprinting" with DecoArt Chalky Finish paints to.
I used Seth Apter StencilGirl stencils and also Seth Apter rubber stamps alongside the Baked Texture. But let's start with the very beginning of this project - the Baked Texture samples that said sample tags are holding on their backs!
I've done samples of each Baked Texture colour on different backgrounds so I can compare how different they look against various backgrounds and colours. I may well add samples on other coloured backgrounds at some time. As I can simply add them to the others in the little plastic zipper bags, my collection of samples can grow over time.
As you can see on the following images I simply stamped a colour sample box image (a Badass stamp design) several times onto different backgrounds...
....and heat embossed them with all seven Baked Texture tones.
The pictures also show how different backgrounds make the colours look different:
Deep Sea
Chunky Rust
Rocky Road
Just look at the incredibly chunky look of Rocky Road in its melted state! Amazing, huh?!
Ancient Amber
Patina Oxide
Vintage Beeswax
I also noted on some of the samples if the embossing powders are transparent or opaque.
Dirty Sand
When that was finished with that, I found that I wanted a third comparison with a warm brown background. So I repeated the process on some kraft paper...
Here's an image showing the Patina Oxide Baked Texture before I heat set it. Look at the chunks it has!
So these are my samples so far - all cut out so I can place each beside each other to see how they look being used together.
Now I needed a storage for these!
On the image below you can see the (flipped over) primed box and some tags that I covered with different designer papers, music sheets and old book pages (using matte DecoArt Decou-Page).
Then I used Seth's "monoprinting with paper" - technique (as I call it) to add painty layers to the box and the tags. I used DecoArt Americana Chalky Finish paints but you can use any matte finish acrylic paint you want.
As you can see I also glued some torn paper scraps to the box before I added my layers of "printed on" paint.
Slowly I built up layer by layer...
...then it was time to add some texture by rubber stamping in black archival ink.
I used some of Seth's IO stamp designs.
I applied the Baked Texture powders to each according tag by dabbing on clear embossing ink through some Stencil Girl stencils with Seth's designs...
I also added some Baked Texture to the box here and there...
The tags so far...
Then I stamped the Baked Texture names onto some yellowed pages of an old magazine, cut them out and glued them to the according tags...
I used smudged black soot Distress Crayon to darken the edges of the glued on words.
As I had quite randomly applied the paints to the tags, each tag shows several colour tones in combination with the Baked Texture, which was exactly what I had been aiming for. One tag - many examples! Yay!
I used double sided transparent sticky tape to fix the plastic zipper bags with the samples to the backs of the tags.
Done!
And there's still enough room for additional tags (just in case there will be more Baked Texture in the future ;). But for now I am more than happy with my finished Baked Texture Tag Sample Box!
I hope you like it too and I can't wait to see what you will create with Seth and Kim's amazing embossing powders!!!!
Click
HERE if you want to enter this month's challenge over at
Emerald Creek Dares!
Hugs and happy crafting!
Claudia
xxx


