Seiten

Monday, 7 December 2020

A Little Bit of Xmas Crafting

 Hi, servus and thanks for stopping by today! 

How's everyone getting along with Christmas preparations? I hope you can all enjoy the advent season and find some relaxed time off real life with Corona pandemic and the usual hectic rush before Christmas! 

This is another invite over to the Calico Craft Parts blog where I am sharing some really quick Christmas projects today - all done with wood shapes from the wide range of winter and Christmas themed craft parts! 


The list with the craft parts (and few DecoArt products) used and some short explanations (honestly not a lot needed regarding the simplicity of the makes) can be found on their blog too. Hope to see you over there! 


Hugs and happy Xmas crafting!

Claudia

xxx


Wednesday, 25 November 2020

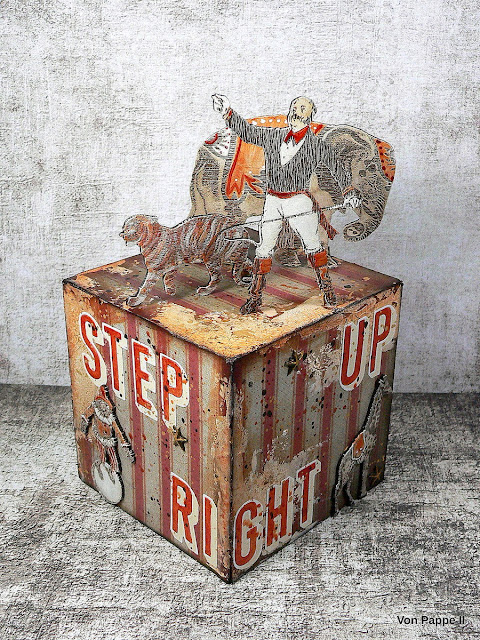
Step Right Up! - Artist Trading Block for Calico Craft Parts

 Hi, servus and thanks for stopping by! 


My usual Monday invite over to the Calico Craft Parts blog is two days late, because this Monday my husband and I got the keys to our new home in the beautiful Austrian Salzkammergut region! We found a lovely modern (and affordable!) wooden house with a small garden at my beloved Attersee (or Lake Atter)!!! So instead of crafting, my time is being filled with planning furniture and organising. 

But I even found the time to indulge in a joyful mixed media session - which led to this circus themed ATB (Artist Trading Block)!


I fell in love with the circus themed new craft parts at first sight (well, who wouldn't, right?). As always there's a tutorial over at the Calico Craft Parts blog to check out, as well as the list of craft parts and products used. 


I hope to see you over there soon!

Stay safe! 

Claudia

xxx


Sunday, 1 November 2020

Snarky Cat's Dapper X-mas - for SanDee&amelie's Steampunk Winter Special Challenge 2020

 Hi, servus and thanks so much for stopping by! 

I am sharing my make (and tutorial) for our annual two-months-long Winter Special Steampunk Challenge over at SanDee&amelie's Steampunk Challenges and as you can see I am already in Xmas swing. 

I recently bought a cheap Christmas themed dome kit and decided to customise it by using one of the absolutely adorable and fun cat stamps from the Tim Holtz "Snarky Cat" stamp sets (in this case I've used one of the cats from the "Snarky Cat Halloween" set). 

And of course I wanted to have lights - so I used one of Tim's Tiny Lights as well! 


Snarky Cat had to dress up for the festivities on Christmas Eve (as is the custom in my family...well, not for the pets actually, but for the human family members of course) - so I decided to give it a dapper hat and bow tie (from the Tim Holtz "Distinguished" stamp set)! 


You can tell from his look that he obviously doesn't like wearing a hat and a tie, but there is a little present for him under the tree - so it is worth the little suffering, right? Or maybe he is already planning on some climbing the tree with its temptingly dangling baubles and the shiny star at the top and doing what most cats love (or would love) to do at Christmas ;) 


Our Winter Special Challenge at SASPC will ("Same procedure as every year, James!")  be open from 1st November until 31st December and instead of the usual three entries each player is allowed up to five this time. Two more chances to win one of our two prizes!!!! And if you need some inspiration, there is a link to the challenge blog at the end of this post, so you can hop over and check out my teamies' fabulous makes too! 

I've created my Christmas tree using an older Tim Holtz Bigz die - the "Evergreen" one (which is still my favourite tree die to be honest). As a base I die cut one tree shape from thick grey board. That was going to be mounted to the dome's base by cutting a wood slice (found at the home decor section of a Dollar Euro store) in two and gluing the finished tree between these two. 


Then I cut two more tree shapes from a piece of white card stock that I had first coloured using Distress Inks, Distress Oxide Inks and Distress Oxide Sprays and Tim's technique of creating this kind of beautifully splattered backgrounds with loads of lovely depth. (Make sure you die cut one of the two tree shapes with white side face down and the other with the coloured side face down so you get two different tree shapes for the front and back sides!)


I added a bit of Distress Glaze on top to preserve the colours and speckles and to intensify them. 


Finally I glued the coloured trees to both sides of the grey board tree using Tacky Glue. 


Next I die cut my dimensional star for the tree top using my beloved Sidekick and the smallest die from Tim's "Dimensional Stars" Thinlits dies set


I then folded the little star into shape and glued it to a piece of left over white card stock. Only AFTER I had painted the star with DecoArt Extreme Sheen "Vintage Brass" acrylic paint, I cut off the excess! This way the small star was easier to hold while being painted and my fingers stayed clean. 


Snarky Cat was stamped onto white card stock using black archival stamping ink and then I used my coloured pencils to colour him (as I find it easier for me to use these instead of Distress Inks and a watercolour brush). 


I also coloured the bow tie and dapper hat and then fussy cut all my shapes. Snarky Cat also got his tail chopped cut off - which explains the look on his face I guess. 


But he got to keep it of course - I just needed it to stick out at a different angle. 

So far, so good. 


Time to prepare the decoration for the tree! I used more white card stock, Tim's "Deck the Halls" Colorize dies set, his "Festive Things" dies set, Distress Oxide Inks and the ink blending tool on my media glass mat


I also added a generous amount of DecoArt media Liquid Glass on top of the baubles (to give these a dimensional and glossy look) and put everything to the side (on the central heating to be more precise) to dry naturally while I went on with decorating the dome kit base. The inner platform got a coat of DecoArt Americana Arbor Green acrylic paint, while the edge was painted using DecoArt Extreme Sheen "Vintage Brass"


I die cut some cogs in different sizes and shapes from white card board, painted these with more Vintage Brass (on both sides) and glued three of them to the back and one as a front piece around the base. 


I also added a self adhesive gold foil trim around the base that was die cut using Tim's 
"Star Trim" 3-D Impresslits folder. 


To create a stand for the Christmas tree, I sawed the wood slice in two (but first I made sure the tree would still fit into the dome when being put between the two pieces) - the smaller wood slice piece pointing towards the back. Next I used my rotary tool to drill two holes - one into the smaller wood slice piece and another through the base (at the exact same spot where the wood slice hole was going to be). 


I also engraved a notch into the bottom of the base - leading from the drilled hole to edge right at the centre of the three glued on gears at the back of the base. I made sure it was wide enough to hold the thicker part of the Tiny Lights' cable. 


Then I glued the wood slice pieces with the tree pinched between them (and more glue) in place and after that had dried I inserted the string of Tiny Lights. 


I used my small hot glue gun to glue the thicker part of the cable into the notch and to fix the Tiny Lights chain to the wood slice in some places. As it got wrapped tightly around the tree it stayed in place pretty well and I only needed two glue spots to fix the lights chain to the wood slice base and one at the tree's back. Snarky Cat, his present and the stamped quote got glued in place using little pieces of MDF left overs at the backs as little stands. 


Before I filled the dome with "snow" (from the kit) and glued it in place permanently, I checked the lights of course. Then I added glue around the dome's edge and put the base with the tree face down in place (otherwise the snow would fall out from the dome) and let that dry. 


Finally I added four pieces of self adhesive felt floor protectors to the base. 


Done! 


Our steampunk/industrial style challenge is open until the end of December - the team and I hope to see you play along with us! Simply click HERE to get to the challenge blog with the actual challenge post. 


Stay safe, enjoy the advent season, merry Christmas and a happy new year! 

Claudia
xxx


Tuesday, 20 October 2020

Take the Scenic Route - for Marte Savona

I love this time of the year!

And I love to travel by train - I can sit and look out of the window for hours! There's so much to see and each house I pass by is inhabited by people who have their very own stories. Each forest the train rushes through is inhabited by animals who have their own stories too. Each falcon I see standing midair above a huge field is looking for prey. How long has he already been looking out for food? What will it be this time? A tiny mouse or a common hamster?
And before I can continue to think of the falcon's possible story, we pass by some allotments - new stories start to unfold in my head...


When we go by car, my husband and I also sometimes love to take the scenic route instead of the motorway - just because this way the journey becomes the reward...


There is of course a step by step waiting for you over at the MarteLAB blog - as well as lots of steps images and the list of all products used (which are all available in the Marte Savona online store).

Hugs and happy travelling crafting!
Claudia
xxx


Monday, 12 October 2020

Blair Witch Manor - a Calico Craft Parts Project

Hi, servus and thanks so much for stopping by, dear creative friends! 

I am finally back after a creative break with a new project for Calico Craft Parts and of course it is a Halloween themed one this time. 


A small cemetery is part of it...


...but the main project is an obviously abandoned manor...


...with a front garden that has taken on a life on its own...


...and it has an uninvited lodger in the basement.


Will-o'-the-wisps light a neglected garden...


...and who's that behind the half open door?
Seems he is already waiting for YOU! 


If you want to find out more about the maybe not totally abandoned manor (and see it by day light) and also about how I've done everything, simply click HERE to get to the Calico Craft Parts blog. A (very) long detailed tutorial with loads of process images is waiting there for you to be checked out. 


I hope you like the tuto and the project!

Hugs and happy Halloween crafting!


Claudia

xxx


I am entering my spooky project to https://www.simonsaysstampblog.com/mondaychallenge/

Thursday, 1 October 2020

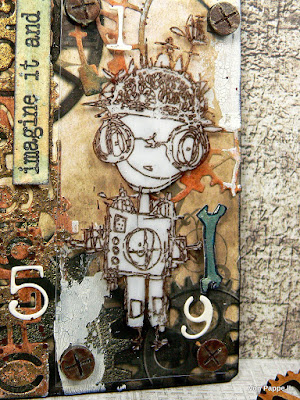
Brave Little Robot - Tag - for SanDee&amelie's Steampunk Challenges

Hi, servus and welcome to the start of our October challenge over at SanDee&amelie's Steampunk Challenges! Once more it is time for a little steampunk crafting fun - and who knows...maybe it is you who will win one of the two prizes we're giving away each month! Please, check out the rules and details - alongside the teamies' fantastically inspiring makes - over at SASPC


I've created a fun tag this time - playing around with DecoArt media fluid acrylics and Crackle Paint, Seth Apter's Wow embossing powders, some steampunk and industrial themed dies, background papers, Calico Craft Parts and the cute "Robot" stamp from Aall & Create


Using stamps with sketchy images is a bit tricky as you cannot fussy cut the stamped images without losing a lot of character from the design - so I decided to stamp the image onto some acetate with StazOn ink and paint the back white - using an acrylic paint marker. 


In a final step the acetate got fixed to the finished tag background using small black sticky foam pads that I covered on the top with some Calico Craft Parts screw heads. 


The background was done first of course - using a designer paper from my holy paper stash (yes, I am trying to use up my long hoarded stuff....lol). That was glued to a sturdy Calico Craft Parts MDF tag with matte Decou-Page glue, trimmed and finally inked around the edges with black archival stamping ink. 


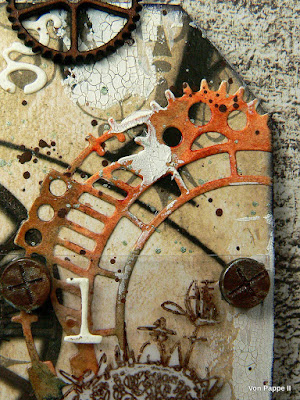
The die cuts were cut from sturdy white cardstock and then got painted using DecoArt media fluid acrylic paints in a watercolour-y way. I layered Burnt Umber, Quinacridone Gold and English Red Oxide quite randomly. Afterwards I partially heat embossed one of them using Seth Apter's Weathered Gold embossing powder. 


In addition to that I spread a little white DecoArt media Crackle Paint here and there on the tag with the very tip of a palette knife. 


To repeat the white from the stamped image and crackle paint I then also used the left overs from one of the die cuts - the white numbers - and added them to the background with DecoArt matte Decou-Page. 

The acetate got fixed to the tag - done! 


I hope my little "brave robot"-tag has put you in the right mood for some steampunk crafting! I promise; the makes of my teamies over at our challenge blog will add even more fantastic inspiration! I hope to see you play along!

Hugs and happy crafting!
Claudia
xxx