Showing posts with label metal leafing. Show all posts

Monday, 16 December 2013

Altered Chocolate Box Book

Today I can finally share with you a project I made as a birthday present for one of my dearest long term friends - another chocolate box book I altered (and yes - I it was once again necessary - for the sake of art - to eat the chocolate first that was inside! Considering all the X-mas cookies I will be eating during the next weeks this is really a sacrifice *lol).


As she teaches chemistry and is a lover of artefacts too, I knew this was the right thing to make for her ;)

You can find a detailed how-to by clicking here (or searching the Tutorials page that can be found at the top of my blog - directly under the banner).

I glued some sandwich paper onto the box and created a lot of wrinkles while the glue was still wet. After this had dried I gave the whole box a coat of "Raw Umber" acrylic colour.

While this was set aside to dry I created the aged paper (using Distress Inks and the Wrinkle Free Distress Technique - an all time favourite of mine which I never tire to do honestly).


The insides of the box were covered with stamped and aged paper too.

I used the Tim Holtz "Laboratoire" stamp set, which I really love!


When the acrylic colour had dried I rubbed on some DecoArt Metallic Lustre "Gold Rush" with a piece of cut'n dry foam.

I toned down the bright red ribbon using a dark brown ink stain to match the rest of the design.

Done!

(Inside - rolled up, stuffed into a tiny vial and corked - was a gift coupon - selfmade of course - for one day's crafting with me in my studio ;)


She seemed to like it very much - and I hope you like it too! :)


Hugs, happy crafting and a merry X-mas to you all!
Claudia x

Tuesday, 9 April 2013

"Windows and Doors" at FunwithATCs

Let me welcome you to another challenge at FunwithATCs!
This time our theme is

Windows/Doors


(If you also want to know the challenge theme over at TioT, please, scroll down to the previous post).


Doors are a very mighty symbol... no surprise then that doors come with many sayings. One of my favourites says:

For each door that closes there is a new one that opens. 

I love the idea that we first have to close doors (or sometimes fate closes them for us) to be able to open new ones and step through  - without carrying too much of the old stuff with us. And I like the thought that we never have to be afraid of having nothing to step forward to... fate always will provide us with new goals and challenges worth being met. There's always the chance to evolve by opening unknown doors.


I had this awesome stamp from DarkroomDoor which I used on a background cut from a paper scrap left over from a selfmade background.


and I also stumbled upon my (seldom used but) gorgeous Lynne Perella stamp showing a door opening and a mysterious man standing in it...


On this ATC I did some metal leafing with IndigoBlu guilding flakes and I applied the glue (and some thin layers of white Gesso in other places) using a stencil, thus creating a couple of dotted layers.

I hope you like it and will hop over to our challenge blog to see what my DT mates have created for your inspiration! 

See you at the challenge!

die amelie x

Wednesday, 27 February 2013

"Feenwünsche.../Fairies' Wishes..."

I tried a lovely technique today - stamping with water into Distress ink (thus removing some of the paint), which leaves a kind of "watermark".

The impression of that background inspired me to work a rather playful and "lovely" tag. Did I ever mention that I love fairies? Well, maybe you remember this image (one of my very first and still most beloved scrap pieces)...


A lot of different mixed-media went into this one:

I gessoed a page from an old book and stamped the fairy image (a nice goodie that came with an order some time ago) and the words on it.
I treated a small, thin vial with alcohol inks and filled it with some glitter flakes and some hand written lines that came to my mind while working on the tag.
I drilled a hole into a piece of bark (that was blended with some Distress inks to match the colour scheme of the tag) to use it as embellishment and add some depth and texture.
I fiddled a small flower from another piece of the book page and inked it with some Distress inks.

Well - enough about the what and how to - enjoy the images!

Hugs,

die amelie xx


"Feenwünsche - leicht wie Sommerbrisen -
 landen sacht in deinem Herzen,
fliegen über Wald
und Wiesen"


( a rather loose translation:)
"Fairies' wishes, lighter than a summer breeze,
disembark on your heart's shores,
softly sail 'cross mountains,
glens and fields"

Monday, 21 January 2013

My personal Top 12 for 2012

Catered Crop want to see our Top 12 creations of the last year! Phew - quite difficult, I think. To choose twelve projects doesn't make choosing easier for me - it only elongates the process *lol.

But it is an awesome idea for a challenge as it makes you browse through all your projects from one year of creative activity - and I am sure by doing so one can learn a lot about one's own process of creative development. Or maybe discover some almost forgotten technique you might want to return to.... who knows...(and not to forget: it makes you browse through awesome top twelves from other crafting colleagues *giggle...have already visited and commented a couple of them and will return to it when there's more time - there's loads of awesome projects to be seen!  ;).

My choice of the Top 12 for 2012 are (in chronological order - from oldest to most recent ones):


#1 My first "scrap" piece of art ever - a 3D scenery with a very personal story behind it: "and then the fairy touched his heart"


#2 The "Love and Passion tag" (love the photo booth picture of that guy and that wire heart!)


#3 The "ATC storage" - made from a fantastic metal photo box I altered (first time working with AAI - this is such awesome stuff!)


#4 The "Bad Moon Rising" card (as I love Noir Comics and spooky stories)


#5 The "Love, I am so worried about you!"-tag (just love that couple...she is sooo worried and he has that caring look...has to be true love, hasn't it?...sigh...)


#6 "The Practical Witches' Companion" - an altered Altoids box for Halloween ( I LOVE Halloween!)


#7 The "Let's tell off for play!" - Leporello (altered playing cards and "Oblatenbildchen")


#8 The "Fall is the door to renewal"-tag (using real patina for the first time)


#9 The "Steampunk Willow" (I love working with wire and that special stamp set)


#10 The "Treasure your Memories"-booklet (with old pictures of my ancestors hiking a glacier! Wow!)


#11 The altered domino booklet (using metal leafing and alcohol inks)


#12 The altered tin box containing a self-made buttons-bracelet (a X-mas present for my sister)


Voila! It was a hard job choosing but I finally made it. Thanks to Catered Crop - what a great opportunity to get a look around the fellow crafters and their choices! Thank you for visiting, my dear friends, old and new followers! So glad, you stopped by!

Hugs,

die amelie x


Top 12 for 2012

Sunday, 25 November 2012

Altered domino booklet

This time I want to share with you my latest "first try" - altered dominoes. There are some amazingly beautiful projects to be found in blog land, which made me want to create one of these tiny treasures myself.

As the main colours used were greens and blues (and there are some red sparkles in the metal leafing too), I dare to enter Vintage Stamping Challenges' "Red/Green/Blue/Purple"-challenge with this project.

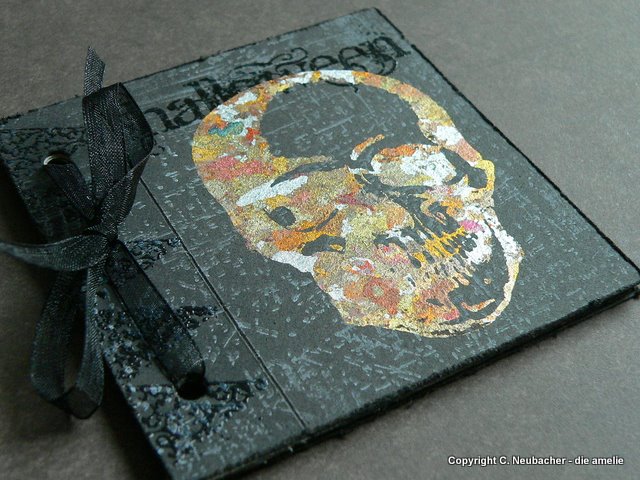
I first gave two dominoes a treat with AAI (mainly greens and blues) and afterwards I adhered some metal leaf by stamping a tiny swirl image, using special metal leafing glue instead of stamping ink.
I applied the glue with a small piece of a rough kitchen sponge onto the rubber stamp. After stamping the glue-image onto the dominoes, I immediately cleaned the stamp with soap and warm water, because this glue is very very sticky and the metal flakes should be put on only after some open time. (Otherwise you only wipe off the glue AND the flakes, when you try to rub them in with your fingertip).

I gave the edges the same treatment, applying the glue directly onto the surface with the sponge. The result looked like this:


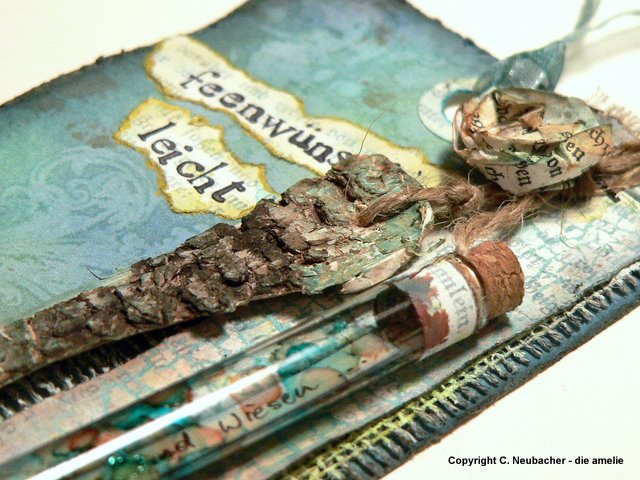
As I wanted to create a booklet, I had to prepare a tiny accordion, which I cut to size, folded and stamped with images of time pieces, birds and quotes about time flying and precious moments.


The edges of the pages were blended with Distress ink "walnut stain" and were given some sprays of diluted colour wash in green and blue. For a finish I painted the edges with gold acrylic colour. For stamping I used archival inks "jet black" and "sepia".

To be able to close the domino booklet, I fixed two organza ribbons by glueing them to the dominoes together with the first and last page of the inner booklet. But first I attached a hinge to the dominoes, which I had treated with AAI too, to make it look aged and timeworn.


I also fixed a small piece of ribbon to the booklet, that holds a golden eye to provide being attached as a pendant to a chain or ribbon.


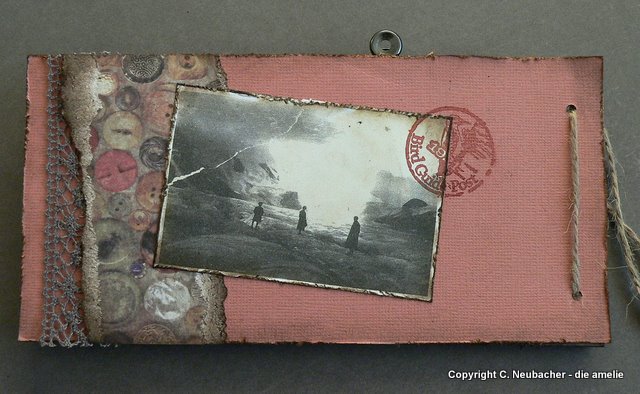
I embellished the front cover of the domino booklet  with a tiny ephemera from some of my paper stash and a small key, that was also treated with rust, green and blue AAI to match the pendant.

The whole surface was given two coatings with Gloss Mod Podge. Voila!


Friday, 26 October 2012

Halloween ATC Brochure

I wanted to do some metal leafing again - had done it years ago, covering found objects (rhinestones and driftwood for example) thus turning them into paperweights - and ordered some of the gorgeous Mega Flakes from Indigo Blu. The "Brighton Pier" mixture has some warm colour tones like reds and orange and a small amount of contrasting blues in it too, which I really love about it.


As it is still Halloween season, I decided to go for a little booklet with three ATCs in it, that are to be torn out, as I perforated the binding edge instead of just creasing it.


For the background of the ATCs I used an Impression Obsession "cover a card" stamp with a scratched design. (Love this one so much!)

I also did some embossing with clear embossing powder (on the covers) and black "Sternenstaub" (inside the brochure), namely the border on the front cover , the pumpkin picture on the back cover and the Halloween postal stamp images on the ATCs.


Stamps used for the ATCs and the front cover picture are from Paper Artsy, Darcie's, Chocolate Baroque and the Unity Stamp Company. Distress inks used were "black soot" and "barn door" (last one to blend the distressed edges of the ATCs). The white scratches on the front cover, which first looked to plain, were stamped with white chalk ink.


I punched two holes into all of the ATC-pages and covers and used a black organza ribbon to bind the brochure. Done.


Happy Halloween!

die amelie x