Showing posts with label stencils. Show all posts

Friday, 29 April 2022

A Stencilled Staircase Showcase - a StencilGirl® Project

Hi, servus and thanks for stopping by today! Over on StencilGirl Talk I am sharing my latest quarterly column and before I start with telling you a bit more about it, I feel I need to thank Mary C. Nasser for the "Stencilled Staircase Showcase" title  - I was struggling with coming up with a good title for my column and project and she helped me with that (this way we found out that we both just loooove alliterations ;). 


Our timber house's staircase needed some wall decoration I found - and my recent new "dental adventures" had meant a little set-back concerning my panic attacks and shaking hands issues - so I needed some creative me-time where I could practise some mindfulness during the creative process. 

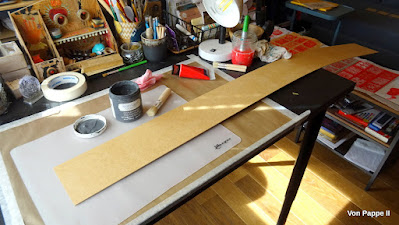
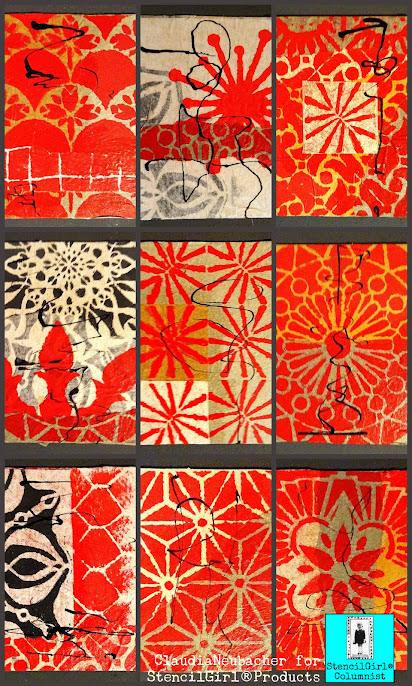
The main idea for the wall art piece originated from this strip of press board that I rescued from going to the waste disposal site (it was a protective "sheet" that came with a piece of furniture). It was a perfect fit for our staircase wall and its width to me seemed the perfect "frame" for a lovely collection of ATC sized collages with stencilled papers. 


I stencilled and stippled a lot and especially enjoyed the relaxing repetitive nature of the whole project - perfect for getting into the flow! To find out about the finished project, stencils used and how it looks on the wall of our staircase, simply click HERE to get to the blog post with steps images, some hints and more eye candy. 


Hope to see you over there!

Stay safe and creative!

Claudia

xxx


Saturday, 30 October 2021

A Glam Grunge Pencil Case - for StencilGirl Products

 Hi, servus and I hope you are all well and safe these days and enjoying a beautiful autumn!

I am sharing an autumn inspired project over at the StencilGirl Talk blog today. A lot of images and a detailed how-to are waiting for you to be checked out! Simply click HERE to get taken to the blog post. 


I found that a bit of bling goes awesomely well with a truly grungy background and design! 


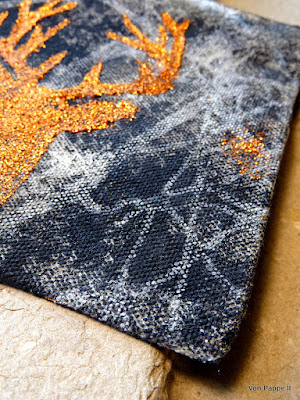
I did some stencilling, also some printing with stencils and layering to create my Alpine Glam Grunge pencil case - and it was such great fun! The how-to explains in detail what I did and which DecoArt paints and media I have used on my blank cotton pencil case to transform it into a glam grunge Alps Lover's fashion statement ;) 


Hope you'll like the inspiration! See you over there! 

Claudia

xxx

Saturday, 16 October 2021

Affirmative Matchbook - a StencilGirl Project and Instagram Hop

 Servus, everyone!


It's in the middle of the night over here and I am posting about my latest project for StencilGirl Products as we are having an Instagram hop with two giveaways for you to win (which starts in about twenty minutes at 10 p.m. their time seen from now that I am writing this post - which is 5 a.m on the next day at my place ;) . I hope to see the deer (that have recently started visiting our garden) in about an hour, before I go back to bed and catch a little more sleep. 

But back to "business" - the Instagram hop and my little matchbook! 


Our wonderful boss, Mary Beth Shaw, has recently sent all on the team little surprise parcels with paints, media, mixed media tools and other little goodies and the plan was to use these on a project that would get shared in an Instagram hop - which is where we are right now. Thank you once more, boss, for the great goodies - love them all!!!! xxx

The picture shows all of these to the right and the StencilGirl stencils and die cut matchbook (using the Tim Holtz "Matchbook" die). 


I used stencils designed by Tracy Evans, Wendy Aikin, Kristin Williams and Seth Apter. 

I started with adding black and natural white chalk paints for a first layer. The black paint got scraped on using a palette knife, then the white was added on top using the architectural stencil and a stipple brush. 


That was followed by scraping on some yellow chalk paint with the palette knife again and adding marks in brown here and there...


I then continued with a layer of sprayed on Cerise IZink spray ink die using Seth Apter's latest Grunge Strips & Borders stencil. 


The ink mixed beautifully with the yellow and natural white layers underneath and created awesome tones from intense pink to warm bright orange. I really loved that!


The sticky cork dots I was given were perfect for adding depth and texture! I painted these yellow and white...


...and while these were set aside to dry I stencilled the lovely faces to the inside of the matchbook (which I had primed with black chalk paint). Next I used some of the Sharpie and watercolour brush pens to add marks to the cork dots. 


Once these had dried I glued them to the matchbook cover and added black shades around them using the watercolour brush pen and a detail brush to smudge the drawn lines around the cork dots. 


To finish up the project I added some word stickers with affirmative quotes and outlined the stencilled faces with the yellow Sharpie. 


Et voilá!


All the infos on the Instagram hop and how to win one of the two giveaways are to be found on Instagram (of course) - simply look out for #stencilgirl and/or #winstencils. Good luck and have a lovely day! 

Claudia xxx

Friday, 30 July 2021

GrungyFlower Still Life - a StencilGirl Project and Video Tutorial

 Oh, well...hey there....long time no see...so thank you even more for stopping by! ;)


As you may have noticed I haven't been spending much time in my studio(s) during the last months but now and then inspiration still likes to strike (at least a little) or one or the other design team project "forces" me to indulge in some creative me-time and I really always enjoy that (and am thankful for it as it keeps me going and in touch with my creative side). 


I am still in the middle of exploring and re-defining myself and my life, being in a new location and also health (or rather meno-pause)-wise forced to find new approaches to enjoying myself and everyday life. The new home close to the lake and the mountains helps a lot with this and I am enjoying my little garden, riding my kayak and exploring new sections of the lake's shore. Hail from one of the last heavy thunderstorms has done some superficial damage to the house and garden, but it is definitely nothing compared to the massive damage farmers and market gardens are dealing with! 

This weekend my son will get his second dose of Cov-19 vaccine and then the three of us will all be on the safe side and relaxed. So we are all well and safe - I hope you and your loved ones are too! 


I am sharing a flower still life with a video tutorial today - done for StencilGirl and with their wonderful stencils of course. If you hop over to their StencilGirl Talk blog, you will learn about what subconsciously influenced my painting - I was amazed myself how much I am obviously visually influenced by my new home and surroundings! 


The ten-minute video shows the whole process and also offers hints on composition and other helpful information on paints and tools used - so I hope you will like it! Enjoy your summer! 


Stay safe!

Claudia xxx


Friday, 30 April 2021

Time to Reinvent - a New Studio and StencilGirl Project

 Hi, servus and thanks so much for stopping by my little (recently quite quiet) creative corner!

Today's post is not just  a kind of update on my creative journey that has come to a sort of halt last autumn but also an invite over to the StencilGirl Talk blog, where I am sharing a new project (slowly getting back into the saddle it seems) and tutorial but also a short video tour around my new studio in my new countryside home at Lake Atter! 


We're keeping our Vienna home and my studio there too - so moving in the house and setting up another studio from scratch there is quite a challenge - especially as I need to decide which materials and tools to leave in Vienna and which ones to move to the new studio in the countryside. 
Deciding which of these to take to the house or leave in the flat still is a challenge I need to meet. Generally I find it hard to nail criteria for dividing stash by as it means you need to know first which kind of projects you will prefer to do in one spot and which in the other. But how do you do this without the feeling of limiting down yourself in both places? 


(impressions from the new studio - more details in the video over at StencilGirl's blog)


So far I have come to the conclusion assumption that I will rather do nature-inspired projects in the new countryside studio and focus on Distress and stencil techniques in the city studio...but what to do with the stencils that are nature themed for example?...I think I will have some items that will need to travel in the future. ;) 

 For now I have put together a kind of base equipment that will allow me to tackle a variety of themes and project types with some of my favourite techniques, inks, paints and products, but I also re-discovered items while browsing my stash that I had either forgotten about or that were among my first acquisitions when I started this hobby and got (mentally) replaced by newer ones over the years. I found these were well worth using again - so I hope they will get to be loved again in the new studio. In the last years I slipped into the habit of "needing" - needing to try out this new product or that new technique or theme...which led to some themes or loved items slipping out of focus...some having been real loves of mine. 


I re-discovered a lot of old texture and nature themed stamps that have been accumulating dust in some forgotten corners in my studio. By forgetting about these I also forgot of themes and project types that fuelled my imagination in the first place...and that still do. 


I have also been feeling lately that I've reached a kind of dead-end with my creativity in many ways - maybe that happened because I somehow lost track of the creative path I originally started on but then found myself trying out too many side trails at once and also designers highways where the urge of new high speed impressions replaced in-depth adventures and a journey that would lead to myself rather than to feeding the "needs" artificially created by something quite shallow - something that is ruled by online marketing thoughts and strategies and not needs of a creative spirit. 

So I am quite thankful for the health crises I am struggling with at the moment, as that forces me to think over a lot of things and re-invent myself and the way of how I want to live my creative side. Setting up a new studio in a new home that also brings me a lot of joy and inspiration from the beautiful nature it is surrounded by is the perfect help! 


The new project for StencilGirl was done in the Vienna studio though (remember - stencils stay there or will travel with me) - and gladly it was a project that brought back my joy in creating after the long break, too. Just me, myself, the beautiful designs, my favourite DecoArt paints and products and the joy of playing with colours and putting together something new to use in my new studio! 


 I hope you will visit the StencilGirl Talk blog too to take the short studio tour and check out the tutorial for this desk tidy! 

Stay safe!
Claudia
xxx


Tuesday, 20 October 2020

Take the Scenic Route - for Marte Savona

I love this time of the year!

And I love to travel by train - I can sit and look out of the window for hours! There's so much to see and each house I pass by is inhabited by people who have their very own stories. Each forest the train rushes through is inhabited by animals who have their own stories too. Each falcon I see standing midair above a huge field is looking for prey. How long has he already been looking out for food? What will it be this time? A tiny mouse or a common hamster?
And before I can continue to think of the falcon's possible story, we pass by some allotments - new stories start to unfold in my head...


When we go by car, my husband and I also sometimes love to take the scenic route instead of the motorway - just because this way the journey becomes the reward...


There is of course a step by step waiting for you over at the MarteLAB blog - as well as lots of steps images and the list of all products used (which are all available in the Marte Savona online store).

Hugs and happy travelling crafting!
Claudia
xxx


Thursday, 17 September 2020

StencilGirl® and Seth Apter - Wow! - Blog Hop

Hi, servus and welcome to an especially exciting blog post today!


As the banner indicates, it's time for another blog hop - this time "WOW!" and StencilGirl Products have teamed up to showcase the new fabulous embossing powders (and Mixed Media Embossing Brush) designed by wonderful Seth Apter and to demonstrate how well these can be used together with StencilGirl stencils to create the most amazing projects with the special wow-factor (sorry, couldn't resist the pun).


Designers from the WOW! and StencilGirl Products design teams are sharing their projects (WOW!'s designers have shared theirs already yesterday...today it's StencilGirl's turn) to inspire you and introduce several ways on how to use Seth's cool WOW! embossing powder Trios and - my favourite - the Mixed Media Embossing Brush (I will tell you why I love it so much a little later in this post in the tutorial section).

At the bottom of this post you will find the links to the other teamies' blogs and projects and learn how to participate in the blog hop and about the great  GIVE AWAY that is waiting for three lucky persons...


But first let's take a close look on Seth Apter's new WoW! embossing powders and how they go together with StencilGirl stencils!
This is the project I have created for this blog hop:


It was all done using - of course - Seth Apter Wow! embossing powders, StencilGirl stencils...and DecoArt Americana acrylic paints.
The panel my altered brush sits on is an old bamboo chop board that I created a background on using Seth's "monoprinting-with-paper" technique (one of my favs).

And as I love to use found objects and left over snippets of previous projects in my work (that I keep in a little wooden box on my desk for inspiration), there is also a left over piece of self made Dresden trim (done with one of the 3D Impresslits folders designed by Tim Holtz), a frozen charlotte, some dictionary scraps and a small piece of linen ribbon to find.


Here are the products and substrates I've used...I always love to have quite a stash of stencils at hand when I start a project so I can pick the ones that fit best while the project evolves and takes me on its own journey (so some of the ones shown here weren't used in the end).


 I've used these StencilGirl stencils to create my altered brush panel: 


- ATC Mixup Apter stencil by Seth Apter
- medium sized stencil from the October 2016 Stencil Club Set by Mary Beth Shaw


The two WOW! embossing powder Trios designed by Seth hold six amazing powders that go by the intriguing names of Blue Moon, Sea of Tranquility and Space Dust (from the "Cosmic" Trio) and Etched Platinum, Weathered Gold and Crusty Copper (from the "Metalz" Trio). The thin bottle with the yellow liquid to the left holds Seth's "Mixed Media Embossing Brush" and an embossing liquid that can be applied to almost any surface by using the brush that is included in the lid.

On my project I went wild and tried the powders and the Mixed Media Brush on as many different substrates as I could - on wood, on paper, on top of acrylic paint, on the brush's bristles and also the metal part, on left overs from chipboard tokens from some board games and on some linen ribbon...and it all worked like a dream!


What I especially love about the Mixed Media Brush is that the liquid has an extremely long open time (compared to other embossing liquids from embossing dabbers) and you can vary the thickness and amount of liquid applied by spreading some of it with the brush on a palette first and using a cosmetic sponge for dabbing only a really thin coat of that onto a surface (which also works extremely well with stencils).
A little of the liquid goes a long, long way and applying too much of it can cause your embossing powders to kind of swim on top and drift away during the melting process. So less is more in most cases, but on certain substrates - like the brush's bristles or fabric for example - you need a thicker coat than a dabber would provide. So the Mixed Media Brush is really versatile and opens up a lot of new possibilities (which makes my mixed media heart sing).

My bamboo board and the ugly red brush were primed using DecoArt Chalky Finish paint "primitive". 


Then I picked some DecoArt Americana acrylic paints and put together one of my go-to colour schemes. I applied layers of paint by first brushing it onto a piece of card stock and then pressing that onto the board - a kind of mono printing technique that is perfect for layering and creating depth and that I've picked up with one of Seth Apter's great online classes.


Voilà - the base for my altered brush and for the next layer that was to be done with stencils and embossing powders was finished!


To tone down my brush I dry brushed it with some dark brown acrylic paint. Then I used the Text and Texture Transform stencil and orange acrylic paint to add the focal word to the brush's handle. I applied the paint through the stencil using a very small stencil brush.


I added more orange words from the stencil to the bamboo panel. Before the paint was completely dry I sprinkled some Sea of Tranquility embossing powder on top, tipped off the excess and heat embossed the traces left on the stencilled words. This added a kind of patina look as it didn't adhere to the whole design.


To create a kind of metal rivets I used two different sizes of left over circles from board game chipboard tokens and heat embossed these with Weathered Gold and Crusty Copper.


The label was heat embossed using Space Dust embossing powder.

Then I fused the smaller "metal" bits with the larger ones by simply putting them together and re-heating. This way the bits on top sank into the molten embossing powder below and once everything had cooled down it was beautifully fused without the use of any glue.


Two stripes of embossing powders (Space Dust and Sea of Tranquility) got added to the very ends of the brush's bristles.


More heat embossing on the panel was to follow! I used Sea of Tranquility again together with a stencil to create the beautiful drip lines. You can see the cosmetic sponge to the very right. Right left to it I had spread some embossing liquid from the Mixed Media Brush flask on my palette (but that doesn't show in the picture). From there I picked some up with the sponge and applied it thinly through the stencil. It gave perfectly crisp outlines!
(I used the left overs on the palette about half an hour later and it still worked smoothly - that's what I really call a long open time!!!)


You can also see the crisp lines from the design from Seth's Urban Insiders Bar stencil - this time done in "Blue Moon" embossing powder.  I had again used the cosmetic sponge through the stencil to apply the Mixed Media Brush liquid from my palette.


Etched Platinum went to the widest section of the metal wrap of the brush and was also used to fix the frozen charlotte in place.


I added some more heat embossing here and there - trying to repeat all the colours used in at least three different spots to fuse everything visually.

Using a fine tip Faber Castell PITT artist pen I outlined some of the designs for better visibility and more interest.


I finally found I needed a kind of frame for my frozen charlotte, so I die cut a circular label holder from heavy cardstock and heat embossed that with Weathered Gold (using the still not dried out left overs from the Mixed Media Brush liquid on my palette!). The label holder looks almost like the real metal thing, doesn't it?!


Three more tiny circle chipboard left overs were heat embossed with Crusty Copper for two nail heads for the label holder and one nail head that was to go on the end of the brush handle.


The piece got finished off by adding some text from the dictionary page scraps and gluing everything in place. Before that I had also added thin stripes of Weathered Gold and Blue Moon the the brush - the latter was applied to the linen ribbon (to the right). With the Mixed Media Brush that was no problem at all.

The brush got fixed to the panel by using thick heavy duty sticky foam pads. The other bits were glued in place using tacky glue and matte DecoArt Decou-Page.


Some close ups: 


My panel tells about stories lost, stories within, stories that are yet incomplete (the stories of our lives), the acceptance of incompleteness in general, it tells about the "principles of trusting" - that come into play when we take a "leap" and put our art (and soul) out there and only dare to do so because we are able to "lean" on our faith in the quality of our own art.


And now let's finally talk about the ...


There's a $35 Gift Certificate to StencilGirl® Products,
a $35 Gift Certificate to Seth Apter’s Shop
AND a $25 Gift Certificate to Wow!

Enter to win by leaving a comment below.
Then be sure to visit the other blogs in the hop and comment to win.


Tina Walker
Debi Adams
Mary C. Nasser
Claudia Neubacher (you are here now)
Kate Yetter


The more blogs you comment on, the more chances you have to WIN!
Three winners will be chosen at random from all blog comments!
(Only one comment per blog please.)

You have until Tuesday, September 22nd at 11:59PM Central Time to leave your comments.
Winners will be announced on Wednesday, September 23rd.


Good luck, everyone,

and as always

hugs and happy crafting!

Claudia 
xxx