Wednesday, 30 January 2013

"Take these sunken eyes..."

"...and learn to see!" (from the Beatles song "Blackbird", Lennon/McCartney, 1968)


That's a line from one of my favourite songs by The Beatles, as I really love the message of encouragement in it (the song was composed by Paul McCartney, as a reaction to racial tensions escalating in the United States in the spring of 1968).


I was asked earlier today what I did with the white gessoed panels (above) I showed today on WOYWW - well, here's at least one of them. 


I did a lot of spraying, spritzing, heat embossing with my favourite embossing enamels, inking and blending...

I stamped the birds nest onto tissue and applied the image to the panel using Mod Podge..pardon, Mod Podgy of course (sorry, Podgy from the House of Bears, it will never happen again ;).

The bird image was stamped on white card (as was the line from the song), cut out, edges distressed and blended with "pumice stone" DI.
For making it a hanging panel, I punched two holes and bent some rust wire to shape. Done! (As Mr. Mojo seemed to have been taking his day off today, I had an awful lot of scraps with failed tries on them thrown away today until I finally was content with the result).


The bird image comes from the lovely "Periwinkle" stamp set from Kaisercraft, the birds nest image is a stamp from De Stempelwinkel's awesome collection. The alphabet stamps are my alltime favourite from Hero Arts! What would I do without them!


Ah - and just because I remember sandeeNC asking, if my son would want to show some of his fantasy combat playing cards he draws (which I mentioned in my first post for WOYWW), when we both are busy at the crafting table, I am going to show you some of them in this post right now (otherwise I forget about it):


As he wants the names of the monsters/creatures to be in English, he learns a lot of English by that. "Legendary Mystic Graveyard Master" - which other nine year old knows phrases like that? *lol

Ah..where were we? Back to the panel! Some close ups for a finish will do perfectly I guess.


Thank you all so very much for stopping by and always leaving encouraging comments with me! That really means a lot to me!

Hope you enjoyed your visit today!
Hugs,

die amelie x


WOYWW # 191 (= #2 in amelie's timeline)

How quickly a week can pass...  it's Wednesday again, which means the perfect time to visit crafters all around the globe showing their working desks at WOYWW. Still think, this is the most brilliant idea in crafty blogland I have ever seen! Sooo well done, Julia, and thanks - this is so inspiring.


Well, not too much to see on my desk - I am having a period of aimlessly trying this and that with the supplies and materials I have...not always successful, when it comes to presentable results. To be honest - I hate it when it feels like this, left by Mr. Mojo, who even cannot be found among all the awesome stuff I own. Brrrrrr!


On the white plate you can see two panels (cut from corrugated card using one of my dies I got for X-mas and haven't used since), left for drying. I coated them with white Gesso but that is as far as my plan has gotten yet. Maybe I will do some spraying with  my colour sprays (in the box to the right) and afterwards I could cover some areas with stamped on tissue paper - a technique I really love. (Still on the search for a theme though...).

In the lid of the TH Cargo Case you can see a brown booklet (right beside my painting frazzle). This is, where I keep track of my online orders in and of how much money I have already been spending during the month on stamping and crafting supplies (quite helpful to give you some short thought of "Ooops, already that much? Well, I should postpone that purchase then..." - this is often followed by calculating the latest purchases again, heavily rounding down the sum, which often leaves the lovely opportunity for that one last buy for this month...*giggle. I really know it's enough, when I do not even try calculating. That works brilliantly with me).

I wish you all a wonderful workdesk wednesday!!! Hope, I will find the opportunity to visit as many as possible this week!

Hugs,

die amelie x

Tuesday, 29 January 2013

"Get ready to celebrate Valentines Day!"

And again it's time for a new challenge over at Try it on Tuesday, folks!
(and as it is Tuesday, this means there's also a new challenge over at FwATCs - scroll down to find out more about that). 

We want you to get ready for Valentines Day, which means we ask you to use at least one heart in your project! (Easy peasy, huh?)
Once more you get the chance to become one of the participants in the monthly prize-draw where you can win a £10 store voucher for some smooth online-shopping over at Crafty-emblies.


So here comes my take on this fortnight's Valentine theme:


It was one of those projects that take over control at a certain stage... the card was originally intended to be much more "lovely", but I somehow ended up with a rather grungy bit (as usual) ... and I have absolutely no clue where I lost track... *lol

Hope you like it anyway. As you can see, I had to try out one of my new Darice embossing folders and the sanding gadget (love sanding at the moment!)

The letters are cut from Kraft-core using the Tim Holtz "Alphabetical" die and treated with some Metallic Rub-Ons. The heart to the right was stamped (using one of my awesome RedLead stamps) and heat embossed with black embossing powder.


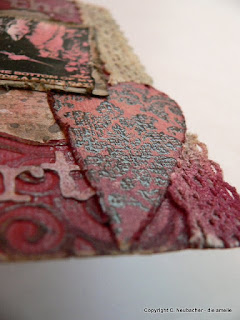
The heart to the left received a coat of Distress crackle paint, which I distressed with "black soot" DI after drying (to make the cracks more visible). For a finish I sprinkled some white and black inks onto the collaged card. Wallaah!


Hope to see you (showing some fab new projects) joining us at TioT's challenge!
And maybe you want to scroll down to the previous post to see what FunWithATCs' challenge is about this fortnight... 

Servus,

die amelie xx

"Flourish"

What would we creative bunch do without our flourishes!? They are the salt to each recipe, they bring some sprightliness into our lay-outs and can be of great help in optically holding collaged pieces together.

Well - easy to guess: the new theme of FunWithATCs' challenge is "flourishes" this fortnight! Show us all your swirly lightness on just 3.5inches x 2.5inches of space! Let flourishes be your main ingredient or the essential spice - but show them!


I had some silver metal foil, from which I cut the flourish using the Tim Holtz "flourish" die. For the background I used some glossy cardstock, which I treated with AAI (mainly dark tones and "copper"). Afterwards I distressed the surface with the scratching tool. The flourish received a treatment with alcohol inks too and afterwards I sanded its edges with the "Sand It Gadget Tool" from Core 'dinations.(I also sanded the edges of the die cut ATC. Love the scratched and worn look).

To receive more depth and texture, I stamped and heat embossed a Paper Artsy image, using Fran tage "aged silver embossing enamel", onto the distressed background. The "flourish" quote was written by hand and embossed too.

Then I fixed the flourish to the background using staples - a lot of staples to be exact. :)
For a finish I added two industrial looking brads (LOVE THEM! Thank you so much, Sandra!!!).

I really hope you enjoyed your visit today and am looking forward to seeing your flourishing creations over at FwATCs ;) !!!

Hugs,

die amelie x

Saturday, 26 January 2013

"Want people talking about you?"

Vintage Stamping Challenges and Allsorts Challenge blogs ask for "Vintage" and "Masculine" projects.

So this was the perfect time to try out my awesome new vintage stamp set I won over at Vintage Stamping Challenges! (Whoop! Whoop!)

I also used my newly bought Sizzix Tag Die (as I never manage to trim the upper corners exactly when I cut out the tags by hand, that was some useful acquisition!). Cool thing is: it cuts two hole fasteners too! (using beige cardstock I found this really looks very vintage!)


To create the background I did some stamping and partially embossing with clear embossing powder, blending over with Distress inks "vintage photo" and "rusty hinge". The stamps are all from the flonzcraft stamp set "Sweet Fifties". Only the pepita texture was stamped with a Tim Holtz stamp from the "Classics #7" plate.


I drew the speech bubbles by hand (love that special comic font!). Hope you like the tag!


Have a sunny afternoon!

die amelie x

Wednesday, 23 January 2013

WOYWW # 199

Rather new to the WOYWW-family over at Julia Dunnit's fab weekly workdesk-event, I am already a WVA (= workdesk-visiting-addictive), I have to admit. *lol


Today I tried to take a picture from a point of view that showed a little more of my workdesk's surroundings. Which means two of my three and a half crammed shelves, that hold a lot of stash I even don't remember owning any more ;)

On my desk you can see the last traces of yesterday's APD - acrylic paints day: a lot of mixing paints and washes, coating and dry brushing that was... and a lot of fun. Only problem was: during drying periods there was plenty of time to sneek around and through online shops, hunting for urgently needed (that's what they always are, aren't they?) crafting supplies - maybe even on sale?!!!! (Darn your coats and washes, Andy Skinner! *giggle). Of course the hunters stalk was successful... :D

The felt tip pen case to the right is my son's, who often joins in crafting, mostly creating fantasy playing cards with self invented creatures and loads of complicated data, indicating their powers for battle.  (LOVE them!!!)

Well, have to hurry on (and have to go visiting your work desks later). My dog girlie needs to be walked and my son to be picked up from school today. Have a wonderful WW ye all!!!

Hugs,

Claudia - aka die amelie x


Monday, 21 January 2013

My personal Top 12 for 2012

Catered Crop want to see our Top 12 creations of the last year! Phew - quite difficult, I think. To choose twelve projects doesn't make choosing easier for me - it only elongates the process *lol.

But it is an awesome idea for a challenge as it makes you browse through all your projects from one year of creative activity - and I am sure by doing so one can learn a lot about one's own process of creative development. Or maybe discover some almost forgotten technique you might want to return to.... who knows...(and not to forget: it makes you browse through awesome top twelves from other crafting colleagues *giggle...have already visited and commented a couple of them and will return to it when there's more time - there's loads of awesome projects to be seen!  ;).

My choice of the Top 12 for 2012 are (in chronological order - from oldest to most recent ones):


#1 My first "scrap" piece of art ever - a 3D scenery with a very personal story behind it: "and then the fairy touched his heart"


#2 The "Love and Passion tag" (love the photo booth picture of that guy and that wire heart!)


#3 The "ATC storage" - made from a fantastic metal photo box I altered (first time working with AAI - this is such awesome stuff!)


#4 The "Bad Moon Rising" card (as I love Noir Comics and spooky stories)


#5 The "Love, I am so worried about you!"-tag (just love that couple...she is sooo worried and he has that caring look...has to be true love, hasn't it?...sigh...)


#6 "The Practical Witches' Companion" - an altered Altoids box for Halloween ( I LOVE Halloween!)


#7 The "Let's tell off for play!" - Leporello (altered playing cards and "Oblatenbildchen")


#8 The "Fall is the door to renewal"-tag (using real patina for the first time)


#9 The "Steampunk Willow" (I love working with wire and that special stamp set)


#10 The "Treasure your Memories"-booklet (with old pictures of my ancestors hiking a glacier! Wow!)


#11 The altered domino booklet (using metal leafing and alcohol inks)


#12 The altered tin box containing a self-made buttons-bracelet (a X-mas present for my sister)


Voila! It was a hard job choosing but I finally made it. Thanks to Catered Crop - what a great opportunity to get a look around the fellow crafters and their choices! Thank you for visiting, my dear friends, old and new followers! So glad, you stopped by!

Hugs,

die amelie x


Top 12 for 2012

Sunday, 20 January 2013

"remember"

As you may still remember, I have been given some awesome cigar boxes by a very dear friend of mine, that are waiting to be altered. The first one I altered was this one.

As I guess I am best known in blog-land for my altered pieces, for distressed, dark, grungy and/or time-worn looks, using aged embossing enamels and for embellishing with metal pieces and vintage pics, I cannot withstand to enter SSSS's challenge with this project, as they ask "what are you known for? " ( a clever theme for a challenge and my cigar-box just fits in perfectly - if this isn't the perfect coincidence, huh?!!!).

I am also entering the challenges at Pin And Tack ("Anything Goes" - SYCN), Happy Daze ("use something recycled"), Eclectic Paperie' ("Altered boxes"), Out of a Hat Creations("most useful stamp" - which my Hero Arts tiny alphabet stamp set I use for the "remember" in fact is, as it is the one I use most often) and Vintage Stamping Challenges ("Vintage") with this project (at least the "remember" is stamped - hope this will do ;).

I altered this cigar box (its orginal state can bee seen in my first altered cigar box post which is linked at the beginning of this post) using the faux leather technique from "Technique Tuesday's" awesome tutorial (which can be found here) again. But for the second box I varied that technique a little by covering the ink-blended masking tape surface with a heat embossed coat of "Old Paper" embossing powder and after that another coat of clear rock candy Distress crackle paint. That was followed by spraying the hardened surface with loads of spray paints from Mr. Huey's, Glimmer Mist and Maya Road to achieve a quite dark appearance that should match the mainly silvery aged embellishments.


The lady on the photograph assumably is a very early ancestor of mine...I found her picture in the photobox my beloved grand-aunt left me. According to her dress and hat this one has to be taken in the late eightteen-hundreds I guess. (wow!)

I distressed a copy of the image with the distressing tool and blended the edges with "vintage photo" and the image with "antique linen". I gave a piece of white lace a bath in Distress inks and stains.

Before I attached the embellishments to it using tiny loops, I darkened them with StazOn jet black ink, which I rubbed in using a small sponge dauber, wiping off the excess with my "painting cloth" (a piece of one of my husband's old (and can be seen through) t-shirts I finally managed to sort out from his all time favourites pile unseen...*phew!).


The hinges (cut out from a Kraft core sheet using the awesome Alterations die from the TH series for Sizzix) were embossed with Fran-tage "aged silver embossing enamel" and glued to the box using special power glue (as usual craft glues won't stick to that kind of surface).


For easily opening the box I attached a piece of brown lace ribbon to the lid's inside, fixing it with a piece of masking tape and later with an additional layer of paper from one of my stashes that would cover the whole inside of the lid.


The book plate was heat embossed with aged silver embossing enamel too and glued to the box instead of fixed with the brads as the lid would have been too thick to simply punch holes in it.

I had one of my awesome Prima flowers left, that matched the design of the box perfectly and I embossed that one too with small traces of aged silver embossing enamel (you possibly could have guessed by now which embossing enamel is my absolute favourite ;). I added two punched leaves, that were coloured by using Distress stains "brushed pewter". (Maybe you can see some of it on the picture.... love these crackles!!!)


For additional embellishing I used some silver parts for making jewelry. The "remember" was stamped with my Hero Arts tiny alphabet stamp set.


As usual some close-ups (which means you have finally reached the end of this post ;)


Hope, you enjoyed your visit today!

Wishes,

die amelie xx