Showing posts with label SanDeeANDamelie's Steampunk challenges. Show all posts

Saturday, 1 May 2021

Two Rusty Crusty Tags for SanDee&amelie's Steampunk Challenges

 Hi, servus and welcome to the start of a new challenge over at SanDee&amelie's Steampunk Challenges, dear friends! 

A new two months long challenge is waiting for you to be faced and with my inspirational project for May and June I decided to get rusty again! 


I was given some delicious chipboard pieces to play with by lovely Glenda from boozybear - one of our two prize sponsors: two cool gentlemen from the "Canes" set, the beautiful "Umbrella" set, a fine selection of awesome cogs and gears and the fabulous "Stacked Suitcases"! 


Of course these had to be used with some steampunk/industrial style travel theme tags! 


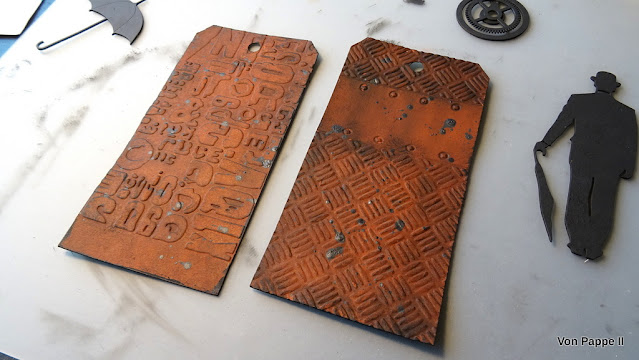
I started with die cutting two #8 size tags from old packaging cardboard using my "Tag&Bookplates" die designed by Tim Holtz - one of the very first dies I bought and still one of my most often used ones. 


I ran them through my BigShot using an embossing folder from Carabelle Studio and another from Spellbinders (I think). 
Then I added a base layer of red-brown acrylic paint - which already gave a great rusty appearance. 
I enhanced that by dry brushing the dried tags with Carbon Black acrylic paint and adding sprinkles of a very dark grey that I mixed by adding a tiny amount of white acrylic paint to the black paint left overs on my palette. I also painted the chipboard pieces with that dark grey tone. 


The hat, shoes, umbrella and suitcase handles were heat embossed using black embossing powder. The buckles got painted using DecoArt Extreme Sheen "Vintage Brass". I also added sprinkles of that to the tags before I fixed the finished pieces in place. The umbrella man and suitcases got a bit of shading with a detail brush and black acrylic paint for more depth and dimension. 


To fix the elements in place I used some chipboard left overs that I glued to the backs. 


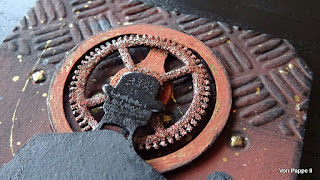
The second gear was heat embossed with Ranger "Rust" embossing enamel. 


I found the umbrellas needed to be painted over with Yellow Iron Oxide acrylic paint - as this tone has a bit of a green-ish touch it makes the orange rusty tones pop even more and it also forms a great contrast. 


The quotes were stamped using Tim's "Noble Gent" stamp set. 

Some detail shots: 


I hope you like my two tags! I made these in my new (and not yet fully equipped) studio in our new home in the countryside! I love this spot so much and moving in kept us busy during the last months - so this was one other reason for my being absent for quite some time (besides struggling with break down, exhaustion and depression after an obviously too long struggle with health issues and many nasty side effects from tried out medications...but I won't bore you with that now). 

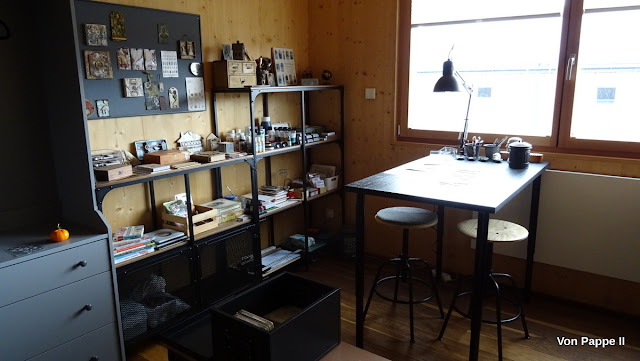
Here's a first view of my new creative spot at Lake Atter! So far I've managed to put together a base equipment that allows me to play whenever time allows and creativity comes by for a short visit (which isn't too often at the moment, but it is slowly returning). 


Two thirds of the shelves are still empty - and I guess these will only get filled slowly as it is a slow process to find out which things I want to keep and use in my Vienna studio and which ones in our country home. The room also serves as a guest room - therefor the sofa which can be turned into a comfy bed. 


I intend to buy less new crafting stuff, but one item had to bought again - the BigShot. I found I couldn't do without one in either spot! I remember when I got my first one...I was a bit sceptic if I would use it a lot, but I found it really took my creativity to another level and I wouldn't want to miss it now. 

And here's a first picture of the lovely view from my studio window - taken several weeks ago when winter came back for a short but hefty surprise visit after spring had already set in. 


But back to our steampunk challenges! The team and I are waiting for your entry over at our challenge blog! I hope to see you play along with us soon!

Hugs, stay safe and happy crafting! 
Claudia
xxx


Saturday, 9 January 2021

New Year , New Paths, New Hopes and a New Steampunk Challenge

 Hi, servus and thanks for stopping by my quiet creative corner! I hope you've all had lovely holidays and I wish for us all that 2021 will bring everything we've been hoping for! 

Those who have been following me might already know that I have been struggling hard with health issues (mainly caused by menopause in combination with my chronic thyroid illness) during the last twenty months or so - panic attacks and nervousness with shaky hands having made crafting almost impossible at times. I am now trying to tackle that differently (after having tried different ways of medication during the last months which turned out to cause severe side effects instead of improving health) by seeing a therapist (so much better than flooding the body with chemicals it obviously cannot take) and I believe that things will get better step by step - maybe slowly but for good and with a lot of improvement on the personal side. 

That will very likely also lead to new, different ways of living and expressing my creative side I guess...my main goal with this is that I will get back to enjoying the creative process - free from any pressure or struggle with shaky hands and nervousness. During the last months I have already cut back when it comes to design team work, but luckily my favourite design teams I am on are very understanding and wait for me to return! 

Speaking of design teams - our first challenge for 2021 has just launched over at SanDee&amelie's Steampunk Challenges and there are some changes there as well: due to Corona pandemic DecoArt cannot send out prize bundles for now. As requests on certain products have exploded during Corona pandemic, they had to adapt to that and cut back on other specific product lines - one of these being our prize bundle paints and products. DecoArt and I have decided to switch to two-months long challenges until everything is back to normal (which we all hope will be in or around April) and prizes can be shipped out again as usual. We will of course draw prize winners for all our challenges, but ask our DecoArt prize winners to be patient as their prizes will be sent out later this year. 


My mojo is still on vacation - not only because of my health issues...but also because I am currently busy with moving in our newly bought holiday home at Lake Atter in the beautiful Austrian Salzkammergut!!! My husband and I were incredibly lucky to find and buy our dream house in our dream location this autumn - I am still pinching myself! It's not a big house - but it has everything we need and is a modern house made totally of wood! I love that! And it offers everything I had wished for - located close to a lot of hiking trails and even a skiing piste, just a two minutes drive from the lake, with forests and mountains and the view at the lake (and the very top of the amazing Dachstein glacier) just around the corner! 

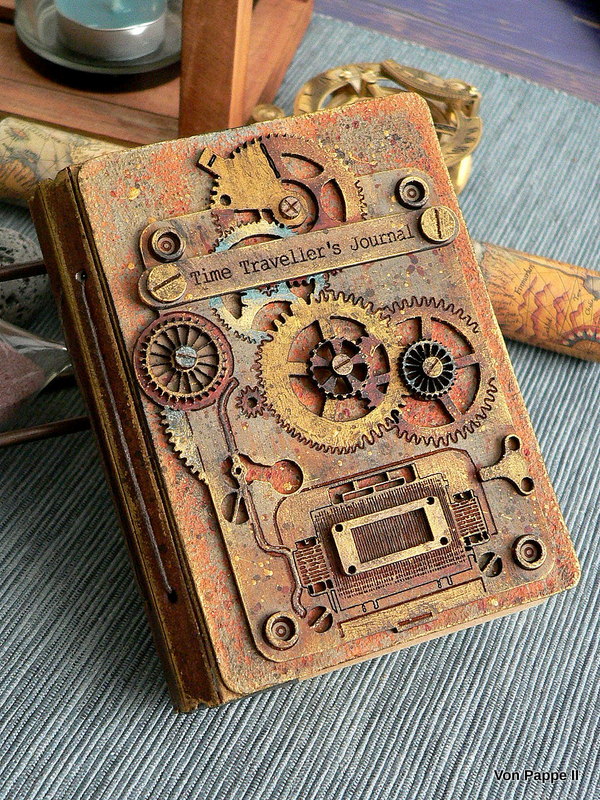
But back to mojo and challenges - I am sharing this older steampunk project to inspire our steampunk challenge players; one that hasn't been shared via the challenge blog but on the Calico Craft Parts blog - HERE. There is a full tutorial to find there as well as loads of images and a list of products used. 


It's a notebook I've made using one of Eileen Hull's cool book dies and Calico Craft Parts. The metal and weathered effects were created using DecoArt and DecoArt media paints and products (more info on these in the blog post over at Calico Craft Parts). 


The covers were die cut from heavy grey board and I found some little journals that fit perfectly as signatures (so I do not need to make my own). 


Well, that's it from me so far! The team over at SASPC are waiting for your visit and entries! 

Make sure you check out the different rules that apply for our two-months long challenges (Maura, your current challenge host for January and February, explains everything in the blog post)! Good luck and joyful crafting!

Hugs and a successful, healthy and happy 2021!


Claudia

xxx


Sunday, 1 November 2020

Snarky Cat's Dapper X-mas - for SanDee&amelie's Steampunk Winter Special Challenge 2020

 Hi, servus and thanks so much for stopping by! 

I am sharing my make (and tutorial) for our annual two-months-long Winter Special Steampunk Challenge over at SanDee&amelie's Steampunk Challenges and as you can see I am already in Xmas swing. 

I recently bought a cheap Christmas themed dome kit and decided to customise it by using one of the absolutely adorable and fun cat stamps from the Tim Holtz "Snarky Cat" stamp sets (in this case I've used one of the cats from the "Snarky Cat Halloween" set). 

And of course I wanted to have lights - so I used one of Tim's Tiny Lights as well! 


Snarky Cat had to dress up for the festivities on Christmas Eve (as is the custom in my family...well, not for the pets actually, but for the human family members of course) - so I decided to give it a dapper hat and bow tie (from the Tim Holtz "Distinguished" stamp set)! 


You can tell from his look that he obviously doesn't like wearing a hat and a tie, but there is a little present for him under the tree - so it is worth the little suffering, right? Or maybe he is already planning on some climbing the tree with its temptingly dangling baubles and the shiny star at the top and doing what most cats love (or would love) to do at Christmas ;) 


Our Winter Special Challenge at SASPC will ("Same procedure as every year, James!")  be open from 1st November until 31st December and instead of the usual three entries each player is allowed up to five this time. Two more chances to win one of our two prizes!!!! And if you need some inspiration, there is a link to the challenge blog at the end of this post, so you can hop over and check out my teamies' fabulous makes too! 

I've created my Christmas tree using an older Tim Holtz Bigz die - the "Evergreen" one (which is still my favourite tree die to be honest). As a base I die cut one tree shape from thick grey board. That was going to be mounted to the dome's base by cutting a wood slice (found at the home decor section of a Dollar Euro store) in two and gluing the finished tree between these two. 


Then I cut two more tree shapes from a piece of white card stock that I had first coloured using Distress Inks, Distress Oxide Inks and Distress Oxide Sprays and Tim's technique of creating this kind of beautifully splattered backgrounds with loads of lovely depth. (Make sure you die cut one of the two tree shapes with white side face down and the other with the coloured side face down so you get two different tree shapes for the front and back sides!)


I added a bit of Distress Glaze on top to preserve the colours and speckles and to intensify them. 


Finally I glued the coloured trees to both sides of the grey board tree using Tacky Glue. 


Next I die cut my dimensional star for the tree top using my beloved Sidekick and the smallest die from Tim's "Dimensional Stars" Thinlits dies set


I then folded the little star into shape and glued it to a piece of left over white card stock. Only AFTER I had painted the star with DecoArt Extreme Sheen "Vintage Brass" acrylic paint, I cut off the excess! This way the small star was easier to hold while being painted and my fingers stayed clean. 


Snarky Cat was stamped onto white card stock using black archival stamping ink and then I used my coloured pencils to colour him (as I find it easier for me to use these instead of Distress Inks and a watercolour brush). 


I also coloured the bow tie and dapper hat and then fussy cut all my shapes. Snarky Cat also got his tail chopped cut off - which explains the look on his face I guess. 


But he got to keep it of course - I just needed it to stick out at a different angle. 

So far, so good. 


Time to prepare the decoration for the tree! I used more white card stock, Tim's "Deck the Halls" Colorize dies set, his "Festive Things" dies set, Distress Oxide Inks and the ink blending tool on my media glass mat


I also added a generous amount of DecoArt media Liquid Glass on top of the baubles (to give these a dimensional and glossy look) and put everything to the side (on the central heating to be more precise) to dry naturally while I went on with decorating the dome kit base. The inner platform got a coat of DecoArt Americana Arbor Green acrylic paint, while the edge was painted using DecoArt Extreme Sheen "Vintage Brass"


I die cut some cogs in different sizes and shapes from white card board, painted these with more Vintage Brass (on both sides) and glued three of them to the back and one as a front piece around the base. 


I also added a self adhesive gold foil trim around the base that was die cut using Tim's 
"Star Trim" 3-D Impresslits folder. 


To create a stand for the Christmas tree, I sawed the wood slice in two (but first I made sure the tree would still fit into the dome when being put between the two pieces) - the smaller wood slice piece pointing towards the back. Next I used my rotary tool to drill two holes - one into the smaller wood slice piece and another through the base (at the exact same spot where the wood slice hole was going to be). 


I also engraved a notch into the bottom of the base - leading from the drilled hole to edge right at the centre of the three glued on gears at the back of the base. I made sure it was wide enough to hold the thicker part of the Tiny Lights' cable. 


Then I glued the wood slice pieces with the tree pinched between them (and more glue) in place and after that had dried I inserted the string of Tiny Lights. 


I used my small hot glue gun to glue the thicker part of the cable into the notch and to fix the Tiny Lights chain to the wood slice in some places. As it got wrapped tightly around the tree it stayed in place pretty well and I only needed two glue spots to fix the lights chain to the wood slice base and one at the tree's back. Snarky Cat, his present and the stamped quote got glued in place using little pieces of MDF left overs at the backs as little stands. 


Before I filled the dome with "snow" (from the kit) and glued it in place permanently, I checked the lights of course. Then I added glue around the dome's edge and put the base with the tree face down in place (otherwise the snow would fall out from the dome) and let that dry. 


Finally I added four pieces of self adhesive felt floor protectors to the base. 


Done! 


Our steampunk/industrial style challenge is open until the end of December - the team and I hope to see you play along with us! Simply click HERE to get to the challenge blog with the actual challenge post. 


Stay safe, enjoy the advent season, merry Christmas and a happy new year! 

Claudia
xxx