Showing posts with label DecoArt media fluid acrylics. Show all posts

Wednesday, 20 October 2021

Zombie Fright Night at Calico Craft Parts!

 Hi, servus and how do you do? 

Over on the Calico Craft Parts blog I am sharing my latest make - a Halloween themed one, of course! There are some new Halloween Hanger Kits available in their store and I got the Zombie themed one to play with - and that was great fun! 


I added some other cool pieces from their wide range of Halloween themed craft parts to the kit, though of course it already looks great on its own. But you know me: I love to customise kits of all sorts and that forms a huge part of the fun for me. 


Some Zombie hands from the cool Add On Sheet here, a little bat and word element there...and that amazing log fence really gave a boost to the whole scene! 
The pieces were all painted using DecoArt paints of all sorts - if you want to learn more about the used Calico Craft Parts and paints and HOW I've painted and used them, simply click HERE to get to the according blog post over at the Calico Craft Parts Blog. 


Happy Halloween crafting!

Claudia

xxx


I am entering this make to Simon Says Stamp - Monday Challenge.

Saturday, 9 January 2021

New Year , New Paths, New Hopes and a New Steampunk Challenge

 Hi, servus and thanks for stopping by my quiet creative corner! I hope you've all had lovely holidays and I wish for us all that 2021 will bring everything we've been hoping for! 

Those who have been following me might already know that I have been struggling hard with health issues (mainly caused by menopause in combination with my chronic thyroid illness) during the last twenty months or so - panic attacks and nervousness with shaky hands having made crafting almost impossible at times. I am now trying to tackle that differently (after having tried different ways of medication during the last months which turned out to cause severe side effects instead of improving health) by seeing a therapist (so much better than flooding the body with chemicals it obviously cannot take) and I believe that things will get better step by step - maybe slowly but for good and with a lot of improvement on the personal side. 

That will very likely also lead to new, different ways of living and expressing my creative side I guess...my main goal with this is that I will get back to enjoying the creative process - free from any pressure or struggle with shaky hands and nervousness. During the last months I have already cut back when it comes to design team work, but luckily my favourite design teams I am on are very understanding and wait for me to return! 

Speaking of design teams - our first challenge for 2021 has just launched over at SanDee&amelie's Steampunk Challenges and there are some changes there as well: due to Corona pandemic DecoArt cannot send out prize bundles for now. As requests on certain products have exploded during Corona pandemic, they had to adapt to that and cut back on other specific product lines - one of these being our prize bundle paints and products. DecoArt and I have decided to switch to two-months long challenges until everything is back to normal (which we all hope will be in or around April) and prizes can be shipped out again as usual. We will of course draw prize winners for all our challenges, but ask our DecoArt prize winners to be patient as their prizes will be sent out later this year. 


My mojo is still on vacation - not only because of my health issues...but also because I am currently busy with moving in our newly bought holiday home at Lake Atter in the beautiful Austrian Salzkammergut!!! My husband and I were incredibly lucky to find and buy our dream house in our dream location this autumn - I am still pinching myself! It's not a big house - but it has everything we need and is a modern house made totally of wood! I love that! And it offers everything I had wished for - located close to a lot of hiking trails and even a skiing piste, just a two minutes drive from the lake, with forests and mountains and the view at the lake (and the very top of the amazing Dachstein glacier) just around the corner! 

But back to mojo and challenges - I am sharing this older steampunk project to inspire our steampunk challenge players; one that hasn't been shared via the challenge blog but on the Calico Craft Parts blog - HERE. There is a full tutorial to find there as well as loads of images and a list of products used. 


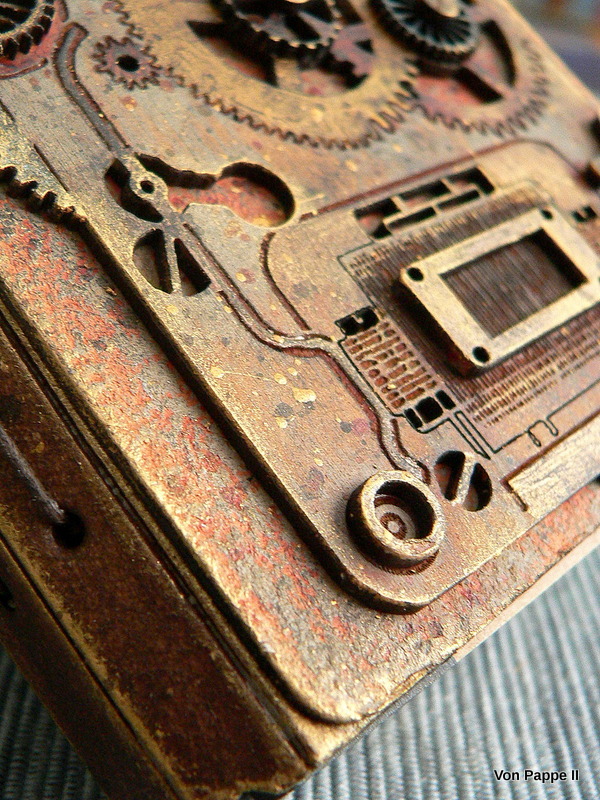
It's a notebook I've made using one of Eileen Hull's cool book dies and Calico Craft Parts. The metal and weathered effects were created using DecoArt and DecoArt media paints and products (more info on these in the blog post over at Calico Craft Parts). 


The covers were die cut from heavy grey board and I found some little journals that fit perfectly as signatures (so I do not need to make my own). 


Well, that's it from me so far! The team over at SASPC are waiting for your visit and entries! 

Make sure you check out the different rules that apply for our two-months long challenges (Maura, your current challenge host for January and February, explains everything in the blog post)! Good luck and joyful crafting!

Hugs and a successful, healthy and happy 2021!


Claudia

xxx


Wednesday, 25 November 2020

Step Right Up! - Artist Trading Block for Calico Craft Parts

 Hi, servus and thanks for stopping by! 


My usual Monday invite over to the Calico Craft Parts blog is two days late, because this Monday my husband and I got the keys to our new home in the beautiful Austrian Salzkammergut region! We found a lovely modern (and affordable!) wooden house with a small garden at my beloved Attersee (or Lake Atter)!!! So instead of crafting, my time is being filled with planning furniture and organising. 

But I even found the time to indulge in a joyful mixed media session - which led to this circus themed ATB (Artist Trading Block)!


I fell in love with the circus themed new craft parts at first sight (well, who wouldn't, right?). As always there's a tutorial over at the Calico Craft Parts blog to check out, as well as the list of craft parts and products used. 


I hope to see you over there soon!

Stay safe! 

Claudia

xxx


Tuesday, 20 October 2020

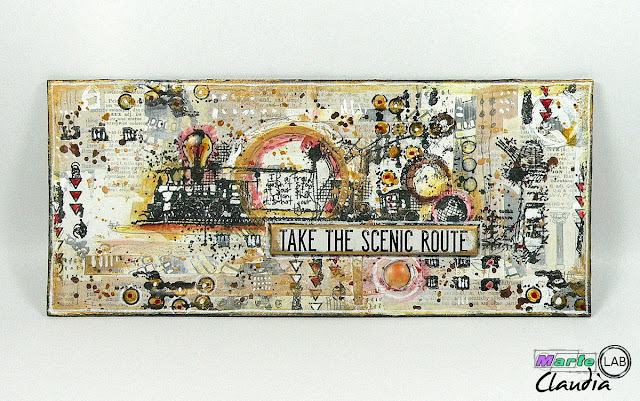
Take the Scenic Route - for Marte Savona

I love this time of the year!

And I love to travel by train - I can sit and look out of the window for hours! There's so much to see and each house I pass by is inhabited by people who have their very own stories. Each forest the train rushes through is inhabited by animals who have their own stories too. Each falcon I see standing midair above a huge field is looking for prey. How long has he already been looking out for food? What will it be this time? A tiny mouse or a common hamster?
And before I can continue to think of the falcon's possible story, we pass by some allotments - new stories start to unfold in my head...


When we go by car, my husband and I also sometimes love to take the scenic route instead of the motorway - just because this way the journey becomes the reward...


There is of course a step by step waiting for you over at the MarteLAB blog - as well as lots of steps images and the list of all products used (which are all available in the Marte Savona online store).

Hugs and happy travelling crafting!
Claudia
xxx


Thursday, 1 October 2020

Brave Little Robot - Tag - for SanDee&amelie's Steampunk Challenges

Hi, servus and welcome to the start of our October challenge over at SanDee&amelie's Steampunk Challenges! Once more it is time for a little steampunk crafting fun - and who knows...maybe it is you who will win one of the two prizes we're giving away each month! Please, check out the rules and details - alongside the teamies' fantastically inspiring makes - over at SASPC


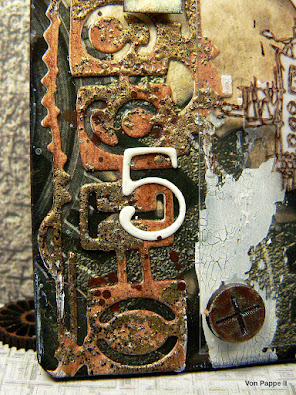
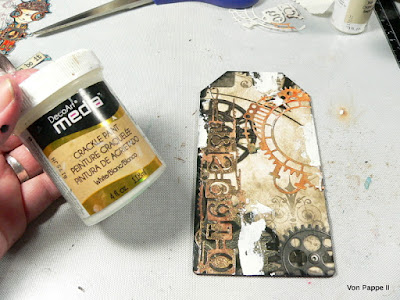
I've created a fun tag this time - playing around with DecoArt media fluid acrylics and Crackle Paint, Seth Apter's Wow embossing powders, some steampunk and industrial themed dies, background papers, Calico Craft Parts and the cute "Robot" stamp from Aall & Create


Using stamps with sketchy images is a bit tricky as you cannot fussy cut the stamped images without losing a lot of character from the design - so I decided to stamp the image onto some acetate with StazOn ink and paint the back white - using an acrylic paint marker. 


In a final step the acetate got fixed to the finished tag background using small black sticky foam pads that I covered on the top with some Calico Craft Parts screw heads. 


The background was done first of course - using a designer paper from my holy paper stash (yes, I am trying to use up my long hoarded stuff....lol). That was glued to a sturdy Calico Craft Parts MDF tag with matte Decou-Page glue, trimmed and finally inked around the edges with black archival stamping ink. 


The die cuts were cut from sturdy white cardstock and then got painted using DecoArt media fluid acrylic paints in a watercolour-y way. I layered Burnt Umber, Quinacridone Gold and English Red Oxide quite randomly. Afterwards I partially heat embossed one of them using Seth Apter's Weathered Gold embossing powder. 


In addition to that I spread a little white DecoArt media Crackle Paint here and there on the tag with the very tip of a palette knife. 


To repeat the white from the stamped image and crackle paint I then also used the left overs from one of the die cuts - the white numbers - and added them to the background with DecoArt matte Decou-Page. 

The acetate got fixed to the tag - done! 


I hope my little "brave robot"-tag has put you in the right mood for some steampunk crafting! I promise; the makes of my teamies over at our challenge blog will add even more fantastic inspiration! I hope to see you play along!

Hugs and happy crafting!
Claudia
xxx


Tuesday, 1 September 2020

Numeric Goddess - Revisited - for SanDee&amelie's Steampunk Challenges

Hi, servus and welcome back to a new challenge over at SanDee&amelie's Steampunk Challenges.

As usual we had our annual two-months long summer special challenge so everyone could enjoy their summer outdoor activities and still squeeze in some steampunk crafting, but now we are back to our monthly schedule, two prizes are once more waiting to be given away and the team has once more come up with some amazing projects for your inspiration.

I obviously needed that total break from crafting (in order to get back to a healthier daily routine) - so I haven't done any crafting during the last month (all projects and posts for August having been prepared and scheduled) - but instead of sharing no project at all, I have decided to present a steampunk project that I did for Calico Craft Parts two years ago and that you might not know yet.


My "Numeric Goddess" looks quite large in this picture, but actually it is a tiny assemblage piece.
If you want to learn about the craft parts and products I've used (and the how-to as well), simply visit the old blog post on the Calico Craft Parts blog HERE.

It's always amazing by how much mixed media you can "throw" on the smallest surface! A bit of crackle here, ...


...some wire wrapping there,...


...an improvised stand in steampunk style...


...and some found objects from my little treasure box on my desk 


et voilá! 


The number 7 is my lucky number, and my frozen charlotte was missing a head....this way the idea for this piece was born. Sometimes I just need to look at a random collection of bits and bobs on my desk (or in my little treasures box) and it sparks an idea for a project.

I hope you like her! Maybe one day she gets free to fly again...

The team and I would love to see you play along with us over at our steampunk challenge blog! Simply click HERE to get there and check out their fabulous makes! As always we have an "Anything Goes - Steampunk/Industrial" theme - so you are free to create away and enjoy what you love most. Please, make sure you've checked out our few rules though. These can be found right below our blog header in the "Da Rules" section. ;)

Hugs and happy crafting!
Claudia
xxx


Monday, 10 August 2020

Heroes - a DecoArt Project

Servus, hi and thanks so much for taking the time to stop by my little (quite quiet) creative corner.

I haven't posted much lately as I am having to take a break from some of my already few design team commitments - due to health issues that I can no longer ignore.
I am in the middle of a struggle with a panic disorder that has obviously built up during the last fifteen months (being caused by menopause having hit hard last year) and has now struck me full blow.
Shaky hands and panic attacks caused by just sitting down at my craft desk and trying to tackle (even far away) deadlines are a nasty thing to have - especially when it concerns a hobby you think (or thought) you love. So obviously I will need to find new ways to go on with being a creative (which I have no doubt I am). Gladly I am in the very lucky position that some of my design team terms have just ended and that I am also on design teams where members are being cared about; so special agreements could be made. This way I didn't have to completely leave them all!

Sounds worse than it is actually (or maybe it doesn't) - but there's no need to feel sorry for me. I've already hit rock bottom and finally accepted my current situation - so the only way from now on can be upwards again. ;)

But there are of course also better days when my muse seems to be around and when I obviously manage to not be fixed too much on a deadline or the needed perfect (uh oh! Killer!) result of a project. So this week is going to bring you even two new projects and tutorials instead! Today's post is the invite over to the DecoArt Blog, where I am sharing a little altered mixed media tray that was a true pleasure to create.


It originated during my attempt to do a bit of tidying up in and around my craft space - which I find often sparks ideas for new projects (I guess because it is definitely more fun than a proper tidy up). I was right about to store away the little tray (the post on the DecoArt Blog reveals what it held in the first place), when I saw the drawer with my hoarded Tim Holtz paper dolls....and there it was!

The quote and melancholic feel to it were inspired by Peter Gabriel's fantastic cover version of David Bowie's wonderful "Heroes" - a song that never fails to deeply touch me. I have obviously heard it lately (I think it was used in a TV series or documentary or so) and it seems it was still spinning round in my head and needed to come to the surface.


As always there is a detailed tutorial with lots of steps images to find on the DecoArt Blog. Simply click HERE to get to the blog and check it all out. I hope to see you over there soon! And don't forget to pop by tomorrow for another project and tutorial!


Hugs and happy summer crafting!
Claudia
xxx


Friday, 31 July 2020

Travel Journal - a StencilGirl Project and Column

Hi, servus and thanks for stopping by!
How's your summer been so far? Travelling has become quite difficult and even more of an "adventure" these days, but you don't always have to travel far to experience new things and inspiring new locations.

Anyway, having a travel journal can never be wrong.
I always use a small travel journal to have information about timetables, train connections, locations to visit and other important stuff at hand without having to switch on my phone and connect with the internet. I simply am a dinosaur when it comes to electronic devices and always will be and do not trust them totally (or maybe my ability to have their batteries re-charged properly all the time). And I love journals and notebooks of all kinds. ;)


So I have created this one for my first post as a StencilGirl Columnist over at the StencilGirl Talk blog - and you will find loads of steps images and detailed descriptions of the how-to if you hop over to their blog (by clicking HERE for example).

It also has pockets to store tickets and other ephemera in and you can adjust the tutorial to any size of cheap bought notebooks to use on the inside (so you do not have to make your own signatures, which can be quite time consuming)!


And the flaps do not only help to keep the tucked in content in the pockets safe and in place, but also work as bookmarks if needed! And it all is made from just a single sheet of A3 Mixed Media or heavy drawing paper!

Here's a little scene from the back cover - just to make you even more curious and check it all out in the blog post. As a columnist for StencilGirl I will be sharing stencilled projects with a focus on "Textured, Weathered, Grungy" - my personal favourites when it comes to surfaces and designs - every three months on their blog.


Hope to see you over at the StencilGirl Talk blog!
Have a wonderful summer
and safe travels!

Claudia
xxx


Monday, 6 July 2020

The Start of a "House Journal" - a Calico Craft Parts Project

Servus, hi and thanks for stopping by! I hope you've had a lovely weekend!

It's Calico Craft Parts time today and over at their BLOG I am sharing the first piece of a kind of House-Journal I have been wanting to create for a long time, but haven't found the courage yet to start. But finally I took the first plunge and the first house is waiting for you to be visited ;)

A sneak peek should give you a first impression on what kind of mixed media project is waiting for you. Of course there is a step by step as well as loads of pictures and the lists of the Calico Craft Parts and DecoArt media products and paints used as well. Simply click HERE (or on the picture) to get taken to the blog post.


Hope to see you over there soon!

Have a good start into the week!
Claudia
xxx


Wednesday, 1 July 2020

Victorian Style Brooch & Pendant - for SASPC's Summer Special Challenge

Hi, servus and welcome to the kick off of our annual summer special challenge over at SanDee&amelie's Steampunk Challenges! I hope you will join in our two months long summer challenge again this year!

My project for your inspiration this time is inspired by an upcoming murder mystery dinner on a beautiful castle with our best friends, that will throw us back into Victorian times. Yay! I will be playing the murdered lady's chambermaid - so I am looking forward to having lots of fun and joyful role playing!

Of course I will need some personal belongings for my character (my friends and me all being passionate and true role players) - so I decided to make a brooch and pendant showing some of "my" ancestors that I like to keep close to my chambermaid's most innocent (!!!!) heart ;)


But back to the project and the challenge! The rules apply as usual - the only small change for our summer special is that you can enter up to five makes during the two months instead of the usual three. So two more chances to win one of our two fabulous prizes (being generously sponsored by DecoArt and boozybear chipboard)!!!!

To create my jewellery set, I used DecoArt matte Decou-Page and Raw Umber Americana paint alongside DecoArt media clear Crackle Glaze, Liquid Glass, Raw Umber, Interference Gold and Metallic Gold fluid acrylics, Titanium White Antiquing Cream and Americana matte spray sealant.

The arches and tiny shields MDF wood shapes are from Calico Craft Parts.


The papers I've cut the backgrounds and portraits from are from older Spellbinders designer paper pads designed by wonderful Susan Lennart Kazmer.

I also added some texture using the 3D Impresslits "Lattice Trim" designed by Tim Holtz.
The loop on the pendant was made using a thin strip of linen ribbon that I glued in place with matte Decou-Page.


(by the way...have I already mentioned that I am NOT the murderer of my poor lady?...I am sure it must have been the gardener!!!)


The Lattice Trim pieces were first painted in Metallic Gold and then given a wash of Raw Umber fluid acrylic.


The arches were first painted with Raw Umber and then given a coat of clear Crackle Glaze. Once that had cured, I went in with Titanium White Antiquing Cream and only wiped part of that back with a damp cloth for an aged look. Before I went on, I sealed the two pieces with DecoArt Americana matte spray sealant (otherwise the Antiquing Cream could be reactivated by any moisture or come off with time).

The third arch shape was covered with some script designer paper and then painted with Interference Gold.
The tiny shields with the glued on portraits were given a thorough coat of DecoArt media Liquid Glass each and left to cure over night.


Once all the pieces were dry and cured, I painted around all the edges with Metallic Gold fluid acrylic and then diluted the left overs on my palette and sprinkled that onto the pieces as well.


I used a simple safety pin for my brooch. It was glued to the back using matte Decou-Page and a piece of linen ribbon. I made sure the ribbon was glued tightly around the pin, so it would stay in its exact position. Gold Metallic Lustre was added to highlight the raised areas from the Lattice Trim pieces where the wash had toned it down too much.


Done!


I love how much dimension the Liquid Glass and the Lattice Trim add to the pieces! And the depth and weathered look from the sprinkled on Gold and the Antiquing Cream was just what I had hoped to achieve! A thin purple velvet ribbon from my stash was the perfect addition to the more colourful pendant. Yesss!!!

I love it when things come together just nicely! 


I hope you like my little jewellery set too and are inspired to play along! There's time until the end of August to enter your creations to our challenge. Over at our challenge blog the teamies' fabulous makes are waiting for you to be checked out as well - please, take some secs to visit their blogs and leave them a little love. Thank you!

Hugs and happy crafting!
Claudia
xxx


Monday, 22 June 2020

Tribute to Bee No. 2647! - a Calico Craft Parts Project

Servus and hi! I hope you are doing well and are having a good start in to the week!

This is my usual every other week invite over to the Calico Craft Parts blog.
No ATC this time - I promised! lol
But you will find the frame of one on a tag - alongside a lot of yummy crackle and weathered effects.


I hope you'll like it. Simply click HERE to get to the blog post with the step by step and the list of Calico Craft Parts (and DecoArt stuff) used.


Hugs and happy crafting!
Claudia
xxx