Showing posts with label book. Show all posts

Saturday, 9 January 2021

New Year , New Paths, New Hopes and a New Steampunk Challenge

 Hi, servus and thanks for stopping by my quiet creative corner! I hope you've all had lovely holidays and I wish for us all that 2021 will bring everything we've been hoping for! 

Those who have been following me might already know that I have been struggling hard with health issues (mainly caused by menopause in combination with my chronic thyroid illness) during the last twenty months or so - panic attacks and nervousness with shaky hands having made crafting almost impossible at times. I am now trying to tackle that differently (after having tried different ways of medication during the last months which turned out to cause severe side effects instead of improving health) by seeing a therapist (so much better than flooding the body with chemicals it obviously cannot take) and I believe that things will get better step by step - maybe slowly but for good and with a lot of improvement on the personal side. 

That will very likely also lead to new, different ways of living and expressing my creative side I guess...my main goal with this is that I will get back to enjoying the creative process - free from any pressure or struggle with shaky hands and nervousness. During the last months I have already cut back when it comes to design team work, but luckily my favourite design teams I am on are very understanding and wait for me to return! 

Speaking of design teams - our first challenge for 2021 has just launched over at SanDee&amelie's Steampunk Challenges and there are some changes there as well: due to Corona pandemic DecoArt cannot send out prize bundles for now. As requests on certain products have exploded during Corona pandemic, they had to adapt to that and cut back on other specific product lines - one of these being our prize bundle paints and products. DecoArt and I have decided to switch to two-months long challenges until everything is back to normal (which we all hope will be in or around April) and prizes can be shipped out again as usual. We will of course draw prize winners for all our challenges, but ask our DecoArt prize winners to be patient as their prizes will be sent out later this year. 


My mojo is still on vacation - not only because of my health issues...but also because I am currently busy with moving in our newly bought holiday home at Lake Atter in the beautiful Austrian Salzkammergut!!! My husband and I were incredibly lucky to find and buy our dream house in our dream location this autumn - I am still pinching myself! It's not a big house - but it has everything we need and is a modern house made totally of wood! I love that! And it offers everything I had wished for - located close to a lot of hiking trails and even a skiing piste, just a two minutes drive from the lake, with forests and mountains and the view at the lake (and the very top of the amazing Dachstein glacier) just around the corner! 

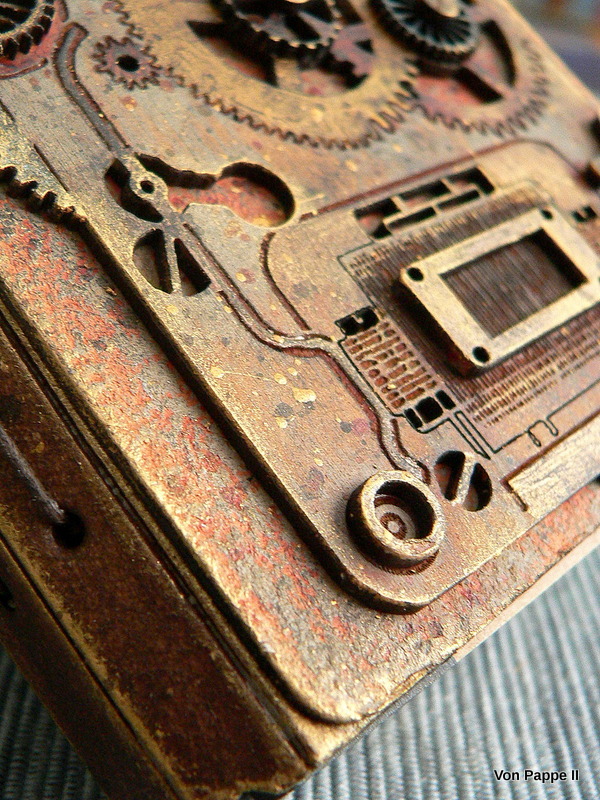
But back to mojo and challenges - I am sharing this older steampunk project to inspire our steampunk challenge players; one that hasn't been shared via the challenge blog but on the Calico Craft Parts blog - HERE. There is a full tutorial to find there as well as loads of images and a list of products used. 


It's a notebook I've made using one of Eileen Hull's cool book dies and Calico Craft Parts. The metal and weathered effects were created using DecoArt and DecoArt media paints and products (more info on these in the blog post over at Calico Craft Parts). 


The covers were die cut from heavy grey board and I found some little journals that fit perfectly as signatures (so I do not need to make my own). 


Well, that's it from me so far! The team over at SASPC are waiting for your visit and entries! 

Make sure you check out the different rules that apply for our two-months long challenges (Maura, your current challenge host for January and February, explains everything in the blog post)! Good luck and joyful crafting!

Hugs and a successful, healthy and happy 2021!


Claudia

xxx


Tuesday, 17 March 2020

Art Journal for MarteLAB

Servus, hi and I hope you're all well and not affected too much by the spread of the Corona virus and whatever this brings along!

All over the world nations are trying to starve out the spread and to cope with how this affects everyday life and keeping one's spirit up while facing extraordinary times in isolation...over here in Austria people are advised to keep to themselves and not leave the house other than to shop for food or medicine (or walk their dogs) at least for the next four weeks (but very likely we will have to stick to that for longer than that).

It's spooky having the tele on to not miss any new announcements and directories from our government and one of our two main Austrian TV stations is reserved for broadcasting info on Corona crises developments and measures being taken all day only instead of the usual children's and entertainment program.
Seeing people hoard toilet paper (of which nobody really understands and knows why) and buy survival stock of canned food, water and what have you as if preparing for an atomic threat makes the whole situation even more unreal and weird to be honest. And the fake news that spread so easily across the internet these days bring the most ridiculous "facts" that either make people panic even more or get them to think it is all once more just a joke or the usual conspiracy of the industry or something like that.


Staying at home can be hard for people who are used to leave the house to go to work or school and who have mainly out door hobbies - but luckily crafters and mixed media fans never are at risk of not knowing what to do with their spare time, right?

And to brighten up the mood I have made something play- and colourful for you - another art journal cover - this time using Eileen Hull's "Passport" die, some Aall & Create stamps and stencils and DecoArt media fluid acrylic paints and my Gelli Pate.


Over at the MarteLAB blog there's a stepped out tutorial as well as the list of what I have used to create this art journal. Simply click HERE to get to the tuto with a lot of steps images. I hope this will brighten up your mood! Hang in there, all of you!


Stay safe!

Claudia
xxx


Thursday, 18 July 2019

Pod of Whales Notebook - a Gelli Arts & DecoArt Project

Hi, servus and thanks so much for stopping by!
I hope you have been enjoying a lovely summer so far!

Today's post is meant to invite you over to the DecoArt Mixed Media Blog, where the DecoArt Mixed Media Design Team are sharing projects throughout this month that were all done using Gelli Arts products (Gelli Plates and Gelli Arts gel printing tools) and the wonderful DecoArt premium acrylic paints. A round up of all the projects for July can be found HERE.

The team were all given Gelli Plates and brayers, so we could go wild and experiment and indulge in heavy gel plate printing with creating piles of beautiful prints, some of which we used to create a bundle of summer themed inspiring projects that will all be shared on the Mixed Media Blog during July. You even get the chance to win a fab bundle of Gelli Arts and DecoArt products! Information on how to enter the giveaway can be found over at the DecoArt Mixed Media Blog as well as the Gelli Arts blog.

My project that goes live today was inspired by my love for the ocean and especially for whales, so I went for refreshing blues and greens when picking paints for my gel plate prints ;)


Here's a picture of my work space covered with the Gelli Arts texture tool (the Gelli Plate is hidden somewhere underneath the prints), DecoArt premium (and Americana Titanium White) paints and the prints I had picked for creating my Mixed Media Blog project.


...and here (yay...just found it again!) is the picture that shows all the DecoArt premium paints and Gelli Arts Gelli Plate and special tools I used (and also the die cut masks and foam stamps I used to create my collage papers). Somehow the brayer I used didn't make it into the picture, but it is somewhere close by... no gel plate printing without a proper brayer to spread the paints, right?


In my tutorial that can be found over at the DecoArt Mixed Media Blog today, I am not only sharing a detailed step by step on how to make gel plate prints using masks and stencils and how to create an art journal using these prints together with grey board and cutting die, but I am also sharing how to use the papers you clean the brayer on and make them part of the finished project.


Curious? Good! 

I hope to see you over at the Mixed Media Blog. And good luck with the prize draw!!! ;)

Hugs and happy crafting!
Claudia
xxx


Saturday, 6 April 2019

Steampunk Traveller's Journal - a Calico Craft Parts Project

A bit late this week I am sharing a make that already went live on the Calico Craft Parts Blog on Monday. But as I had to spend the last week in hospital (with a critical crises of sudden high blood pressure) I am behind with everything and am now trying to catch up with everything.

But the post is still there and the tutorial is too...so I would like to invite you to hop over to the Calico Craft Parts Blog to check out a cool steampunk journal I did using mainly steampunk themed Calico Craft Parts (...and, believe me, there is a wide, wide range of fantastic steampunk craft parts to choose from in their store!) and Eileen Hull's "Passport" book die.


The full tutorial that takes you through the process is over at the Calico blog, alongside with many more pictures and close ups of details. I hope to see you over there!


Hugs and happy crafting!
Claudia
xxx


Friday, 25 January 2019

"You Can" - a StencilGirl® Project and a Message

Hi!

When have you last found yourself focusing on what you can do, instead of what you can not or no longer do?
And on which of these two opposing perspectives do you tend to focus more often and more easily?

....well,I guess I am not the only one whose recognition is - most sadly - more trained to detect all my "CANNOTS" and flaws that - if you look at it honestly - are also part of what makes us unique and loveable.
What a boring place of non-individuals our world would be if we were all equally perfect and equally skilled and how boring life would be if we could do whatever we wanted or were asked to to everyone's full satisfaction! No goals to reach, nothing to learn or teach...???


But as a teacher and mother I have learned that our society is already training our children to focus on failure instead of already made achievements - which is a very sad thing and has a massive impact on the self esteem of children at that age.
Most teachers - by having to give marks on their pupils' efforts - are forced to keep up a society that tells people what they still have to improve in and learn - instead of honouring what they have already achieved. The message is "unless you aren't really good at this, you are worthless and not as good as all those who can or do it better than you" - and that's nonsense!

But if we look at it honestly this is also the most common way we look at ourselves as grown ups too! Without consciously noticing we are making ourselves feel small, incapable and worthless on whatever occasion possible....I don't know a lot of people who have managed to get through childhood without being snatched away their self esteem and awareness of the beauty of their uniqueness and individuality.

Things get especially hard to handle when you are taken down by chronic or severe illness. Suddenly you find you aren't "functioning" properly...and with that often come feelings of being broken...of imperfection, worthlessness and incapability....and fear of being inferior. As if our worth for others were solely defined by what we can do for them and by how functional and perfect we are.

I have a dear friend who is going through a hard time at the moment and is facing all that. Even though she would never mention it, I know she is...because I have been there too and haven't forgotten what that did with me and to my self esteem. So I created a little "YOU CAN" journal for her as a gift.


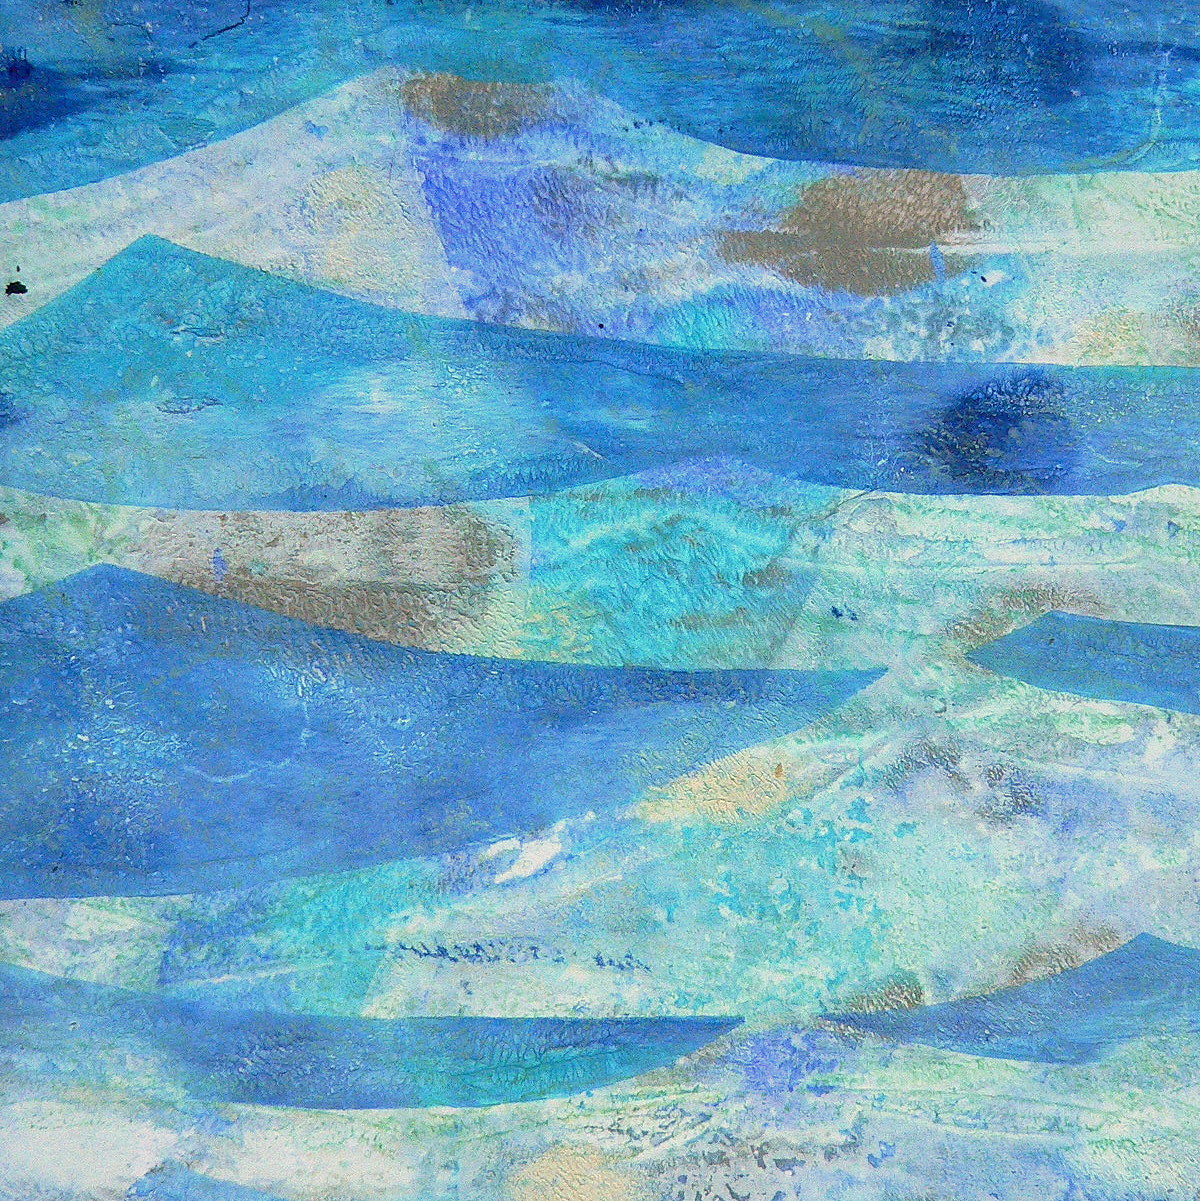
It is another Wrapped Journal made from heavy grey board (and with the use of Eileen Hull's Wrapped Journal die) and some mono printed papers I have recently done on my Gelli Plate using DecoArt Americana acrylic paints and a variety of StencilGirl® stencils from my stash.
(I have a post up on the new German-language blog of Kerstin's and mine in which I am showing a collection of finished prints from that particular Gelli Plate session. If you're interested, you can find it over HERE).

And of course there's a full tutorial (including a short video) on how I have done the prints that I have used on the journal, which particular stencils I have used and how I put it all together over at the StencilGirl® Talk Blog. Simply click HERE to get taken to the full length project post with loads of images. Hope to see you over there!

And I would like to invite you to try to ask yourselves more often what it is that you really ENJOY doing and have already learned and achieved! I will try to do the same ;) 
(I wonder if it has an impact on the art we create....)


Hugs and happy crafting! 
Claudia
xxx


Wednesday, 31 October 2018

Come on-a my house, my house a come on...

Last chance to post a Halloween project...so here we go!


The design team of Calico Craft Parts recently did samples showcasing the Book Box Kit and as this was a feature for the October issue of Craft Stamper Magazine, some - including me - went for Halloween themed projects (using more Halloween wood shapes from the Calico Craft Parts range).
(Better pictures and the projects of my teamies alongside the detailed product lists and the how-tos can be found in the October issue of Craft Stamper Magazine!).


Being a fan of "The Walking Dead" TV series and with the compartments of the book box reminding me of single rooms, I went for a house that is inhabited by zombies...


I especially aimed for that typical colour scheme from the Walking Dead Intro - a pale rotten palette with fleshy warm tones and fading greens. To find the right colour palette for my project I used an online tool (there are several out there) that extracts colour palettes from images you upload on their site - so I snatched a Walking Dead picture I found on the internet - et voilà: all I had to do was pick the matching tones of DecoArt paints from my studio paint storage trolley and paint away!


I painted one large and some mini Zombie wood shapes and also some Halloween words from the Calico Craft Parts range using DecoArt Americana and media fluid acrylics.

Here's an image of the project in progress (without the painted rooms and the hand painted "of the")...


...and these are the rooms I've painted with the zombies glued in place:


I've imagined these zombies all living next door to each other, trying to leave the rooms they're locked in, but not being able to (until some poor human opens the doors, not knowing what is waiting for him on the other side)...and of course doing their nasty groans and grunts and walking around restlessly in there....huahhhh!


And of course there had to be a Zombie close up - reaching its hand out to grab you...ready to take a bite!


I had great fun painting the Zombies - especially the two on the inside of the Book Box Cover!


Amazing what a little paint can do, isn't it? ;) 

Actually the colour range from the DecoArt media fluid acrylics was perfect for the job, and the Americana paints were a great addition as there are so many tones to choose from! 


Such a friendly neighbourhood this is! 


Happy Halloween!
Claudia
xxx


Thursday, 15 June 2017

Steampunk Notes - for SanDee&amelie's Steampunk Challenges

Servus, hi and thank you very much for stopping by my blog today! As it is the 15th it is time for "Team B" from SanDee&amelie's Steampunk Challenges to share their inspirational makes.

The theme for our June challenge is once more

"Anything Goes - Steampunk/Industrial"

- so you are free to create and craft away and have some creative steampunk or industrial style fun!


I definitely had a lot of fun and my project for June is another notebook (yes, I never tire of making them...I only have to work on using them too...lol).

When I saw the new "Industrial" Sizzix die (designed by Tim Holtz) I knew I had to have it - finally I could make my own nuts and washers for all my industrial style projects!!! Using the real ones doesn't work because they are way too heavy and bulky...but die cutting them from heavy card and stacking them gets very close to the real thing! I love it!


I also used my beloved "passport" Sizzix die (designed by Eileen Hull) and some card from old packaging to create my notebook with. And not to forget about another "must have" that I used - the awesome Tim Holtz idea-ology "Type Lower" cling foam stamps!


But let's get back to the start:

Often I get inspired by some scrap paper or left overs from previous projects on my desk and this time the idea for making another little book emanated from using up the washes and paint residue on my palette that I used on this project HERE


I tend to use large white sheets of paper when painting objects and taking pictures for tutorials as they do not reflect the light like the craft sheet often does. It also shows the colours more clearly.

So I already had a lot of marks and other random patterns on my paper, but then I also simply turned over my plastic palette that still held the left overs from several paint washes and let the paint drip on the paper. Even the paint that remained on the edges of the palette during this process was used too by dragging the palette's edge across the paper in various directions. I didn't spend a single thought on where to add paint and in which direction. I just tried to use up all of it. ;)

I ended up with a beautifully randomly patterned paper and loved the colour combo - so I glued the dry sheet to some cardboard (left overs from packaging) using matte DecoArt Decou-Page.


As you can see the dry card tends to warp. But as I was going to use two of these for each cover that would not be visible anymore once both pieces would be glued together.

I die cut four cover pieces and then decided which ones to use for the covers' out- and insides.


I added a beautiful industrial style pattern to the covers' insides using a Carabelle Studio stamp. 


The stamped on word on the front cover was outlined with a white gel pen for better visibility.


I stacked three die cut nuts each so I had four of these and two of the large rings for the focal piece. 


Once the glue had dried I used Andy Skinner's quick rust technique and stamped on some rust texture in black archival stamping ink. I also blended the edges using a piece of blending foam.


I heat dried everything before I added a thin layer of DecoArt media Quinacridone Gold using a soft brush.


I used more Quinacridone Gold to create some beautiful drip lines on the covers.


For the book's spine I used another of Andy's quick rust techniques: I sprayed on some DecoArt media carbon black Mister and made sure I pressed the nozzle only half way down - this created lovely spreckles instead of an even mist - perfect for creating faux rust!


The dry spine was given a thin coat of Quinacridone Gold as well.


Time to assemble my book! Yay! 
I used matte Decou-Page and made sure there was enough glue added to all the outer edges so the both pieces for each cover would stick together really well and neatly. 


Then I glued the stacked and painted nuts and washers in place.


For my focal piece I chose one of the lovely persons from the idea-ology "photo booth" pictures and glued the cut out image behind the opening. I filled the inner circle to the brim with DecoArt media Liquid Glass and set everything aside to dry thoroughly (at least half a day). 


The whole note book was given a thin coat of DecoArt media Ultra-Matte Varnish to make it more durable. 


The dry focal piece was glued in place before I die cut my signatures...


...and sewed them to the spine using an upholsterer's needle and rough cord.


Done!


I hope to see you over at our challenge blog to check out my teamies' awesome projects - and to play along of course! ;) The challenge is still open until the end of the month and there are two fabulous prizes by DecoArt media and boozybear to be won - all you have to do is enter a project and be a lucky winner if random.org decides to come up with the number of your entry ;)

Hugs and happy crafting!
Claudia
xxx

Grab our badge for display on your blog!