Servus, hello and welcome back to my little creative spot!
I am glad you stop by and before I continue I want to thank all those who have been taking the time to leave their comments with me since I started this blog - I really appreciate that a lot and they also mean a lot (of encouragement) to me. So thank you very much! (We all know that comments are what keeps us going, don't we? ;)
Well, here's my new invention! The "Geistesblitzgenerator" - which is German for "flash of genius-generator". By sharing this project with you today I want to invite you to take a look at or even play along with our actual "
Anything Goes - Steampunk/Industrial" challenge over at
SanDee&amelie's Steampunk Challenges.
The idea originated from several days of mojo-less suffering - trying to figure out what I could create for our steampunk challenge. I knew that I wanted to use some of the awesome steampunk chipboard pieces from our second prize sponsor "
boozybear"...and I knew I wanted to arrange them to give a machine-like impression. But which kind of machine?
The final kick off needed came from our short trip last weekend when we visited one of my favourite places -
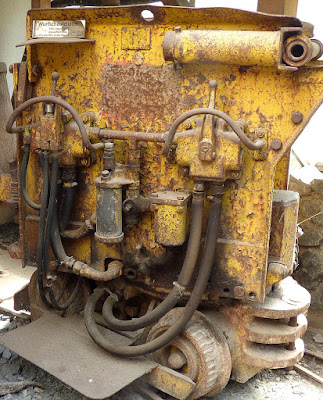
Castle Bernstein in Burgenland. There is a small museum at the foot of the castle hill that shows old mining equipment and machines and I took a picture of this little digger:
I loved the rust working through the coat of yellow varnish and all the rusty texture!
And my plan was to recreate this exact look - but I still didn't know what kind of machine I would want to "build"...well...as usual when this happens I decided to simply start and find out where the project might take me...as long as there was yellow and rust and loads of gears...
So here's what I used:
parts of three packs of boozybear chipboard pieces
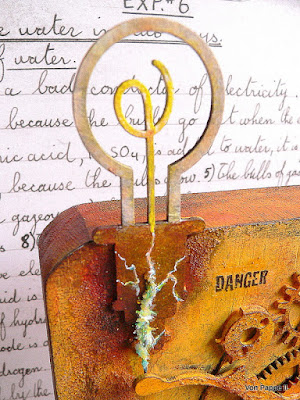
I started with playing around with the "mechanicals" and "lightbulb" chipboard pieces until I had found the "right spots" to make them look a bit machine like. Then I glued them to the wooden block (a find from the sales section of a home decor shop) using
matte DecoArt Decou-Page.
Next I gave everything a thick (stippled on) coat of Raw Umber heavy body acrylic paint. After that had dried I stippled on two layers of DecoArt Americana "Primary Yellow" acrylic paint.
After that had dried, I applied
DecoArt Media Texture Sand Paste in some spots - using my fingertip and a small palette knife.
I let that dry too and then started dry brushing the piece with DecoArt Media Fluid Acrylics "Raw Umber" and "Dark Grey"
I also added first shades of English Red Oxide - dry brushing it on and also applying a light wash.
Then I built up layers of paint - dry brushing them mainly onto my piece - using an old bristle brush and a soft flat brush.
Paynes Grey:
Quinacridone Gold:
Paynes Grey again:
I also added mixes of Quinacridone Gold, English Red Oxide, Transparent Yellow Iron Oxide and Diarylide Yellow here and there for more depth and richness in colour.
I painted some drip lines too and toned everything down with a wash of English Red Oxide.
Next I needed the icy blue spark that jumps from the lever to the light bulb. I used a little bit of wire and applied some matte Decou-Page to it with a soft brush. Then I dipped this piece of wire into various sorts of glitter and let that dry:
I drilled a tiny hole into the chipboard and inserted the wire into it - fixing it with matte Decou-Page. Once that was dry I added some dashes of Primary Yellow to blend my spark in.
The ramifications were painted directly onto the lightbulb using a white gel pen and a light blue marker.
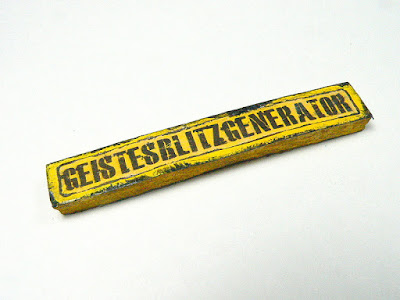
I still needed a sign though. As I didn't have a stamp that matched, I searched the internet for a stencil font I liked, mirrored the word on the computer and printed it out in matching size.
I used DecoArt Americana Decor Image Transfer and applied it to both: my prepared substrate (cut from foam board and painted with acrylic paint) and the front of my cut out word. Then I glued the word face down onto the substrate and made sure I applied thorough pressure so there would be no bubbles.
After that had completely dried (best wait for several hours) I used a soft sponge and added clear warm water to my "sign" to soak the glued on paper. With soft pressure and rotating motion I rubbed off the paper with the soft sponge to reveal the letters - voilá:
Then I used the same paints I had used on my machine to "age" my sign:
I fixed it to my wood block using two short pieces of rusty wire that I inserted into two drilled holes at the side.
I added a bit of matte Decou-Page (using a fine tip brush) to the holes and wires to make sure everything would stay in place.
Done!
Now I will never run out of good ideas! Yay! And I can outsource a lot of brain activity (or rather replace missing brain activity? lol)...
Here are some more close ups, if you like. But first I will give you the link to our challenge blog - over
HERE. ;)
Hugs and happy crafting!
Claudia
xxx


