Servus, dear creative friends!
I hope you've all had a good start into the new year!
Today I am sharing a little self made winter decoration and I am also inviting you over to the StencilGirl Talk blog, where I am sharing my quarterly project and post as a columnist. The picture below shows the stencilled map papers I have made and used for this project (just to lure you into clicking the link at the end of this post to learn more about the how and what I did).
The three months before Christmas have been meaning a lot of struggle for me in these last years - mainly caused by hormonal imbalance and menopause issues not going together well with my thyroid illness. But this year I've made progress at how to deal with that and I have managed not only to do a little seasonal crafting but also bake three sorts of Christmas cookies (which is three sorts more than in the last years actually ;) - despite trembling hands and panic attacks.
Even though I am not crafting a lot these days I still fall in love with a lot of Tim's
dies and feel I am spoiling myself by buying them. ;) Especially the two Paper Village dies sets were a must-have for me (honestly - who does not love tiny houses?).
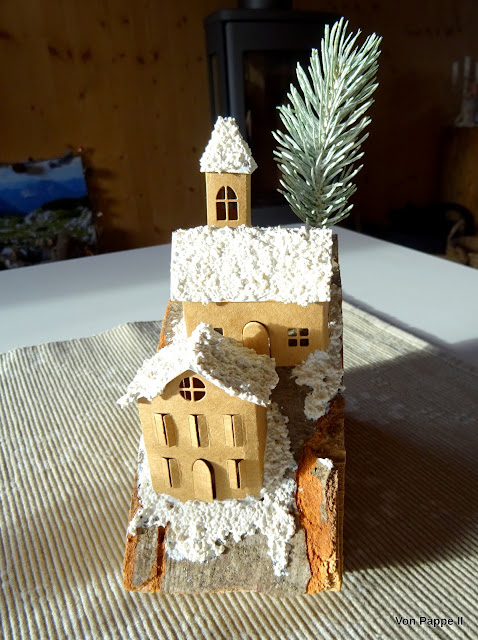
I have also been hoarding some wood chunks that came with the firewood for our fireplace and that I had other ideas for than burning them, as they had a special shape that reminded me of little hills. There were also some wood discs in my stash that I wanted to use as bases for two or three small advent home decoration pieces.
In the end I decided to keep it quite simple and let the raw substrates do their own magic and just add a little snow and a red dimensional star (the smallest from Tim's "Dimensional Stars" dies set) and a small faux fir branch (bought at a dollar store) to the scenery.
I die cut the parts of the houses from heavy Kraft cardstock (varying window shapes and positioning, as the dies sets offer this possibility), assembled them using tacky glue and glued them in place using the tacky glue quite generously around the houses' edges. I later covered any traces of dried glue with Opaque Distress Grit Paste and also added more of that to the roofs and bases to create the look of snow. To add even more texture to the paste I mixed in a bit of bird sand.
To fix the fir branches to their spots I first drilled a hole (using a hand drill) to insert the cut to size branches into, filling the hole with tacky glue. I also added more grip paste around these little "trees" as an additional support.
I really like how the wood, the Kraft cardstock and the texture of the Grit Paste snow go together with the bark of the discs and the wood chunk! And the hints of green and red make for pretty highlights that add that bit of Christmas feel.
Now I wonder how a summer-y version could look like.... ;)
And here's the promised link to the StencilGirl Talk blog.
Hope to see you over there too.
Hugs and happy crafting!
Claudia
xxx


.jpg)
These are brilliant!! Thank you for sharing
ReplyDelete