Showing posts with label Perfect Pearls. Show all posts

Saturday, 15 April 2017

"Steampunk City" ATCs for SanDee&amelie's Steampunk Challenges

Servus, hi and welcome to the mid-month projects share over at SanDee&amelie's Steampunk Challenges!


The challenge theme is once more "Anything Goes - Steampunk/Industrial" - so you are free to create whatever makes you happy (as long as it meets our few challenge rules of course).

Team B - which I am part of - have again put a lot of love and labour into creating some awesomely inspiring projects for you! And we already have a lot of amazing entries from our wonderful players (not to forget about the fab makes of Team A)...so there's a lot to find and check out over at our challenge blog (and I am so proud of what the small challenge blog that Sandra and I set up four years ago has become!!!)


This time my April project was done using stuff from my latest Tim Holtz haul. ;)


There's a lot of traffic going on on my "Steampunk City" ATCs! Zeppelins are floating by and shiny metal dust flakes from the many factories cloud the air. Gear shaped drones are monitoring everything that happens down in the narrow streets...these are adventurous times for tough steampunk explorers! 


These are actually altered playing cards but very close to ATCs regarding their size and format...

The playing cards were first covered with old book pages on both sides (so they do not warp!) and then blended with various Distress Oxide inks and spritzed with water to activate the oxidizing process.


The Zeppelins (a flonzcraft design) were stamped onto the cards and partially coloured with a white gel pen. 


The "Cityscape" skyline was die cut from Kraft card that I had used the Distress Oxide inks on as well but then had to darken it with walnut stain to make their silhouette pop from the background.
They were glued to the background and outlined with a white gel pen and a black permanent marker. 

I added some of the fab new Tim Holtz "Aristocrat" design tapes to the bottom. 


Then I stamped on some gears (that are meant to be "drones") and doodled on them with the white gel pen too. Afterwards I sprinkled on whatever metal spray inks and paints I had - from gold and "brushed pewter" to opaque white. 


The cards' edges were darkened using black archival stamping ink and a piece of cut'n dry foam. Done!

After seeing the finished APCs I found that it would also have been a cool effect if I had stamped the Zeppelins across the touching cards so they would float by from card to card...guess I will have to do some more... ;)


Thanks for stopping by and I hope to see you over at our challenge blog soon! Please, visit my teamies' blogs and leave them a little love if you are able to spare a second or two!

Hugs and happy crafting!
Claudia
xxx

Grab our badge for display on your blog!

Tuesday, 2 July 2013

Show us your metal!

This fortnight's challenge over at Try It On Tuesday invites you to

"Show us your metal!"

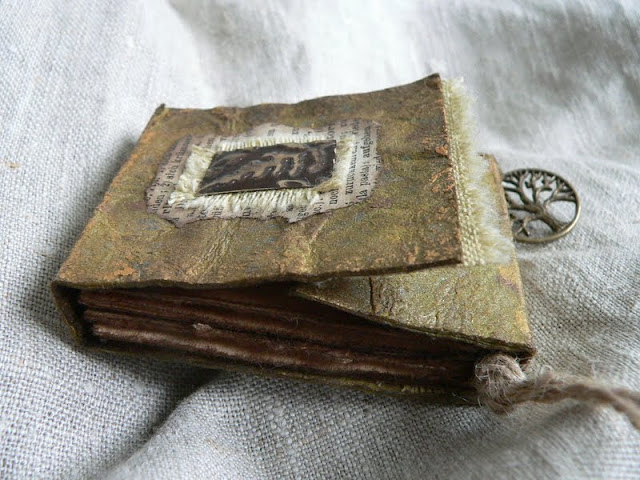
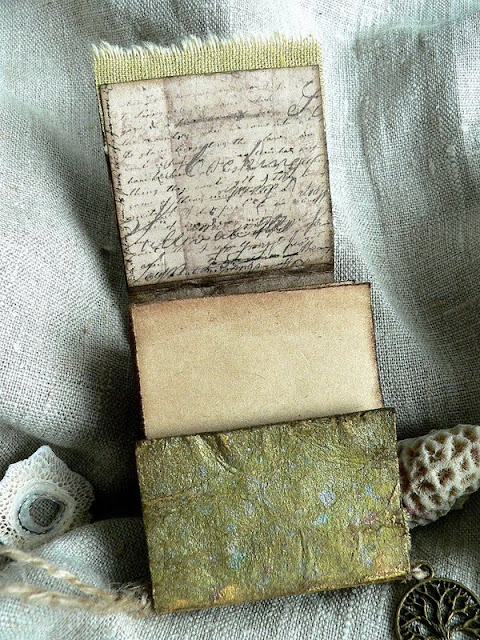
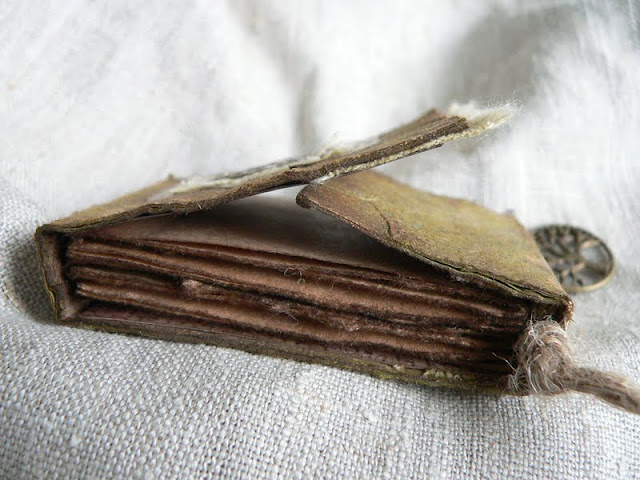
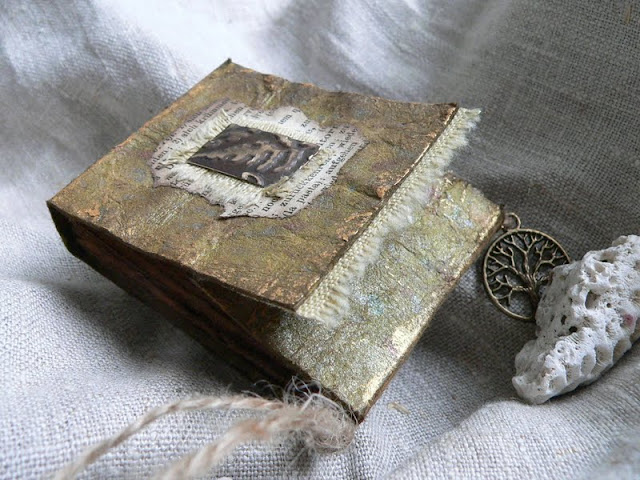
This inspired me to create a tiny booklet, encouraged by highly talented Ana K. and her indredibly beautiful selfmade books. So I tried book binding for the first time and made a sewn binding mini (about matchbook size) note book.


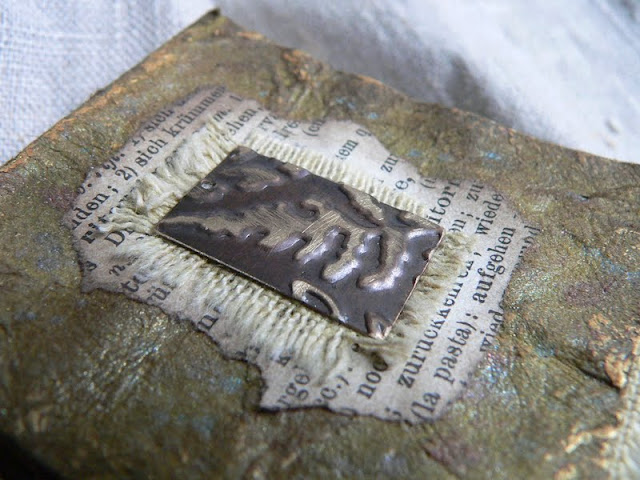
The metals I used with my project are a lovely tree embellishment that I was given to by lovely SanDee1899 and a tiny embossed metal plaque made of a Vintaj copper pendant.

I also used metal effects spray colours on the piece of kraft I used for the book's cover.


I cut a strip off the kraft and treated it with the awesome Tim Holtz "Wrinkle Free Distress Technique", combined with Perfect Pearls and Distress stains. When the piece was soaked I crumpled it in my hands,  carefully unfolded it and dried it using my heat tool.  Afterwards I also added some spreckles of metal tones of  Perfect Pearls Mists and Glimmer Mists.


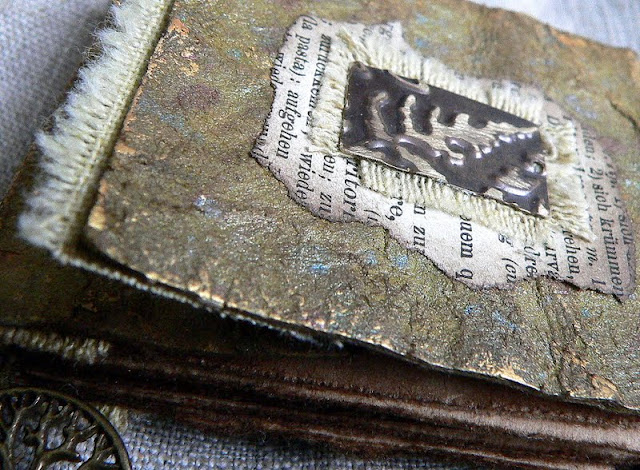
A view of the back of my booklet maybe shows a little of the spreckles and the effect of the Perfect Pearls powder that I mixed with the Distress stains. I also rubbed some Inka Gold onto the edges and some of the bigger wrinkles.

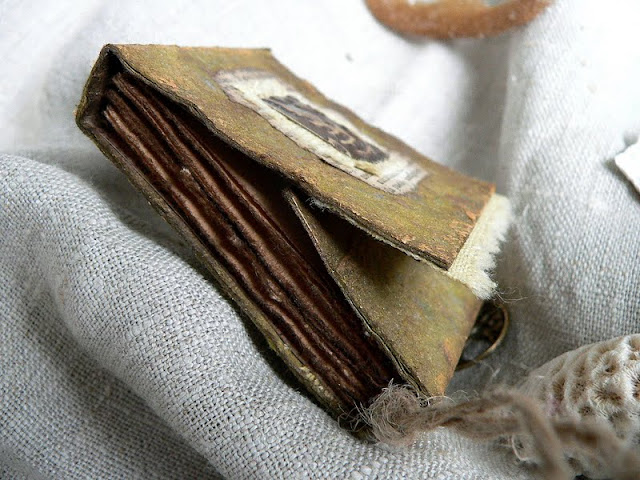
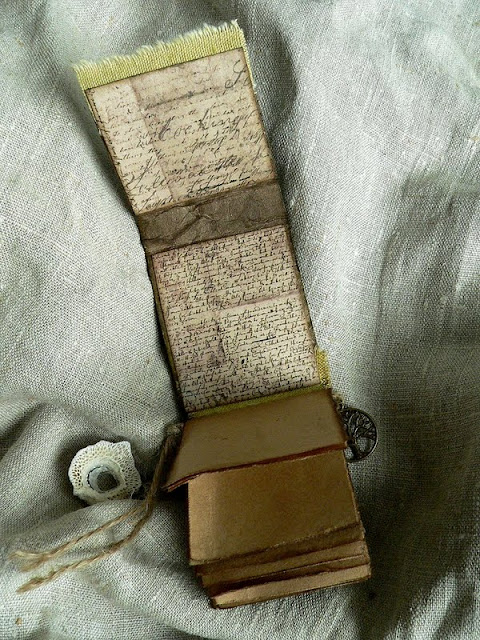
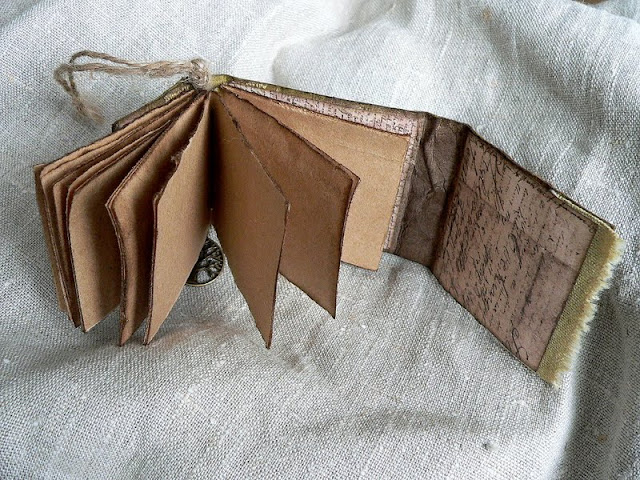
For the pages I tore some strips of brown paper along the edge of a steel ruler, folded them into halves and thus created four bundles, which I sewed to a piece of rough linen.

I distressed and blended the edges of the page bundles with DI "walnut stain" before sewing them to the linen.

Then I glued the left and right overlaps of the linen to the inside of the book cover and covered that with some cut to size pieces from a sheet from the Prima Engraver paper stash.


Using a long sewing needle I fixed the tree embellishment with some rough cord to the inner of the book's spine. 


I ran the Vintaj metal pendant through my Sizzix using one of the lovely metal embossing folders, sanded the raised areas and glued it to the front of my booklet on top of some torn to size scrap from a dictionary and a piece of the same linen that I used for a border and the binding.


I am quite content with the outcome of my first try and as it says "Try it on Tuesday" maybe you also want to try something that you haven't done before... ;)
But of course you can do  whatever is your favourite as long as you show us some metal!!!

I leave you with some more close ups ( I admit that this project was rather tricky to photograph and I hope I have at least captured a tiny bit of the aged feel and the metal sheen of it) and hope you enjoyed your visit with my blog! Hop over to our challenge blog to see what my fantastic teamies made for your inspiration!!!!


I look forward to seeing your entries over at Try It On Tuesday soon!
I enter this project to SimonSaysStampandShow's "Anything Goes" challenge.

Hugs,

die amelie - Claudia x

Wednesday, 19 June 2013

SIMPLIFY, SIMPLIFY.

As I was a lucky girl to get to buy the lovely Artistic Outpost stamp sheet "Old Grist Mill" second hand from Rosie AND they already arrived today, I had to use them immediately for a tag.

I also was inspired by Fashionable Stamping Challenges' "Something New/New Style", The Artistic Stamper's - "Makes For Men" and SSSaS's "Kraft" challenges, which I enter this tag into. I also enter the Artistic Outpost's June Referral Program with it.

Something New - yes, to ME my new stamping sheet is as good as new (and Rosie really took great care of it, so it arrived merely as good as new) AND I guess I also did a new style - working with Perfect Pearls for my very first time, creating the background for this tag.

The grungy look and the muted colours work perfectly for makes for men I'd say and Kraft is the material of the tag - a piece of packaging material I kept, as I love the natural Kraft look.


The "create" stamp is one of my self made ones from funky foam (for the how to click here). I heat embossed this image using Ranger embossing powder "walnut stain".

I rusted the bottle cap myself (which was actually a lot of work - I left them in a plastic container with some vinegar and salt on my balcony for some weeks ;).

Then I filled it with some "treasures" and UTEE and heated it from below, holding the bottle cap with a pair of tongs.

It was glued to the tag together with the piece of burlap.


I used a piece from the tag's ribbon (which I won alongside with a lovely assortment of various ribbons as a winner of  Zeus and Zoe's last challenge :) to "frame" my chit chat sticker, and fixed it to the tag with some Chronology brads.


The tag's background was made with the Tim Holtz "Wrinkle Free Distress Technique", using Perfect Pearls alongside some Distress inks.

When the tag was totally soaked, I crumpled it to a ball and rolled it between my palms. Then I unfolded my ball carefully and started to dry the tag. That way I created a kinda "faux leather" effect, which I definitely LOVE! ;)


I highlighted some of the raised areas, blending them with DI "vintage photo", which I also used for blending the tag's edges. Done!

I hope you like it!
Also a big thank you so far to those who have already been celebrating my blog anniversary with me! (See sticky post). I wished you could all be winners ;)


Hugs,
Claudia - die amelie x

Tuesday, 23 April 2013

"Inventions" at Try It On Tuesday!

Sometimes it is scary how time flies - another fortnight has passed (better: flewn by) and it is time for a new challenge theme over at Try It On Tuesday!

This time our theme is 

"Inventions"


As usual our challenge is "anything goes" as long as your project follows the theme.  (As you may well know, Tuesday is also the day I invite you over to FunwithATCs - so, please, scroll down to the previous post to have a look at this fortnight's challenge!)

Of course I had something "Steampunky" in mind when first reading our challenge theme and I wanted to use my new stamp from Crafty Individuals as well as the new Tim Holtz Alterations "pediments" and "layered wings" Sizzix dies, my beloved cogs and gears dies from Xcut, some of the Perfect Pearls Mists, my selfmade Steampunk wordstamp (the How To can be found here) and lots of alcohol inks!!!! 


I created a little "Steampunk engine shrine", using a left over chocolate box (yes, I have to face the truth that  I can no longer hide the fact that there are chocolate boxes to be found at my place ...er...from time to time *lol, but I guess I mentioned the sacrifices we have to make for our art earlier on...). 


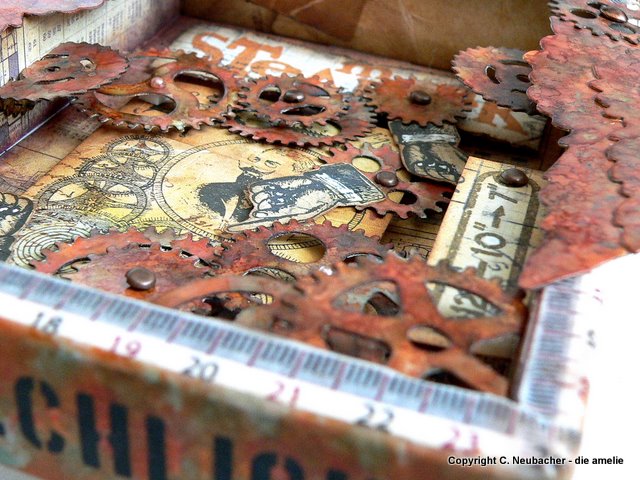
I had a lot of fun creating this box, stamping, glueing and doing a lot of die cutting, layering and alcohol inking. I hope the close ups show a little of the variety of effects on the gears and cogs!


The outside of the box was covered using washi tape, blending some of it with alcohol inks too. 


The background for the gears and stamped images was covered with papers from the Prima "Craftsman" and "Romance Novels" collections.

Stamps used are from Crafty Individuals, Oxford Impressions and Tim Holtz. 


Some of the cut out gears were partially folded and glued to the inner sides of the box, thus creating some depth and additional layers. 

The moveable pointing hands with the cogs were mounted using tiny brads and the panels they are on were glued onto the back using foam sticky pads.


The words on the side read "Achtung Zerbrechlich" ("Attention! Fragile!"). Love this tape! As it was only black&white I added alcohol inks to achieve some contrast with the ruler tape on the front. 

To some of the alcohol inked parts I also added some sprays of Mr. Huey's "gold" and Perfect Pearls Mist "blue patina". 


The pediment was given the same treatment:


I wanted to create the impression of a lot of mechanical movement - even though I didn't "invent" something useful *lol. 


I hope I will see a lot of awesome entries from you over at our challenge blog!!! And you have to hop over and see the great projects my DT fellows made too!!!! 

This month's sponsor is 


who are giving away a $25  Gift certificate ! 


As I made all the rusted looking pieces used on this project from white glossy cardstock treating it with alcohol inks, patina and metal colour sprays (I used the backing of one of my Tim Holtz paper stashes...they are perfect for being used with alcohol inks using their white insides), I enter Simon Says Stamp and Show's "Color" challenge with this project.

I also enter the challenges at

Crafty Boots - "Recycle"- recycled chocolate box

Love to Scrap - "Cut it out!"- a lot of die cut gears, cogs, wings, pediment


Thanks for stopping by and Happy Crafting!
Hugs,

die amelie