Monday, 6 February 2017

La Neige - It's Snowing at Calico Craft Parts

Servus, salut, hi and welcome to my blog today!
I am so happy that you are stopping by my little creative spot close to the Austrian Alps ;)

It's time again to invite you over to the Calico Craft Parts blog where I am sharing a wintery make with you today. A full tutorial awaits you alongside some glittery winter magic!

Here's a little detail to lure you over to the project post. Simply click HERE to get there! I hope you'll like my little winter project!


Hugs and happy crafting!
Claudia
xxx


Wednesday, 1 February 2017

Rock the Red at Emerald Creek Dares!


Servus, hi and welcome!
Over at Emerald Creek Dares we're kicking off a new challenge for you and we ask you to


Rock the Red!


Whatever project pops up in your mind when reading this is welcome and you can win a $50 voucher to spend in the Emerald Creek online shop!!! So don't miss the chance and play along!

I had another post on my blog earlier today that is featuring Emerald Creek's fab embossing powders alongside some of Seth Apter's great dies and rubber stamps - so if you haven't already seen it I would like to invite you to click HERE or to scroll to the previous post to check it out too. The background that I used on my "Rock the Red" tag is a left over piece from that project by the way.


Emerald Creek products and supplies used:
(click on the badge to get the shop)


The tag that I created for my lovely boss Kim - as I want her to have a long life and to rise and shine too - emerged from a find on my always crammed and messy craft desk - a left over paper scrap from a monoprinting technique I had used some weeks ago on another project (as already mentioned above you can check that one out by scrolling to the previous post):


I had used several acrylic paints in reds, oranges and yellows and this is the paper I used to dab off any excess paint and create a bit of texture. I also used it to apply paint to the project by brushing on paint and pressing this paper onto the other - hence the lovely brushstrokes here and there.

So I started with cutting out a tag shape and then adding some black text using the lovely Kimilese 3 stamp and black archival stamping ink.


I die cut a star shape - using the fab Sizzix Dimensional Stars dies set from Tim Holtz - and heat embossed it using Emerald Creek Chinese New Year embossing powder. I had folded the star first, so folding it back into dimensional shape after the heat embossing would be easier. This step also included a happy accident - if you would like to call it that. ;)

I added a second layer of embossing powder and cooked it up a bit too much when heating it...or maybe it was too much of embossing ink that had to evade upwards (as it couldn't go downwards)...anyway - my embossing enamel started to bubble. I considered doing a new star for some time, but then found that the texture from the bubbling added a lot of interest. So I embraced imperfection (why is it so easy with craft projects' and so hard with our own???) and maybe i will even try to create that effect again some other time as I really like it. 


Looks a bit like a star fish, doesn't it?

I die cut another star from white card - a small one - and added it to my tag. I also punched a hole and used an eyelet that I painted with picket fence Distress paint to make it match the tag's look. 


I also used the picket fence Distress paint to paint the lovely Three Stars Metal Band charm that I added to the bottom of the tag using two white small brads.


The Chinese symbol for "Long Life" was stamped directly onto the tag and shaded with a white gel pen. "Rise & Shine" was stamped onto some white card, cut out and added using sticky foam pads.


I drew black and white borders - one for the tag, the other for the center heart - and added a piece of red and white cord. The two paper hearts were glued on using matte DecoArt Decou-Page.


Done!


Hop over to the Emerald Creek Dares blog to check out my teamies makes and find out about any challenge rules so you can play along! Hope to see you over there!


Hugs and happy crafting!
Claudia
xxx


Tuesday, 31 January 2017

"A Story Autrichien"

With Creativations being over I can finally share a project with you that I made for my lovely boss, Kim, the owner of Emerald Creek Craft Supplies, and one of the bestest bosses ever!
She creates and sells the most fabulous embossing powders I know and getting to know hers finally hooked me up on heat embossing. I had liked using embossing powders before but with hers I started loving it.

I also love Seth Apter's dies and rubber stamps a lot. So when Kim told me that Seth would be demoing at a booth quite close to hers at Creativations I was inspired to create a project using her embossing powders and some of his dies. And this is the result:


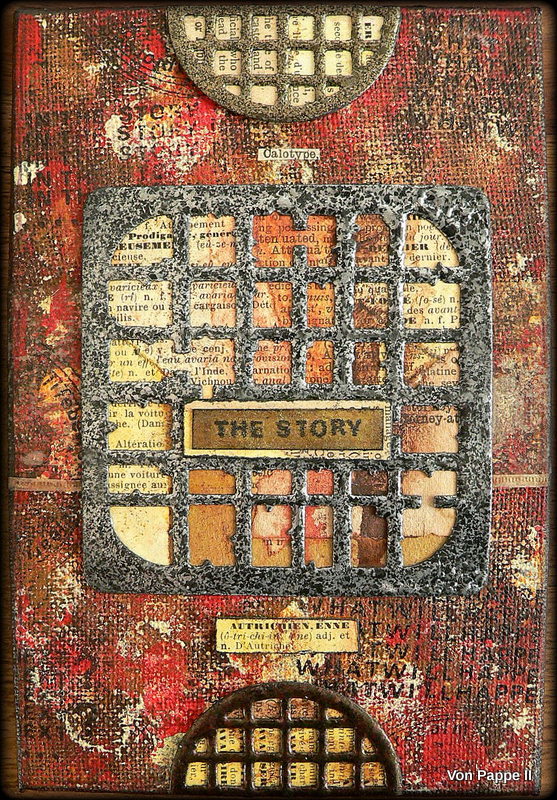
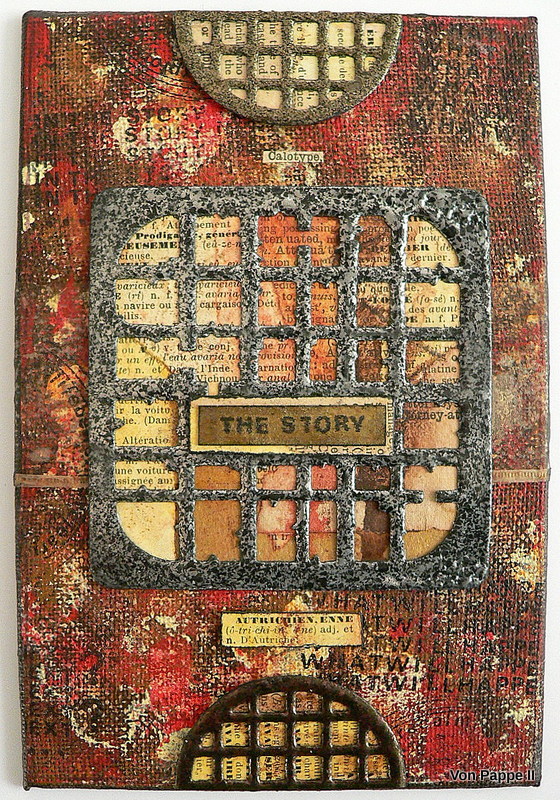
I created a small mixed media piece on a 4'' x 6'' canvas board as I love the texture they provide.

I used old French dictionary pages that I put behind the die cut and heat embossed pieces.


The background was done by scraping on acrylic paint and taking some off again with a piece of card and pressing that down in other spots to create some random patterns and layers.


I also used some of Seth's rubber stamps in the background and for the center word. As I am from Austria I was very happy to accidentally come across the "Autrichien,enne" on one of the pages on my desk. So this project is "my story Autrichien" in a way and I am a girl Autrichienne....so I knew I had to use this word on my make!


Of course I wish I could have been at Creativations in person and meet all the wonderful artists there and my boss, Kim, but knowing that some of my artwork was there still is very exciting and something that makes me proud and happy!


Most of the pieces were glued to the canvas board using sticky foam pads for more depth.


So once more my finished piece. Oh, I forgot to mention that I also used a tea bag behind the center piece but the effect is very subtle. I just love how the Hammered Metal and Charred Gold embossing powders look on Seth's wonderful designs!

Stay tuned for another post that's to come within the next twelve and a half hours...it's time for another dare at Emerald Creek Dares and I will be sharing my latest DT project with you. But for now thanks for stopping by and - as always -

hugs and happy crafting!
Claudia
xxx


Monday, 23 January 2017

Getting Tiny at Calico Craft Parts

Servus and thank you for stopping by!

As usual on every other Monday I am inviting you over to the Calico Craft Parts Blog where I am sharing my latest project with you.

You will not only learn how to quickly and easily create selfmade backgrounds like this one...


...but of course the secret of what's inside that matchbox will be reveiled as well (which finally takes us to the gorgeousness and versatility of the wonderful Calico Craft Parts I have the great pleasure to create with as one of their DT members! ;)


Curious?.....Great! 
Then click HERE to hop over to the Calico Craft Parts Blog to find out!!!

Enjoy your visit there and as always
hugs and happy crafting!
Claudia
xxx


Wednesday, 18 January 2017

An Emerald Creek Treasure Chest

 Hi and servus!


Today sees the second round of January project posts from the Emerald Creek DT and they are all about the new products Kim will be introducing at Creativations (formerly known as CHA) tomorrow! (There will not only be a lot of awesome new products to check out at her booth but also some of my projects I made for Emerald Creek, which makes me a very proud and happy bunny! Yay!)

One of the most impressive new goodies are the lovely gemstones Kim sent me - and I knew immediately what I wanted to create with them.


Last November I went to Munich with my son and husband and there we visited the residence and the treasury. I was deeply impressed by the wonderful treasures and by how much love, skill and labour had gone into their makings! There were crowns, golden boxes, house shrines and many other wonderful things - and all of them were outstanding pieces of craftsmanship!


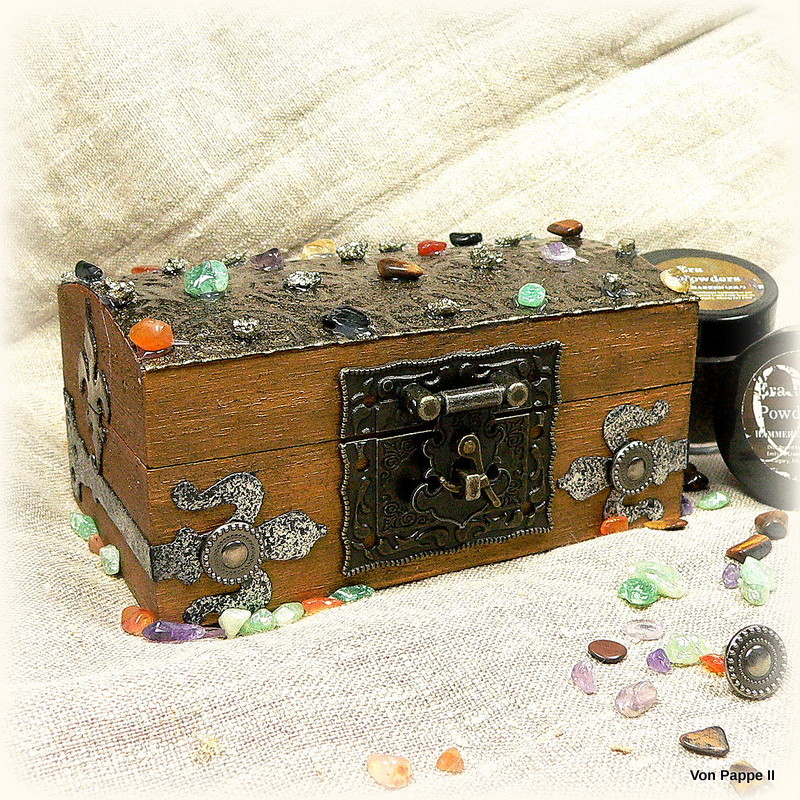
So I decided to create my own little treasure chest using the lovely gemstones and Emerald Creek's fab embossing powders!


My treasure chest is not that shiny and golden, but you know me...I am a grunge crafter and love all things old and heavily worn...which is why I wanted to go for an aged look with my project (imagine that the chest has just been found in a dusty attic or crypt!).


But let's start from the beginning...lol.


I dry embossed a piece of black cardstock using a Spellbinders embossing folder and my Sizzix. Then I painted the embossed card and the balsa wood box with DecoArt Venetian Gold Dazzling Metallic paint.


 The dry card was glued to the chest's lid using matte DecoArt Decou-Page. Then I dabbed on some clear embossing ink directly from the inkpad and heat embossed the lid using Emerald Creek Charred Gold embossing powder. I used it on some die cut fleurs de lis too.


I also die cut two metal fittings from black cardboard and heat embossed these with Emerald Creek Hammered Metal embossing powder. 


The box was toned down using DecoArt media black Antiquing Cream.


Then I glued on the closure and the other pieces.


I added two of the new Emerald Creek Circle brads to the metal fittings. As the balsa wood is quite soft I just had to poke a hole first with a pokey tool and then insert the brad.


The gemstones were fixed to the lid using a hot glue gun.


Voilá! 


Some close ups:


Inside the box the balsa wood is still in its original state - so you can see what a little bit of paint and media can do to turn something new and boring looking into an aged looking artefact... ;)


I love the look of the gorgeous gemstones against the Charred Gold!


If you want to find out what my teamies have used the gemstones for, simply hop over to Emerald Creek Dares and check out their makes too! I hope you like my treasure chest (and the CHA projects if you happen to stop by Kim's booth during the next days ;)!!!


Thanks for visiting and 
hugs and happy crafting!

Claudia 
xxx