...so here we go:
some of you may remember the fantastic blog hop the International DecoArt Design Team were invited to by Stampendous some weeks ago. We were lucky to get some of Stampendous' fabulous Fran-tage embossing powders (one of my favourites) and I used some of them on this project alongside the wonderful new media line from DecoArt that has a lot of fantastic new media for you to conquer new and yet unknown creative territory with!
I created a lot of crackle and heat embossed goodness on this one and hope you will have fun creating your own ;)
Materials I used:
- DecoArt media Antiquing Creme "Carbon Black"
- DecoArt media Fluid Acrylics "Primary Cyan" and "Interference Gold"
- DecoArt Americana "Zinc"
- DecoArt Traditions "Raw Umber"
- DecoArt media Crackle Glaze
- DecoArt Weathered Wood Crackle Medium
- DecoArt Dazzling Metallics "Worn Penny"
- DecoArt matte Decou-Page
- a small wooden box
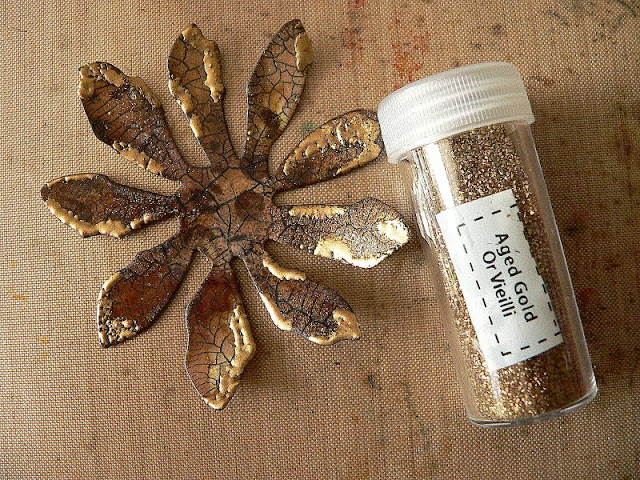
- Stampendous Fran-Tage embossing enamels "Aged Teal" and "Aged Gold"
- embossing pen
- heat tool
- Ranger Distress ink "Walnut Stain"
- Idea-Ology "Linen Ribbon"
- two glass beads
- thick thread
- hand drill
- soft brush, baby wipes, blending tool, palette
- flower die (I used the Sizzix Tattered Florals Alterations die)
- die cutting machine
Steps 1 and 2
I used some left overs from various backgrounds I did with background stamps and Distress inks to diecut my flowers from, but you can use any background left overs you like - as long as the aren't too detailed in texture, so the fine crackle we will add later will show really well!
I blended the edges with DI "Walnut stain". Then I took a soft brush and gently applied a layer of matte DecoArt Decou-Page as a sealant.
Step 3
Once the Decou-Page had dried I brushed on a coat of DecoArt media Crackle Glaze and let dry naturally. The Crackle Glaze is self levelling and produces very tiny cracks when applied rather thin and larger ones where the coat is thicker.
You can see the cracks in the image above - but we still have to make them more visible ;)
Step 4
To highlight the cracks I rubbed some Carbon Black DecoArt media Antiquing Creme into them and wiped off the excess with a baby wipe.
Now that makes a difference, doesn't it?
Step 5
I gave my tiny wooden box a coat of Raw Umber DecoArt Traditions and let dry.
Step 6
While the box sat aside to dry I heat embossed some of my flowers' edges with Fran-Tage embossing powders and enamels.
Step 7
The smallest flower received a treatment with DecoArt media fluid acrylics "Interference Gold".
I love that stuff as it gives a subtle sheen to your make that is only visible when the light hits right.
Can you spot the difference?
Looks awesome, doesn't it?
Step 8
I painted the backsides of my flowers with DecoArt Dazzling Metallics "Worn Penny".
Step 9
I applied a heavy coat of DecoArt Weathered Wood Crackle Medium to my painted box and let touch dry.
Once the Weathered Wood had dried to the touch I painted my box with a mix of DecoArt Americana "Zinc" and DecoArt media Fluid acrylics "Primary Cyan" (to match the colour of the embossing enamel).
And when that had dried I brushed on some more "Interference Gold".
I love how the colours from the Interference range still let the original base coat shine through but show and shine when looked at from the right angle.
Step 10
I painted a piece of linen ribbon with DecoArt media "Interference Gold" and glued it to the lid using matte DecoArt Decou-Page.
Step 11
To fix the assembled flower to the lid of the box I used a small drill to prepare the hole.
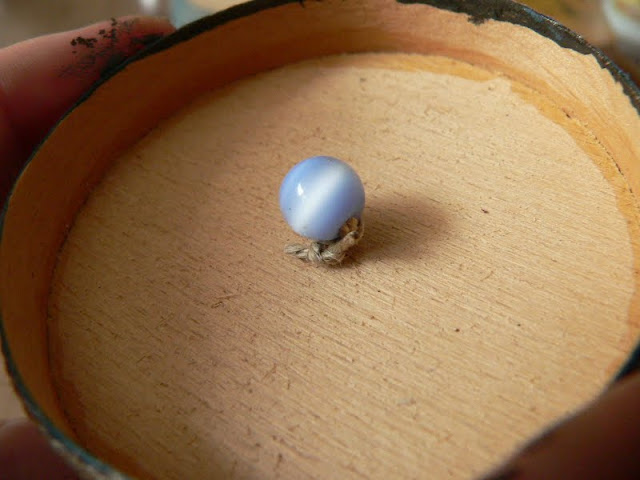
The flower leaves got punched too and a piece of rough thread was threaded through them from the top together with a glass bead of matching colour as the flower's center.
To keep the flower in place I threaded another bead from below and fixed the thread tightly with two knots.
Done!
Some more close-ups so you can see all of the crackle and embossed goodness:
I hope you liked what you saw and that my tutorial manages to encourage some of you to give the fantastic new DecoArt media line a try!!!!
Hugs and happy crafting,
Claudia xxx


Wow! Thank you for the great tutorial on using the new Deco Art products. Your flower is gorgeous and I love the way the different products work with one another! Fabulous!
ReplyDeleteLOVE those crackles! Fab project! xxxx
ReplyDeleteThe flower looks brilliant. I love the frantage edges
ReplyDeleteA stunning project and a great tutorial.
ReplyDeleteYvonne
fabelhafte Blumen auf der Dose...himmlisch gemacht!
ReplyDeleteThe flowers look brilliant and it's a wonderful tutorial!
ReplyDeleteFantastic Tutorial Claudia, very easy to follow and a wonderful project!
ReplyDeleteClaudia, your box is fantastic! I love the colours and the crackle on the flowers is fabulous. Thanks so much for your detailed tutorial. Love it! Jean.x
ReplyDeleteGreat tutorial and fab box and flowers.
ReplyDeleteHi Claudia, This is stunning and a great tutorial.
ReplyDeleteAvril x
Danke für dein wunderbares Tutorial! Jetzt müßte man nur noch wissen, wo man diese Schätze kaufen kann...wenn man nicht in den USA oder in Kanada lebt.
ReplyDeleteGaby xo
Hi Claudia, vielen Dank für deinen netten Kommentar und den 'Link'...da werde ich gleich mal stöbern. Leider bist du ein noreply-comment blogger...ich habe auch nirgendwo eine e-mail addy gefunden...
ReplyDeleteGaby <3
Wonderful flowers Claudia! Your tutorial is absolutely great! thanks for sharing with us! barbarayaya
ReplyDeleteLove the look of those petals The flower looks like something from a dark fairy tale... Amazing!
ReplyDeleteIt looks fantastic!!!!
ReplyDeleteI love what you do. Gorgeous!
ReplyDeleteWow, großartig! So ein feines Schächtelchen!
ReplyDeleteStunning! Thanks for sharing your creative process!
ReplyDeleteOh, wie cool ist das denn! Sieht super aus und vielen Dank auch für dein step x step!
ReplyDeleteLG
Evelyn
What an amazing crackled flower and box. I need to add some more DecoArt products to my stash!
ReplyDeletePinning for future reference!
Wo war ich denn bloß im August 2014? Hier habe ich eindeutig etwas verpasst!! Aber trotzdem gefunden, hihi. Was für ein Augenschmaus! Diese Krakeluren sind zum Dahinschmelzen! Wirklich! Diese Farben sind sowas von meine Farben!!! Wieviel Arbeit und Mühe Du in diese hübsche Blüte und ihr Döschen gesteckt hast. Aber es ist Dir soooo gut gelungen!
ReplyDeleteBeautiful.
ReplyDeleteGorgeous, fab crackle. Thanks for the tutorial.
ReplyDelete