Showing posts with label Creative Chemistry 102. Show all posts

Monday, 28 April 2014

CC3C - Challenge 01 - Paint Marbling

Servus, dear readers, crafting friends and creative folk out there!

Today I finally managed to do my first ATB (Artist Trading Block). I haven't got the much celebrated Eileen Hull die, but it wasn't too complicated to create my own template as it just needed a bit of measuring, calculating and drawing.

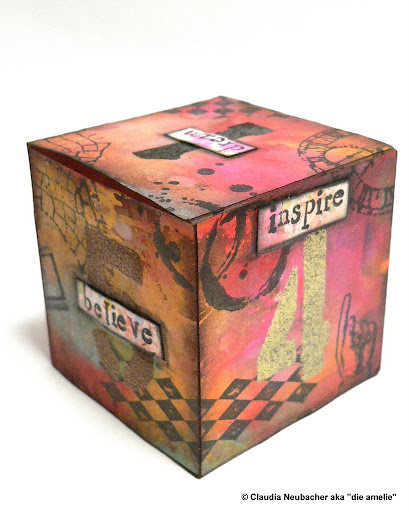
I love the distress paint marbling effect and I thought I would use it on my first ATB and see how heavy distress paint marbling in vivid colours might look like when displayed as a cube...

...and as the fabulous "Compendium of Curiosities Challenge Vol. III" - hosted by Linda Ledbetter - just started, this was the perfect occasion to join in the fun!


There's a prize sponsored by 

http://www.inspirationemporium.com/

this time! Yay!


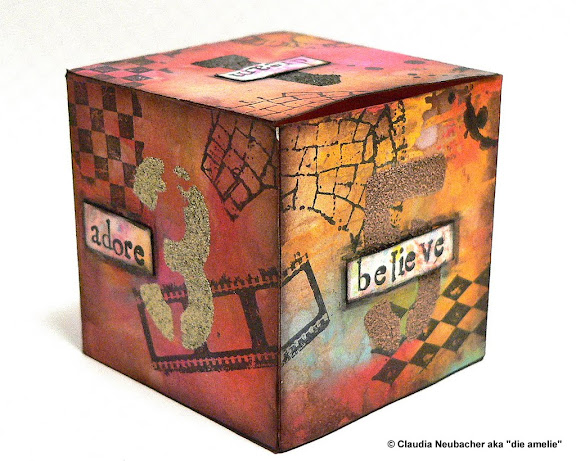
As it is a cube I thought I might create an "artist's die"...a die to roll in case of loss of artistic confidence or mojo. It tells you what to do to get back on track ;)
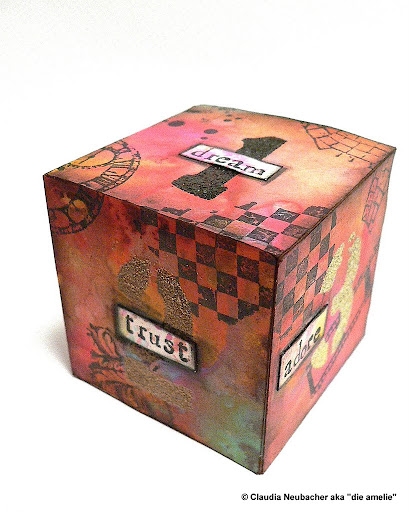
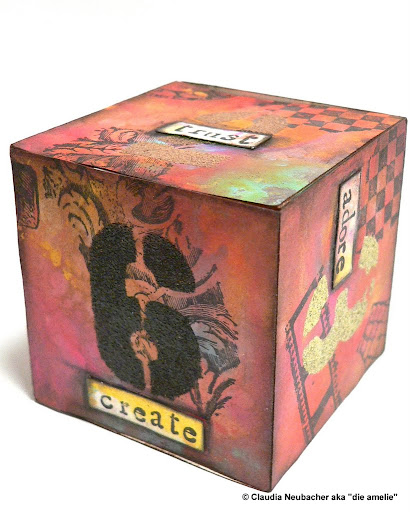


This time the distress paint marbling went really well and I was excited to watch the distress paints do their magic on the once white card!

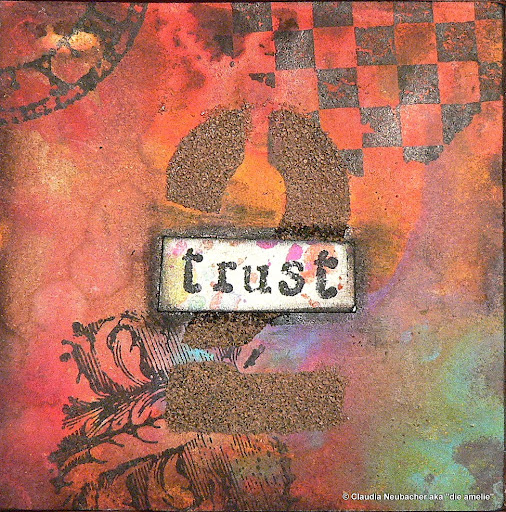


It was fun fiddling with the right sides to put together while stamping so the designs would run around the corners and edges!
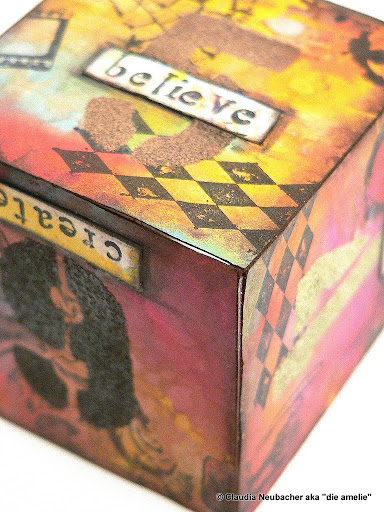
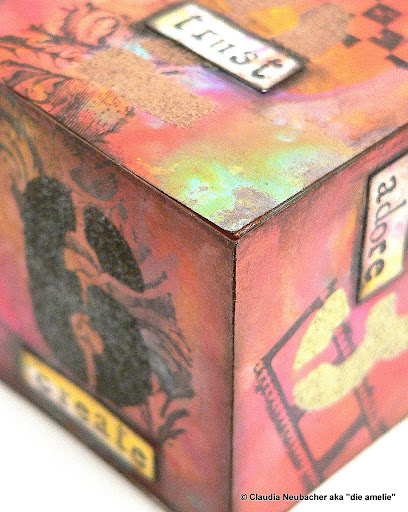

The numbers were heat embossed using one of the TH stencils and various distress embossing powders (walnut stain, brown puffs, tea die).
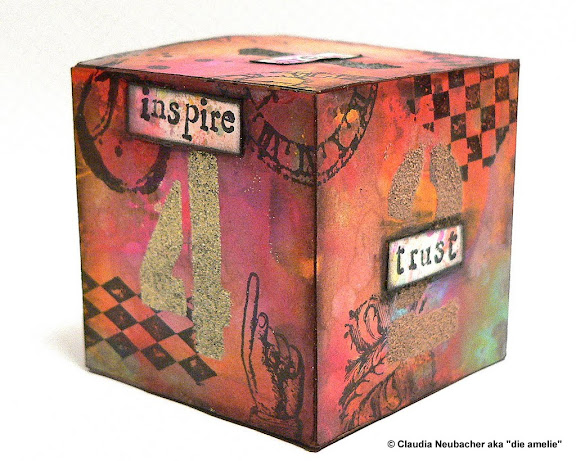

Before I put the cube together I blended all edges with DI "gathered twigs". The six encouragement words were stamped onto a scrap on which I used the left overs from the paint marbling, cut out and glued in place. I blended them in with Distress markers.

I had a lot of fun messing around today and I hope a bit of it shows with my encouragement artists die! Thanks for stopping by!

Hugs and happy crafting,
Claudia x

Sunday, 13 October 2013

Another CC 102 inspired tag

First I want to thank you all for your lovely and kind words on my being featured with Tim's students gallery over at CC 102! They fill my heart with sunshine and they are mostly what gets me going on my creative journey. So I really want you to know that I am glad you share some of the way with me and let ME know either ;)

I had some time to give some of the CC 102 techniques more time for a play and this is the result:


I did some "eroded metallic" (with the background), some rusting with distress embossing powder, the "painted crackles", some alcohol inking and the "faux crackled glass" on this tag. Most of them will sure become favourites of mine - as the possibilities seem endless and I just LOVE the surface texture you can create with it.


As you just have to see those fine crackles the coloured Distress clear rock candy creates, I also have some more close-ups (as a kind of surrogate for the fact that you can't touch the tag and the various surface textures).


I fixed the light bulb to the tag using some thin black wire and I placed in front of the tag's hole so the light shines through when you hold the tag against the light (which is a funny effect - making the bulb look like it has been lit).


I really love that colour combination of the rusty tones and the pale patina verdigris blue-greens.
I dry embossed the tag after I had covered it with the eroded metallic technique and sanded the raised areas a bit down. Then I blended them with DI "broken china".


I let some Distress stain "brushed corduroy" seep into the crackles...but I found that you have to be careful with doing so as some of the crackled surface might fall off if you let your card underneath the crackle texture get too wet.


The light bulb's socket was given a coat of alcohol mixative "copper" and some "sunset".


The die cut gears were glued to the tag, but the text labels are fixed to them with brads so they stay spinnable. Love it when there's something "moveable" or "mechanical" on my steampunk makes.


Actually the tag is more blue-ish than the last picture shows... my camera just did not do the calibrating the same way as it does when I do the close-ups. Sorry for that, but even editing the image could not change the colour tones to match the real colours from the close-ups. Also the metallic surfaces are really hard to photograph... well, I tried my best and I hope you like the tag and the images anyway.

As I used a rubber stamp on this tag too, I enter it to Simon Wednesday 's challenge "Use a clear/rubber stamp". And luckily it also fits the challenge over at Dragons Dream Tag It On, "A word of your choice - plus die cuts, layers, brown" and the Artful Times challenge "Feeling distressed"

Hugs and happy crafting,

die amelie x

Unexpected Joy

Since I found out this morning that one of my shared attempts on the CC102 "brayered stains technique" was featured in the students gallery (alongside  a lot of awesome projects) I have been beaming with joy ;)

This journal page is meant to capture some of that shine ;)


I used the "brayered stains" technique I learned this week at Creative Chemistry 102 and then applied the "unexpected" word using decorating paste and one of my beloved  Red Lead stencils. Some pattern was added to the background using DI "black soot" and two of the Tim Holtz layering stencils. For a finishing touch I gave the page some spritzes with Distress stains I had used for the brayering. Done!

I love the simplicity of the translucent colours with just a tiny bit of black against the plain white background! Hope you like it too!

Hugs,
Claudia - aka die amelie x

Friday, 11 October 2013

Creative Chemistry 102 - Day 5 (2)

Aaand back with my second make for today's embossing techniques over at Tim Holtz' CC 102...

This time I tried the rusting technique, which really turns out sooo lovely.

For those who haven't been to my blog today: there's a brand new Halloween tutorial to find (if you scroll down two posts) - "Witch Myrtle's Favourite Shelf" - an altered wooden shelf with a lot of crackle texture and spooky details (and of course you learn a bit more about Myrtle too ;). I hope you have a lot of fun creating for Halloween and/or CC 102! :)

But back to the tag. Here it comes:


I used Distress embossing powder "walnut stain" with the letters and the rusting technique with the cage. The bird and the border on the bottom were embossed with Ranger "copper" embossing powder. Love all the different sublte textures on the tag!


Creative Chemistry 102 - Day 5

As it is cold and grey in Vienna, the "embossing"-day over at CC 102 helped keep me warm *lol. I also share a new halloween tutorial today - so scroll to the previous post if you want to see "Witch Myrtle's Favourite Shelf" and the how-to ;)

Again Tim has come up with a lot of fab techniques using heat embossing and a lot of powder "chemistry" ;)

I tried to combine some of today's techniques for my project and came up with a Halloween ATC-Ticket Booklet.

Techniques used were the sticky powder leafing technique (with the cover) and the sticky powder glitter technique (on the back of the booklet - using Distress Glitter "rusty hinge").


The book contains three ATCs which can be ripped off from the binding if wanted.


Other materials used were black Kraft Core, the retractable scratching and the distressing tool, clear and black embossing powder and various halloween and texture stamps.


 I hope you all have a lot of fun creating for halloween and for CC 102!

Hugs,
die amelie x

Thursday, 10 October 2013

Creative Chemistry 102 - Day 1 and 3 tag

Good morning, dear readers, friends and followers!

Today I tried to combine some of the techniques from days one and three for a tag.
The background was done using the "brayered stains" technique. Then I added some pumice stone DI through the stripes stencil and some white decorating paste too. The scattered script lines were stamped through the stripes stencil onto the tag for more texture.

The image in the lower left corner was stamped using the "smudge stamping" technique and the acrylic charm tag was my first attempt on the "faux cracked glass" technique, which definitely is something I will use a lot in the future (still haven't got my corked domes yet).

Hope you like it!
See you in class! Hugs and happy crafting!

die amelie x


Wednesday, 9 October 2013

Creative Chemistry Day3 (1)

Today I watched the fab CC 102 tutorials where Tim shows how to create a faux cracked glass effect and a lot more techniques which were - as usual - as surprising as innovative.

The cracked glass is still in preparation (due to some drying time), but the "Braiered Stains Technique" produced immediate results - honestly I had to do several of them until I mastered it. Sometimes I picked too much colour with my brayer, sometimes too little.

I really love the effect of the "brayered traces" of colour against the plain white of the background - so I only blended the edges, but did no further blending with distress inks after the brayering.


My favourite tag of today so far:


Hugs and happy crafting,

die amelie x

Creative Chemistry Day 2 (Part 1)

Well, I' m just done with catching up on the lessons from Day 2 (had no time yesterday to sit at my crafting desk *sniff) and some of the techniques turned out to be a lot trickier to do than they look when Tim does them (just as it should be when you are watching a teacher ;) and some will definitely make it on my new favourites list.


This time I made smaller tags and am not sure yet what I will turn them into - they definitely don't work for a kind of display like my "Day 1" project.

So here they are as they are: done, partially "mastered" (lol) and waiting for ... hm...will have to think about that. ;)


I actually like the one where I used the stencil as a stamp using Distress paint. The embossing without a Vagabond turned out to be a bit tricky, but creating a sandwich with an additional layer of funky foam plus the impressions pad and the base platform AND the cutting pads finally worked... don't ask me in which order I put them through my BigShot - I definitely will have to work on this again (and then make some notes *lol).

Hope you are all enjoying CC102! See you in class!

Hugs,
die amelie x

Tuesday, 8 October 2013

Creative Chemistry 102 - Day 1 (Part 2)

LOL - They are everywhere - posts showing what day 1 over at Creative Chemistry 102 taught by no other than Tim Holtz offered...

..honestly I have decided to share most of my "makes in progress" via a link to my online image storage and only post CC102 related stuff on my blog that I really want to share with you all - not only class (although it seems that "you all" might be the same as "class" *lol).

Maybe you also want to scroll down a bit to view my latest tutorial - an altered wooden box turned into a textured steampunk storage

I decided to try doing a project for each day in class that combines all the techniques shown (well, at least as many of them as I can squeeze into one project). So here comes my make showing all the six techniques from Day 1:


The "eroded metal" technique can be found with the background, the "industrial" is on "d", "marbling" on "a", "altered surfaces" on "y", "stamping resist" on "1" and "colored crackle" with the pediments to the sides.

I also made some close-ups as the letters aren't too big ...


Love all the metal shine on the surface and the "d"!


The Day 1 techniques are definitely a lot of fun to make and rather messy too - so right up my alley! :)


See you in class (or after class ;),

die amelie - Claudia xx

Monday, 7 October 2013

Creative Chemistry 102 - Day 1 (1)

Hello and servus out there!

Just a quick post with which I want to share the very first attempts I made on the first day in class over at Tim Holtz' Creative Chemistry 102.

This is so much fun and I immediately had to try out my two favourites of the techniques Tim shows today - it's "Eroded Metallic" (to the right) and "Industrial".


I am sure many of you are taking this fab online class too and have a lot of fun like I do. See you there!

Hugs and happy crafting!

Claudia - aka die amelie x