Showing posts with label portrait. Show all posts

Sunday, 15 October 2017

Ripper Street at SanDee&amelie's Steampunk Challenges

Servus, hi and welcome back to another project, done for our mid-month reminder over at my SanDee&amelie's Steampunk Challenge blog!

Our challenge theme is the usual one - "Anything Goes - Steampunk/Industrial"...so loads of ways to approach this challenge and have some messy stamping, painting, doodling, crafting,...fun. ;)

My make is a make-over to be precise. You may already have seen these guys on facebook or over here, when I was sharing the "work in progress" picture...but I decided that they deserved better than just being neatly sketched onto a mixed media board. ;) So here's my finished mixed media portrait! I hope you like it!


I tried to also capture the feel and design of the TV series...and even if the portraits are not to the point (with noses being too big and eyes not in the perfect spots), I am still quite content with the outcome.

I have done some steps images...so if you would like to learn more about how this was done, simply read on. If not, simply click HERE to get to the challenge post with the makes of my wonderful Team B ladies!


I simply started out with glueing torn dictionary pages and other scraps from old magazines to an MDF panel using DecoArt media Matte Medium.


Then I added a layer of diluted white DecoArt Acrylic Gesso to tone it all in.


Once that was dry I went over it with a wash of DecoArt media English Red Oxide and Transparent Yellow Oxide for a vintage look.


I used an image from the internet as my model and roughly sketched the shaded areas using a soft brush and diluted DecoArt media Raw Umber fluid acrylic paint.


Then I added the finer details with Raw Umber using a detail brush.


Highlights were painted using DecoArt media Translucent White.


...and that was also the state I previously shared my painting in on facebook and over here on my blog. I liked it, but I didn't think it was a real stunner or any "special". Just a piece of portrait painting practice...


Sometimes I have to put paintings aside and let them "rest" until I decide whether I want to add something to them or leave them the way they already are. In this case I wanted to add that special vintage and steampunk-ish feel to it that I so love with the TV series.

I started with stippling on gears borders with a bristle brush. I used an Andy Skinner stencil and DecoArt media Quinacridone Gold and Titan Buff.


Then I used a thin acetate sheet as a mask and stippled on more Quinacridone Gold, creating shaded and layered rectangular shapes.


After that was done and had dried, I added a wash of DecoArt media Prussian Blue Hue on top.


I let that dry thoroughly before I went in with a scratching tool and some sanding paper to give my painting a really heavy distress treatment.


As I had sanded off the hats' silhouettes I went back in with more Raw Umber and re-painted the hats.

I also sanded the edges of the MDF panel to create a kind of border. The sanding also highlighted the edges of the layered paper scraps...which added perfectly to the design. Done!


Some close ups to show the cool textures and layers:


Thanks for stopping by! I hope to see play along and share your beautiful steampunk and industrial art with us! Once more the link to our challenge blog.


Hugs and happy crafting!
Claudia
xxx

Monday, 9 October 2017

More portrait painting practice...

Tried to capture these three handsome guys today...


Media used:
MDF panel
Old dictionary pages
DecoArt media Matte Medium
DecoArt media fluid acrylics Raw Umber, Translucent White

Friday, 6 October 2017

Mixed Media Portrait - finished

Servus!

My mixed media portrait is finished. Thank you all so much for the lovely comments on my "work in progress" post over here and for the likes and comments on facebook - this really means a lot to me and is great encouragement! Mwah! XXX


Time to write down a bit of info on media and techniques used before I forget them...

In my previous post I had come to the stage to the right - with charcoal sketch and walnut ink being added to the shady spots.

Then I went in with a fine tip brush and Raw Umber and Translucent White DecoArt media fluid acrylics to fill in any fine detail, more detailed shading and highlights.


As many of the fluid acrylics are at least semi-transparent they work really well for shading as you can dilute them into washes and still have the background show through. 


I made a copy so I could cut out a mask.


Placing the mask on the portrait I spritzed on some rusty hinge Distress stain. I also added some of it to the portrait with a fine tip brush. As the Distress stains stay reactive with water (or moisture in general) I sealed everything with a matte spray varnish.


Then I used the mask again and added white Gesso that I scraped on with a palette knife. Then I added Raw Umber. Once that was dry, I used Prussian Blue Hue to add a bit of contrast to the warm colour tones. I finished the portrait up with some stencilled on black stars and a bit of stamping here and there.


The finished piece (detail):


Some close ups of spots that I like best:


Materials and media used:
MDF panel
DecoArt media white and black Gesso
DecoArt media fluid acrylic paints - Raw Umber, Translucent White, Prussian Blue Hue
DecoArt media matte medium
DecoArt media white modeling paste
Charcoal pencil
Walnut Ink (Tsukineko Walnut Ink Crystals)
Distress Spray Stain - Rusty Hinge
Matte spray varnish
Stencils
Rubber stamps
Archival black stamping ink (Ranger)


Thursday, 5 October 2017

Mixed Media Portrait - Work in Progress - Part 1

Hi, servus and welcome to a new kind of post on my creative blog.

I have decided to use my blog a bit more as the means it originally was meant to be - a personal creative diary that helps with keeping track of my creative journey quite easy. The fact that I am sharing my "creative diary" with "the world out there" makes it also a place where you can take a look at the curtains or get inspiration for your own projects. I also write the tutorials not only for you but also for myself - so I can come back to check on any products I have used or look at the steps images. But these "more personal" kind of diary posts will not have as detailed tutos as my projects for my DTs have. IF you have any questions, don't hesitate to email me or drop me a message on facebook, okay?

To start with I am sharing a work in progress that is meant to become a mixed media portrait when it's finished.
This is how it looks so far:


What I have done so far is prepare a mixed media wood panel by glueing on scraps of old magazines and dictionary pages. I have also included some left overs from stamping onto dried and used tea bags.


I also sealed the glued on papers with another coat of matte medium. Then I added a bit of diluted white Gesso and once that was dry I toned the whole thing down with a wash of Walnut Ink Crystals. 

A bit of texture was added using white texture paste through various stencils. Then I sketched the portrait with a soft charcoal pencil. I used a picture from a magazine as a model. 


It is helpful to first lightly mark directions and distances....like the curves and angles of the eyebrows against the angle of the nose, the shape of the upper lip and the shape of the hair. 


Then I filled in some shading with more Walnut Ink. I simply used a soft brush and painted the ink in the darkest spots. The edges from the glued on pages and scraps created a wonderful random texture thus being highlighted by the walnut ink! 
As the surface was sealed with matte medium, I could still go in and wipe back where I had added too much ink.  


Then I let my sketched portrait air dry.

I've not decided yet on what to add...maybe some word stencilling at the top left...some scraped on paint...I definitely need a contrasting colour (like turquoise for example) against the browns for more interest. 

Well....I guess I will continue with first painting the details in the face with a fine detail brush. Maybe that will spark some inspiration for the background. ;) 

Thanks for stopping by! 
Claudia xxx


Saturday, 14 November 2015

Show Your Face in the Style of ...

...an established artist.

That is the "challenge" over at lovely Kim Dellow's "Show Your Face" community event for November.

And this is my share for starters: 


When I think about painted faces the portraits by Amedeo Modigliani are the first ones that come to my mind in the very first place. I love how simple his portraits look and yet he has managed to capture a very intimate moment where the portrayed person's face allows us to take a look behind the facade and reveals something deeply intimate or even the persons' very natures.

https://www.pinterest.com/pin/302656037430410195/


For some examples that have especially impressed me click HERE or HERE.

Being way too over-focussed on a natural look with my drawings or paintings I challenged myself this time to try and follow Modigliani's way of elongating the faces' proportions (but still let them feel quite natural and touching instead of artificial).

I also love his way of applying the paint to the canvas...but as it is one step at a time when trying something new, I decided to just focus on this one aspect for a start.

I needed a photograph with a person whose facial expression was somehow special, meaningful, touching...and I found a picture of a guy in a home decor magazine who is at work in his pottery studio and obviously loving what he does. So my aim was to try capture the wonderful expression on his face - as this is what makes Modigliani's portraits so wonderful to me.


 I used a (very) small canvas for my experiment and made a rough and quick sketch with a soft pencil first.
 

Then I went in with a fine tip brush and did the black lines first. I knew that some would get lost during the painting process anyway so I didn't spend too much time on being very precise with that step.


Next I started to build up layers of paint, trying to use colour tones close to the ones Modigliani used with his portraits.


As you can see I didn't stick to the colours of the photograph. I focussed on the face and on trying to let go of my usual over-accurateness that most of the time "kills" my paintings or drawings. I think I could have been even more brave with elongating the proportions....but hey - maybe a second try will get me (and the portrait) closer to that Modigliani feel. ;)

I am super curious about the other faces that will be shared over at Kim's place this time!

http://www.kimdellow.co.uk/2015/11/show-your-face-in-style-of-toyen-aka.html


Hugs and happy crafting,
Claudia x


Sunday, 27 September 2015

More Faces

Now that I have found a great way that works perfectly for me when it comes to doing portraits I can't stop (not sure though if you can really say something like that after two portraits...lol).

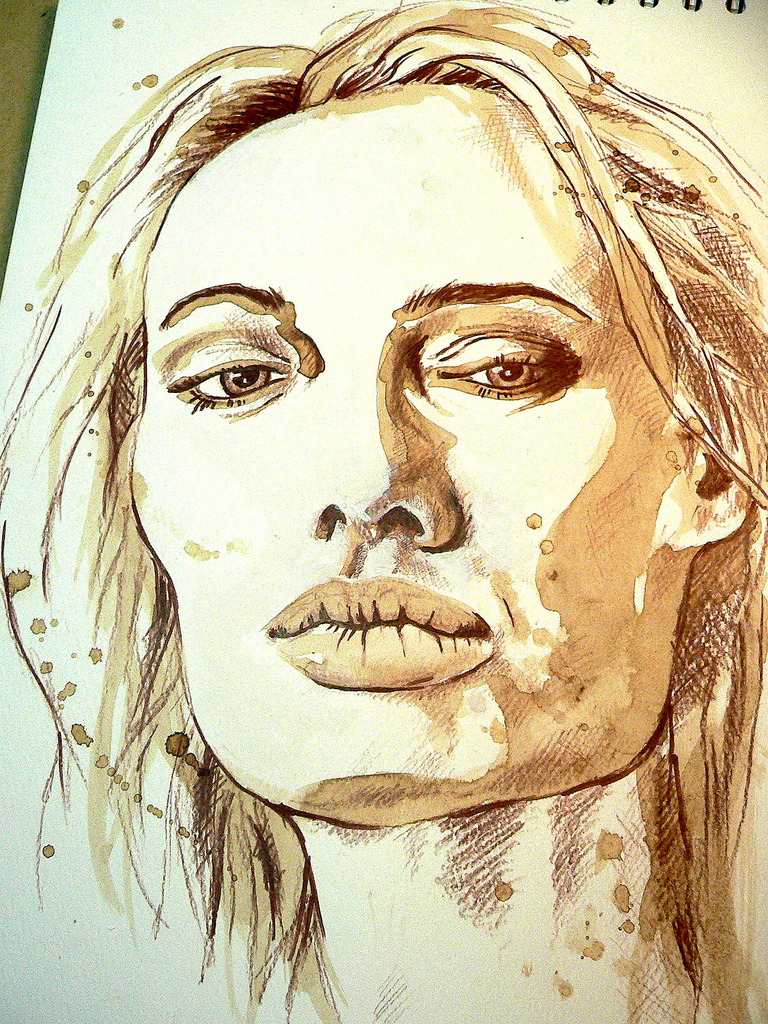
So here she comes:


I have again first roughly sketched the shades with a soft brush and walnut ink solution before I went in with a brown colour pencil and then finished it with a dark brown brush tip Faber Castell PITT artist pen.

I have taken steps images to show the process.


First positioning of the shady areas, lips and eyes. 


 Drawing with the brown colour pencil.


Shading in the hair.


Adding some walnut ink stains and doing some small corrections with white Gesso.

If you haven't seen Kim Dellow's fab "Show Your Face" community where everyone is free to join in and get inspired and/or share his own painted, drawn,...mixed media faces, I highly recommend you check it out. 

http://www.kimdellow.co.uk/2015/09/show-your-face_25.html

It is really fascinating seeing all the different inspired approaches to portraying!

Hugs and happy crafting,
Claudia xxx