Showing posts with label collections. Show all posts

Thursday, 12 September 2019

What to Make From Left Over Gameboard Token Chipboard Frames - a DecoArt Mixed Media Project

Servus and thanks so much for stopping by today!
This is another invite over to the DecoArt Mixed Media Blog, where I am sharing a project done using a left over chipboard frame that came with one of our numerous board games our friends, my husband and I love to play.

Most of these games have a lot of tokens and these come pre-punched but still in their chipboard frames for safer transport. I like to keep the frames as these are usually made from very sturdy chipboard and often they make for perfect frames to create little display trays from. Perfect for a collector of all things small and wondrous like me ;)

So this was how the frame looked before...


...and this is a sneak peek of how it looked after I had used some of my favourite DecoArt media products and paints on it.


There's a very detailed tutorial with loads of steps images over at the DecoArt Mixed Media Blog and I hope you will like it (and the finished project of course) ! I have already put it up on my wall as it displays some of my favourite shells and fossils. They have been stored away in a drawer for way too long - now I am happy that I can look at them every day. And as I am quite happy with how the tray turned out I am happy to look at that too. ;)

Hugs and happy crafting!
Claudia
xxx


Thursday, 24 May 2018

Skeleton Key - a Mixed Media Assemblage with DecoArt media

Hi, servus and welcome to a short post today, in which I would like to invite you over to the DecoArt Mixed Media Blog, where my latest DT make has just gone live.

I love collecting ephemera and found objects of all kinds. Beautiful pages from old dictionaries make fantastic backgrounds, but also offer beautiful vintage words to use in your art. Assemblage art is the perfect way to use some of your treasures and turn them into a piece of art that will beautifully display them and give them new meaning. And with the aid of one or the other DecoArt media product you can fuse all your treasures into one piece of assemblage art that tells stories of beauty and decay.

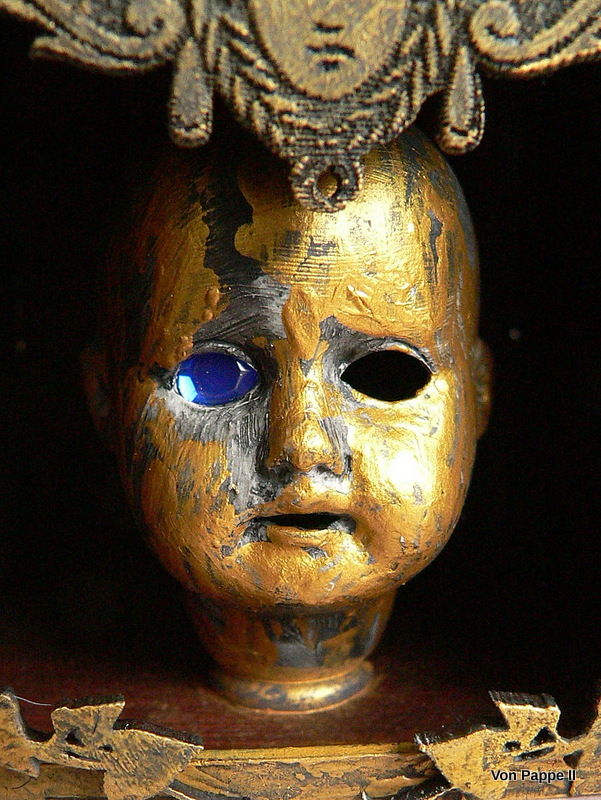
Some of you may remember that I have shared this detail shot on facebook (and maybe instagram too) a while ago...


...now I can finally show you the finished project:


To find out how I did it and which media I used simply click HERE to get taken to the DecoArt Mixed Media Blog post. Hope to see you over there!

Hugs and happy crafting!
Claudia
xxx


Monday, 15 May 2017

The Happy Prince - guesting at Calico Craft Parts

Servus, hi and welcome to the first of my posts on here for today!

It is my bi-weekly invitation to my project that is being presented over at the Calico Craft Parts Blog and I hope that I can lure you into taking a closer look.

My make is all about "The Happy Prince" by Oscar Wilde - and those who don't know the short story can find it over HERE.


Meet the prince and his friend, the swallow and a full step by step tutorial over at the Calico Craft Parts blog. I have used the middle sized of the three cubes of Calico Craft Parts' Stacked ATC Cube KitThe largest cube was used for this project HERE and the smallest for that project over HERE. (which will go live in 90 minutes on my blog).

So I hope you will not only visit the Calico Craft Parts Blog and Shop but also come back to my place for more inspiration in about  ninety minutes when I will be presenting my project for this month's challenge over at SASPC

Thanks for stopping by
and

hugs and happy crafting!
Claudia
xxx


Tuesday, 2 May 2017

Gypsy Travels to my Home with Canvas Corp Brands

Servus and welcome to my blog AND my flat too today!

I am taking you on a tour through my private collections over at "The Creative Studio" Canvas Corp Brands blog to share some of my travel souvenirs, flea market finds, inherited treasures and other beautiful inspiring bits and pieces from my three (!) cabinets and writing desk.

I grew up in a home where my mom (and my grandma) surrounded themselves with beautiful things like porcelain, silverware and knickknackery in general and I have not only inherited some of the pieces but also the love for having my own little "private museum" at home.

In my cabinets visitors will find a mix of beautiful crafted gifts from wonderful and creative friends, inherited porcelain and silverware as well as gifts my lovely sister sometimes brings home from her travels and treasures like souvenirs, flea market or nature finds that I collected myself.


The large keys were a souvenir from our fantastic trip to Turkey and the assemblage to the left was given to me by my SASPC team member and friend Brigitte from France (merci beaucoup, Brigitte! Bisous!)


The little green house was a birthday gift from my sister and the cups and bowls are things I have taken over from my mom's collection. 


And there's a little beautiful story to tell about the small yellowish figurine in the left back: it is a handmade candle that I was given to by one of my pupils before I left my hometown Linz and moved to Vienna to live with my husband. The candle is meant to resemble me and it really looks like I looked back then (with very short yellow hair, my favourite orange shirt and two earrings in my right ear.) The wings aren't visible on this picture, but believe me - I have a pair of beautiful wings!!!! So she made me an angel - how adorable is that!!!! It is one of my most loved treasures that reminds me of my wonderful time as an arts teacher there back in the nineties. ;)

If you want to see more, just hop over to the Canvas Corp Brands Blog.
There are more treasures waiting for you to be discovered. 

Hugs and happy crafting!
Claudia
xxx


Monday, 27 February 2017

Homo hahahbilis

Servus, hi and welcome back to my little creative corner, dear craftin' friends and followers! Thank you so much for stopping by!

Today I want to share with you another project I did as a member of the wonderful DecoArt media Design Team.

At times DecoArt team up with other manufacturers and this time it is Stampendous and their team whom the DecoArt media DT will do a blog hop with to celebrate the new Andy Skinner stamps! So look out carefully this March and visit the Stampendous and DecoArt media blog and their other social media platforms to not miss the kick off of a fantastic blog hop!

Three of my wonderful teamies will be part of this event and some more team members - including myself - will be featuring projects on their blogs during the next days and be showing off with Andy Skinner's new Stampendous stamps and the fab products from the DecoArt media line. So loads of inspiration are about to fuel your creative mojo! Here's my share - enjoy!


This skull of "Homo hahahbilis" as he has been named by its discoverer, Dr. Rufus Bellows, has only recently been excavated and forces anthropologists all over the world to accept that there has been another, much earlier and totally different human species that had the most amazing qualities and seems to have developped in a totally different direction than its later "colleagues".

So far scientists who have carefully examined the specimen dare assume that this much older species had its own means of protecting themselves against predators like the giant sabre-toothed tiger. They believe that these early humans could squeeze their own noses to have some acid liquid squirt from the inner corners of their eyes that would harm the attacker's eyes and thus win them enough time to escape.
They also have come to believe that the ostentatious red tufts of hair on the back and sides of the head were a kind of visual warning sign for predators to indicate that they were inedible, maybe even poisonous (like you still see it with certain caterpillars today for example).

***

The title "homo hahahbilis" was suggested by my son and I love it!!!! He also came up with "hoho erectus" which is just as genius, but I think we will have to wait until Christmas to meet this guy. lol

To create my mixed media foam board panel I used Andy Skinner's new "Skuldoggery", "Unexplained" and "Handle With Care" Stampendous stamp sets alongside the cracke stamp from his older "Industrial" set and of course a lot of DecoArt media fluid acrylics, Misters and Gesso.

I started with covering up a sheet of heavy mixed media paper with torn scraps of old magazines and dictionary pages. This time I used DecoArt's "Antique" Decou-Page as it already has a slight brownish tint to it and I thought that would add beautifully to the grunge look I was aiming for.


Once that was dry, I applied two thin coats of heavily diluted white Gesso to tone everything down a little. 


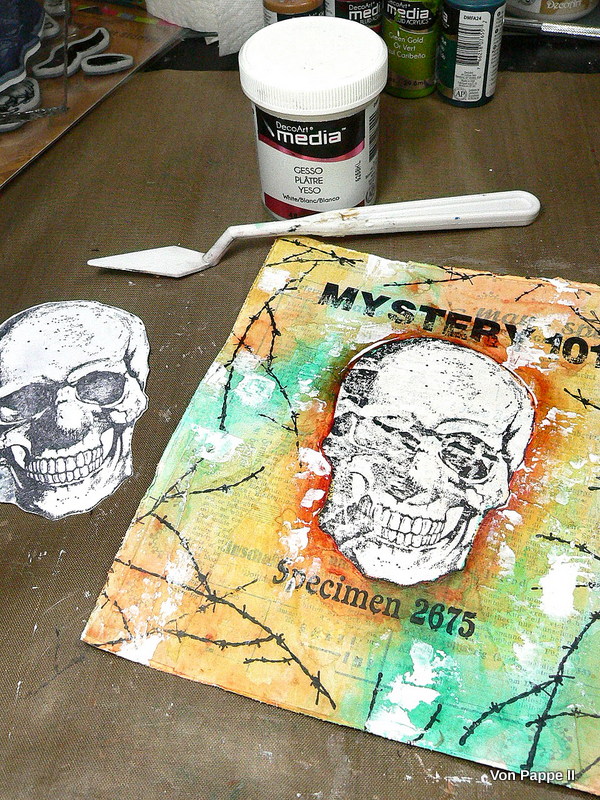
I stamped the clown skull image onto some heavy cardstock and cut out the skull shape with a precision knife so I could use both - the stencil and the mask. Then I placed my stencil onto the prepared substrate and thinly stippled on some white Gesso using one of DecoArt's Dual Sided Paint Pouncers


Next I stamped the skull image onto the dry shape using black archival stamping ink. As the surface was a bit uneven because of the glued and layered on paper scraps the image didn't come out too crisp - but I was expecting that and there is an easy way to fix that.
Of course I could have stamped the image onto a separate piece of paper and glued it on but I wanted to create a single layer piece this time and doing it this way it also fused the image with the textural background.


Then I stamped on the words and the barb wire and let everything dry thoroughly. 

I started adding washes of Transparent Yellow Iron Oxide, Quinacridone Gold and Phtalo Green-Blue. To make the skull pop from the background I painted a shading around it with Quin Gold. 


I placed the cut out skull mask on top of the stamped skull and scraped on some white Gesso as well as some Green Gold and Quinacridone Gold using a palette knife. I let the Gesso and each paint dry before I added the next one.


Then I toned down the skull with a light wash of Yellow Oxide.


The black areas that had gone missing because of stamping onto an uneven surface were painted back in with Carbon Black using a small soft brush. 


Then I started shading my skull image by adding Yellow Oxide to those areas that were in the shade. 


The light areas (that would be hit by the light of a punctual source like the sun) were highlighted with Titanium White as well as the teeth. 


This way the skull pops even more from the flat looking background. 

Time to paint the nose and shade it as well. 


The red hair was stamped on using True Red DecoArt Americana acrylic paint and the chin-beard stamp from Andy Skinner's Skuldoggery set. 


I covered the skull with the cut out mask again and added Red and Black sprinkles using the DecoArt media Misters. I also sprinkled on some white and turquoise Shimmer Mister paint. 


For a finish I stamped on a lot of scratch patterns with black archival stamping ink and mounted my finished painting to a piece of cut to size foam board using matte Decou-Page and four metal brads. 


I wrote the name onto the label and fixed the label holder to the foam board with two thin brads. 


I painted and doodled some structure in black to the red tufts of hair. 


This image shows how the layered on paper scraps create beautiful texture that shows through (see black areas):


And once more the finished piece:


Homo hahahbilis will probably remain a great mystery to the science world, but maybe there will be some more finds that will help reveal the secrets of this wondrous species. 


Hugs and happy crafting!
Claudia
xxx