Saturday 25 October 2014

Our Creative Corner Spotlight Sneak Peek

Servus and welcome!

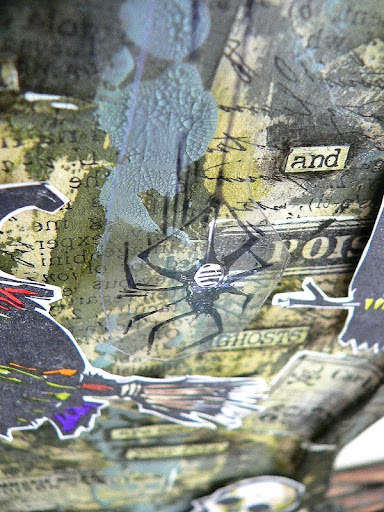
It is my turn today to invite you over to Our Creative Corner! I have prepared a crackin' tutorial with a lot of messy spookyness for you. If you are in the mood for a fun and messy Halloween project using Tim Holtz goodness and a lot of stuff to dip your fingers and brushes in, then hop over to Our Creative Corner to learn more about my project and this month's sponsor for the challenge!

Here's a little sneak peek to quicken your appetite ;)


See you over there!
Hugs and happy crafting,

Claudia xxx

http://ourcreativecorner6.blogspot.co.at/


Wednesday 22 October 2014

Von Pappe Wednesday 2 - Sneak Peek

Time for another "Von Pappe Wednesday" over at the That Craft Place Challenge blog!

If you want to know how to create something like this, you should hop over (by clicking HERE) and have a closer look (yes, that's right - you've spotted some mistletoe there ;) :


There's a fun challenge you could join in as well ;) So check it out! I hope you will like my tutorial!

Hugs and happy crafting,
Claudia x


Saturday 18 October 2014

Spooky Crackle Skull Tag

Servus and welcome to my first Halloween share of the year!


I fell in love with the new "Carved Halloween" stamp set from Tim Holtz the very first moment I saw it. And especially with the skull from that set as to me it is the most spooky skull stamp I own...well, maybe it depends on the colouring...


So I decided to have that skull image play the main role on a Halloween tag and go for a rather simple composition and lots of yummy texture (instead of overloading my tag by adding too much detail or embellishments). Sometimes the clean and simple...erm...the simple makes are the best.


I die cut a large #8 size tag from heavy black cardstock and gave it a coat of black acrylic paint. When that had dried I applied a layer of DecoArt Weathered Wood to it and left it until it was touch dry.

As I love to experiment with media of all kinds, I found that the wonderful DecoArt Americana Chalky Finish paints work over the Weathered Wood as well and create awesome crackled surfaces....with a chalky finish! Yay!


So I applied a coat of DecoArt Americana "heritage" chalky finish paint over the touch dry Weathered Wood and watched the crackle magic happen.


To darken the edges (which helps draw the focus towards the center of the tag) I applied some black DecoArt Texture Fierro with a palette knife:


After I had stamped my skull in black archival ink, coloured it using some Distress markers and cut it out, I found that I needed a panel to mount it onto. So I created a panel in rather the same way as I did the tag's background. But this time I used a mix of  DecoArt Americana "refreshing" Chalky Finish paint with some drops of DecoArt media "Green Gold" fluid acrylic to achieve the ghoulish green I had in mind...voila:


And it had to match the colours from my markers of course:


The edges of the green panel (which I die cut with one of the dies from the new Sizzix Tim Holtz Alterations "Labels" die set) received a treatment with Texture Fierro too - but I dabbed it onto the edges using my fingertip.


The cut out and coloured skull was then mounted to that panel with a sticky foam pad ....and that again was mounted to the tag with sticky foam pads too...to add some depth and dimension:


I had a neon green lace ribbon which I toned down using black soot Distress ink and water from a spray bottle. I fixed it to my tag with a stapler and covered the staples with an idea-ology skull:


At that point I was already very content with the outcome of my chalky finish crackle tag and the skull in its center. But I needed some more elements to finish it off. So I die cut another (thin) label to which I added the "spooky" word and fixed it to the bottom section of my tag alongside some ribbons.


You can see all the layers of my tag in this picture:


I really like how the metal bling of the Texture Fierro yet adds another aspect to the tag and contrasts the chalky finish of the paints used.


I hope you like my rather simple (but definitely NOT clean) tag! ;) I had a lot of fun stamping, colouring and experimenting with the media and creating layers and textures!


I hope you like my 


tag!

Happy Halloween!
And hugs and happy crafting of course!

Claudia 
xxx


http://decoart.com/cgi-bin/mivavm/Merchant2/merchant.mvc?Screen=SFNT&Store_Code=D


I have used some long hoarded items on this tag (the green lace ribbon, the stamp with which I created the quote, the idea-ology skull embellishment), so I dare enter it to Craft Hoarders Anonymous' "Happy Fall, Y'all" challenge.

I also enter it to the second challenge at Artist Trading Post Exchange - "Halloween",  to Simon Says Monday Challenge "O is for..." (which would be October in my case...my favourite time of the year - not just because of Halloween) and to "The Male Room" - "Halloween" challenge. 

And having been inspired by Tim's October tag (and his really fab "Carved Halloween" stamp set and new label dies) too, I also enter it to the 12 tags of 2014 October tags. 

Wednesday 1 October 2014

Go RUST-ic! The September Challenge at Our Creative Corner

Servus and welcome to my messy creative spot! I am so glad that you stop by my blog (again or maybe even for the first time...yay!) and take the time to visit!

Before I jump right in I want to thank you all so much for the lovely and heartwarming comments lately, for sharing my pride and joy on my first publication with the Somerset Apprenctice (on my blog and on facebook) and for all the encouragement you have been giving me so constantly! That really means a lot to me and it definitely helps a lot with getting over those days when I still find that I struggle a bit with finding my own inner center. Mwah! XXX

But now lets get on with business *lol:


Our Creative Corner and SanDee&amelie's Steampunk Challenges both present the starts of their new challenges today and the challenge over at Our Creative Corner is hosted by lovely Laura from Laurart this time!


And she decided for us all to


which is pretty much my thing. Yay! (Thank you, Laura! x)


Laura says: "I really love Autumn and find it very inspiring with all those textures and colours we see in nature right now.  So I decided to bring those textures and colours into a challenge here and see all that rustic creativity at Our Creative Corner!

 We want to see a huge variety of items, so make anything you like - but add some RUST!


Now you can take this Rust-ic creativity to any level you like - You can use just use some rusty autumnal colours or you can really go for it and work with gorgeous, rough textured, grungy, real or faux rust. 

So.....How 'rusty' are you?...."


 ***

My first idea was of course to use some of my rusty treasures, but none of them sparked any concept for a project. So I decided to go look for quotes about "rust" - and I found one that beautifully matches my idea of how to live a fulfilled life! It also is from a very famous English writer you all know...but honestly I would never have guessed who wrote it as it is so very modern. 


The team over at Our Creative Corner have once again risen to the challenge and provide you with a bundle of breathtaking inspiration! So I recommend you hop over to Our Creative Corner to see for yourself - but hopefully AFTER you have read the tutorial I have promised to share with you ;)


To create the arch panel diptych I used:

https://decoart.com/Merchant2/merchant.mvc?Session_ID=27547429bf03bd862299497e0537004f&Screen=CTGY&Store_Code=D&Category_Code=MM- DecoArt media Crackle Glaze
- DecoArt media fluid acrylics: 
Yellow xOxide, Raw Siena, English Red Oxide, xBurnt Umber
- DecoArt matte Decou-Page
- DecoArt media Antiquing Cream Patina xGreen
- old dictionary pages
- Distress marker "black soot"
- Sizzix "Framed Arch" die
- Sizzix Big Shot
- brush, water, a piece of cloth, baby xwipes, scissors
- a strip of rough ribbon
- heavy card for the base
- heavy paper for covering the backs
- black archival stamping ink
- rubber stamps to add some texture


1. Pour some matte Decou-Page into a small bowl and add two drops of Yellow Oxide media fluid acrylic plus some drops of water to create a diluted and tinted glue and sealant. 


2.  Tear two to three pages from an old dictionary to scraps and cover the card with them using the tinted Decou-Page.


Make sure you cover everything with the Decou-Page as this will later be needed as a sealant.


3. Create colour washes from Raw Siena, English Red Oxide and Burnt Umber fluid acrylics. Hold the covered card upright, load a soft fine tip brush with the washes and let them run down to create vertical traces.


Dab off any excess with a cloth if you don't like the result. As the Decou-Page works as a sealant, you can always wipe off any applied colour or stamped images while still wet. 

Allow the washes to make the edges of the glued on scraps more visible. 


Let dry naturally or speed up with a heat tool.


4. Cut two arches from your covered card.


5. Cut a piece of ribbon to size and use it as a hinge for the two panels. To do so glue the ribbon between the two fronts and two pieces of heavy/designer paper. Let dry and cut off the excess. 


 6. Print (or stamp) your quote onto some heavy printer paper and cut out the single words. 


Glue the word tiles to the panels using matte Decou-Page. Also apply a coat of the Decou-Page on top. 


7.  Shade in the word tiles using a black Distress marker: draw a thin outline and smudge it with your fingertip while the Decou-Page still is slightly wet. 


See the difference? 


 Smudge on some black soot Distress marker around the panels' edges as well. 


8. Mix some DecoArt media Crackle Glaze and two to four drops of English Red Oxide fluid acrylic and generously apply onto your panels with a soft brush. 


Wipe off some of the applied Crackle Glaze with a soft cloth:


Once the tinted Crackle Glaze has dried it will look like this:


 9. Rub in some Patina Green Antiquing Cream and wipe off the excess with a baby wipe. 


10. Add some stamping for more texture using black archival ink. 


You're done! :)


Thanks so much for stopping by! I hope you liked the tutorial and will join in the challenge at Our Creative Corner soon! See you there! 

Oh - and before I forget: our prize sponsor this month is The Funkie Junkie Boutique! So don't miss the chance to win! 


http://www.thefunkiejunkie.com/


 and for the


Hugs and happy crafting,

Claudia 
xxx