Sunday 13 November 2022

A Short Creative Update

 Hi, servus and thanks for stopping by! 
I hope you are all doing well and are looking forward to enjoying a lovely Advent season! 

I have been having a hard year to be honest - health-wise. Luckily the new home in our house near the lake and my garden are great sources for happiness, so gardening, hiking (or rather taking walks), riding my kayak and simply being out in nature have been helping with keeping me healthy on the mental side at least. 

I have also taken on a new hobby that is a perfect means to deal with inner restlessness - archery! My husband and I found we have an archery club nearby and it is located in a most beautiful corner there a ten minutes drive away. Spending time on the shooting range (or the 3D shooting course), trying to focus on the perfect motion sequence and the tension of your body and then letting go just feels so calming and it brings the shaking of my hands and mind to rest. 

I have also started to write again - poetry mainly. It also is something that calms the mind and it is a creative process too - I am painting with words in a kind of way. 

I haven't spent a lot of time in my studio this year - being ill for such a long time, crafting and being creative with stamps, paints, stencils and all the other mixed media goodness just wasn't what appealed to me and my restlessness and shaky hands weren't helpful either. 

BUT...I still have been creating projects for StencilGirl Products and PaperArtsy and is always quite a rewarding thing to do. I mostly do home decor pieces for the new home at the moment and being able to plan and make these in my own pace also makes it easier for me to not get panic attacks the moment I enter my studio. 

So to get to the core of his little update, I would like to present both new projects and the links to the according posts on the StencilGirl Talk blog and the PaperArtsy Blog: 

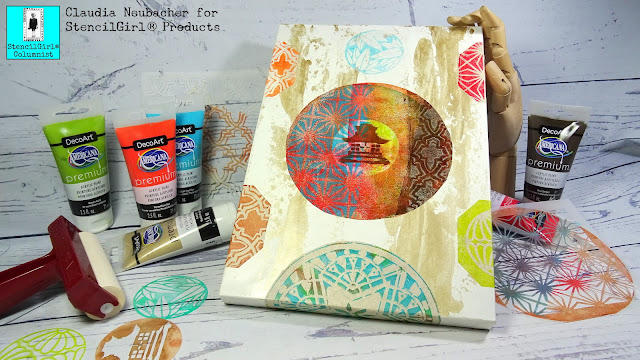
For StencilGirl I created a little canvas, collaged with stencilled tissue paper elements. I needed something to go on the wall near the fireplace that matched the colours of the metallic grey and the rocking chair grey as well as the wooden wall...


And I am really happy with how my "little village close to the mountain"-canvas turned out! 


A detailed step by step and all the stencils and products used can be found here: 


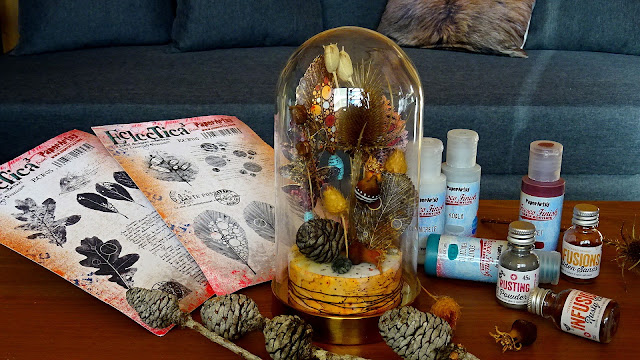
The other project that has just gone live on the PaperArtsy Blog is a cloche displaying an autumnal arrangement of stamped leaves, paper beads and dried seeds and twigs. 


That was a project I also enjoyed making as the lovely PaperArtsy stamp sets designed by Courtney Franich finally made it possible to use (faux) autumn leaves in a project without having these crumble away and lose colours after some time...

I also used their fabulous Rusting Powder and some Infusions. How? Find out by clicking here:

Paper, Seeds and Twigs - Autumnal Cloche


There's some cool techniques there to check out and of course a lot of steps and detail images as well. 

I hope to see you there! 


Stay healthy and enjoy the last days of this beautiful autumn! 

Claudia

xxx


Sunday 19 June 2022

A Leftovers-Mixed Media-Assemblage Piece for PaperArtsy

 Hi, servus and thanks so much for stopping by today! 

I am sharing another project I've done for PaperArtsy, using some of their lovely Fresco Finish Acrylic paints and products alongside some beautiful stamps designed by Lin Brown. "Leftovers" is the actual theme over at the PaperArtsy Blog and that was definitely a theme straight up my alley! 

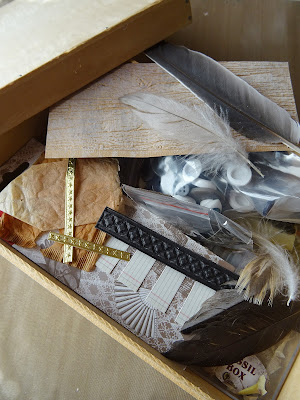
I actually hoard leftovers of all kinds in all kinds of boxes (preferably old beautiful cigar boxes), vintage or vintage looking drawers, wood, tin and ceramic bowls and cabinets of all sizes. Leftovers for me include paper scraps and other tiny left over bits from previous projects as well as found objects like nature finds or rusty bits and also items that I have because I needed a single piece for a previous project and could only buy them in packages of two or more pieces of the same kind. I even keep tiny scraps of trims and paper strips - who knows? Maybe these will come in handy some day with one or the other ATC or assemblage piece...I even have some small tin and wood bowls on my studio desk that display leftovers and found objects for an inspiring space to work in. 

As you know you can click on all the images for a larger, closer view. 


Speaking of assemblage pieces...I've done a new one for PaperArtsy and creating it was a process I thoroughly enjoyed - thanks to my inspiring collections and studio desk! The whole finished project can be checked out at their blog (HERE), but I am sharing some detail shots in this post. It's design was inspired by the leftovers that spoke most to me on that day. 

I guess you might already have seen this one being shared on social media: 


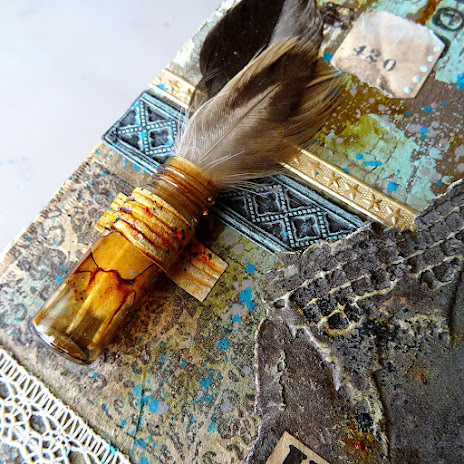
The texture was done using PaperArtsy Crackle Glaze and Fresco Finish paints and the paper trims I used were - yes, of course - leftovers. The blue-ish dry brushed one at the very bottom is a design that I really like and need to use more often I found. It's a paper strip done using the fabulous Tim Holtz Lattice Trim 3-D Impresslits. The thinner Star Trim on top is actually an old (slightly damaged) scrap of original gold Dresden Trim but you can also use Tim's Star Trim 3-D Impresslits to create one yourself if you're not able to get these ( I do have that Impresslits die as well as I love to be able to create my own Dresden Trim whenever I am in need of one and will have run out of the "real stuff"). 

In the picture below you can see the two trims "in action" on the finished project. Another star on my assemblage is the little glass vial that I altered using PaperArtsy Infusions. I wanted to get an aged look instead of having the boring white glass of the vial and found a cool way to create the beautiful drip lines and the tint (it is all explained in  detail in the PaperArtsy blog post along with the other stuff of course). 


You may also have noticed the highly textural piece to the right in all its aged and worn glory...if you want to find out what it is, how I did it and how it looks as a whole, simply click HERE to get taken to the PaperArtsy blog and post. 


I hope to see you over there soon!


Hugs and happy crafting!

Claudia

xxx

Tuesday 10 May 2022

Luminescent Specimen Cabinet - a PaperArtsy Project

 Servus, hi and how's everyone doing these days?! I hope you are all fine and enjoying Spring and (finally!) warmer temperatures! 

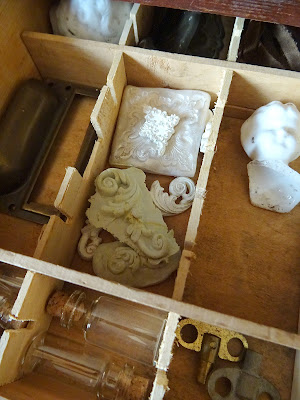
Over at the PaperArtsy Blog they have just started a new topic - "Specimen Jar". You can tell I loved that one right away! I immediately thought about all the specimen neatly aligned in the beautiful vintage glass cabinets in Vienna's Natural History Museum. I could look at these for hours and just feel happy and soothed (I guess not only because I love studying fossils, insects and other small specimen but also looking at something so intriguing to me being displayed in such a neat order and large numbers). 

My aim with this project was to capture the feel of a cabinet from the Victorian era and also re-create an effect from a display box from Salzburg's "House of Nature" where they show some fish of the deep sea that make their own light down there. You press a button and their lights turn on - how cool is that?! So, yes, you're guessing right - I also used some mini-lights with my cabinet (and that was great fun). 

Just a few pictures to lure you over to PaperArtsy's blog


Find out more about the how-to and products used and meet me there

Hugs and happy crafting!
Claudia
xxx


Friday 29 April 2022

A Stencilled Staircase Showcase - a StencilGirl® Project

Hi, servus and thanks for stopping by today! Over on StencilGirl Talk I am sharing my latest quarterly column and before I start with telling you a bit more about it, I feel I need to thank Mary C. Nasser for the "Stencilled Staircase Showcase" title  - I was struggling with coming up with a good title for my column and project and she helped me with that (this way we found out that we both just loooove alliterations ;). 


Our timber house's staircase needed some wall decoration I found - and my recent new "dental adventures" had meant a little set-back concerning my panic attacks and shaking hands issues - so I needed some creative me-time where I could practise some mindfulness during the creative process. 

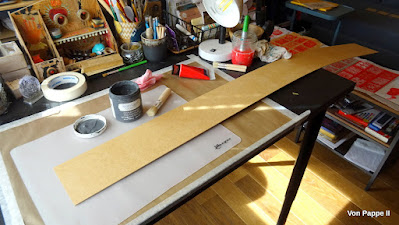
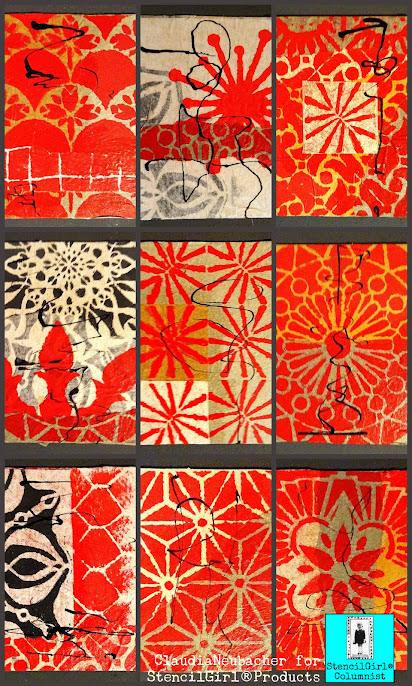
The main idea for the wall art piece originated from this strip of press board that I rescued from going to the waste disposal site (it was a protective "sheet" that came with a piece of furniture). It was a perfect fit for our staircase wall and its width to me seemed the perfect "frame" for a lovely collection of ATC sized collages with stencilled papers. 


I stencilled and stippled a lot and especially enjoyed the relaxing repetitive nature of the whole project - perfect for getting into the flow! To find out about the finished project, stencils used and how it looks on the wall of our staircase, simply click HERE to get to the blog post with steps images, some hints and more eye candy. 


Hope to see you over there!

Stay safe and creative!

Claudia

xxx


Monday 7 February 2022

A Little Handmade Gift, a (not so) Secret Watcher and an Invite

Hi, servus! So happy to see you pop by my little creative corner! 

I hope you are all well and safe! Austria still isn't back to normal concerning Cov-19 rules and restrictions (due to still not enough people being vaccinated) and this year winter isn't a very charming or romantic one (at least not around our corner) - it has been storming for actually weeks and temperatures are too warm for snow that would last. But I am still hoping for at least a few winter walks in the forest with my dog girlie and in the meantime we are mostly staying at home, making cosy fires in our new fire place and I am bit by bit approaching a new crafting routine that fits in with the new life with two homes (and two crafting spaces). 

My mother-in-law has celebrated her birthday with us this weekend and I had altered a splint box to give to her as a little handmade gift. I really love her a lot as she is a good friend and also mother to me and a really great grand-ma to my son! She is a true treasure! 


I used Tim's gorgeous "Bloom" Colorize Thinlits dies set and the BigZ XL "Vintage" Alphabet die for the Initials. 


I started with priming my splint box with a thin layer of DecoArt Raw Umber Student Acrylic paint and after that had dried I applied an uneven coat of DecoArt Americana Crackle Medium and let that dry too. 


In the meantime I die cut all my pieces from the Bloom dies set from white cardboard using my little Side Kick (one of my most beloved tools I've ever bought to be honest. When I bought it, I thought of it as a pure luxury gift to myself, but it has turned out to be my go-to die cutting machine for all my smaller dies). 


I didn't cut the parts for each layer from coloured papers (which is of course the most clever way to do it), as I had planned to paint all the twigs and blossoms intuitively (and maybe slightly differently), starting with the twigs and then picking each next colour from my DecoArt Americana and media fluid acrylics stash as I proceeded. That meant a lot of fiddly painting of course, but you know me - I love me some thorough meditative fiddling from time to time. ;)

I arranged all the tiny die cut pieces in an embossing funnel tray, so I could see at one glance which layer would go on which base piece. 


In the end I used mostly colours that matched the vintage feel I was aiming for. Only the initials and stamen got a layer of bright yellow. I also used mixes of colours already used - this way everything just fused nicely. 


The box lid still needed a matching crackle background for my blooms and twigs - so I picked DecoArt Chalky Finish Acrylic "vintage" and applied a very thin layer with a soft wide brush to the totally dry crackle medium. The crackling process started almost immediately and as I had applied the medium by using random brushstrokes that went in many different directions, the cracks did so too. 


While the crackling chalk paint was drying, I glued all the painted plant layers in place (using a small detail brush and matte DecoArt Decou-Page) and heat dried everything. Then I added a slightly diluted wash of DecoArt "Patina"Vintage Effect Wash on top to tone it all down a bit and fuse it with the vintage crackle background. 


I heat dried that again and then it was time to glue everything in place with more Decou-Page! 


As a final touch I added a thick layer of DecoArt Triple Thick to the rose bloom and the initials and let that dry over night. 


I had added some DecoArt clear Crackle Glaze to the painted Initials and highlighted the cracks with Raw Umber Antiquing Cream afterwards, before I glued these in place and added the Triple Thick. 


At that time it started to get dark outside and I took a look out of my window - only to discover a secret watcher in a tree in our neighbour's garden...


A pheasant had already prepared himself to go to sleep. The picture isn't sharp, but the colours are there! Isn't he beautiful? He sat there and watched the workers at the site nearby and seemed quite relaxed. I learned only a few years ago that pheasants sleep in trees (to be safe from foxes and martens)...and I think they look a bit funny too (as they seem to be too big to sit high up in trees on thin branches). 

The next morning the Triple Thick on the box had all cured and my splinter box was done! 


I was really pleased with how it had turned out! The design of Tim's Bloom and Alphabet die goes so well with the vintage colour theme, doesn't it? 

So before I wish you some happy crafting there is just one more thing to do: invite you over to the PaperArtsy blog, where I am sharing my first project as a new design team member (just in case you haven't seen it on social media yet). 


The actual theme over at PaperArtsy is "Pattern Play" and my teamies have all come up with some really cool projects and ideas on that one too! So hopping over and checking it all out is a really rewarding and inspiring thing to do! I hope to see you over there! 


Hugs and happy crafting!

Stay safe!

Claudia 

xxx

Friday 28 January 2022

Going wabi-sabi with StencilGirl Stencils

Hi, servus and thanks for stopping by today! 

It's time for another column over at StencilGirl Talk and this is a short invite to check it out (by simply clicking HERE for example...but there's a link at the end of this post here as well). 

In my column I am talking about the philosophy behind wabi-sabi and how we can become happier creatives through awareness. The inspiration for my project design came from the beautiful StencilGirl stencils and from typical colours of Japanese Kimono designs and woodcuts. 


A bit of gel plate printing was involved too - and I recycled some of the wrapping papers used when moving dishes from our Vienna flat to our Lake Atter house. 


So I hope I could lure you into popping by my column at the StencilGirl Talk blog. ;)


See you over there and

as always

hugs and happy crafting!


Claudia

xxx