Showing posts with label jewelry. Show all posts

Friday, 1 January 2016

A Mixed Media Necklace for Our Creative Corner

Servus and happy new year to you, my dear old, new and true readers! It is my special honour today to kick off 2016's challenge galore for Our Creative Corner!

I have learned my lesson with new years resolutions and have narrowed mine down to just one promise I am making to myself each Silvester: to be as gentle and kind with myself as possible (as dealing with a chronic illness often makes you feel that you just have to try harder, be less slack...and therefore less forgiving towards yourself - which most of the time leads to the exact opposite from what was intended: more frustration and more anger) and to make more time for pressure-free me-time....without any goals - except this one: to enjoy myself!

So OCC's January challenge asks you exactly that: to enjoy yourselves by creating within your comfort zones...maybe challenge yourselves a little too if that is something you enjoy...but no pressure, no given direction, no precise theme - just a lovely moodboard palette and image to spark your imagination:


http://ourcreativecorner6.blogspot.co.at/


If you hop over to Our Creative Corner you will find a wonderful bundle of very different inspirational pieces done by the Design Team! I love and adore them all!!! (and I will love and adore our players' pieces too! Of that I am sure ;)

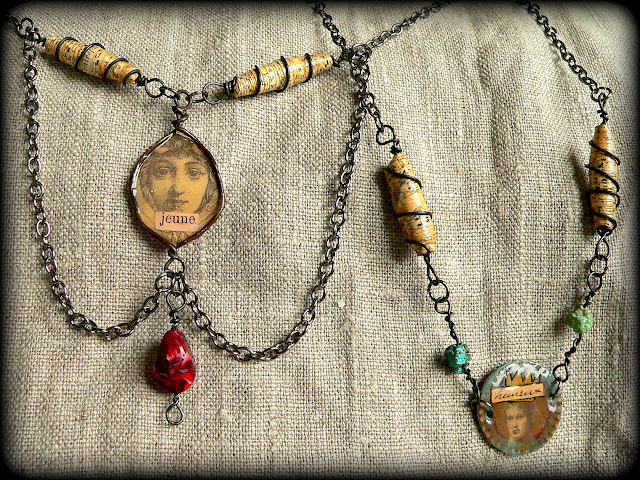
When looking at the colour palette and image I immediately thought of using metal and patina tones...something with circles...which led to jump rings...which led to the idea of creating a necklace from self made wire links, metal stamped pendants and found objects (as I discovered that hammering wire and bending it into shape is something very relaxing for me).

And here it is:


(Ignore the pastel blue pins - these were used to hold the necklace in place). Except from the little key and the idea-ology safety pin all parts of the necklace are handmade (of which I really am quite proud I have to admit as this is a result of my very first steps at metalsmithing and creating beautiful links from wire).


I especially love this wire link that is made from silver coated copper wire and darkened with black patina after some metal stamping.


 The "Live" pendant was made from a flat brass disc which I stamped and domed lightly. For the green patina touch I added a bit of turquoise gilding paste.

If you want to learn how to create the paper beads with wire you will find a full tutorial over HERE


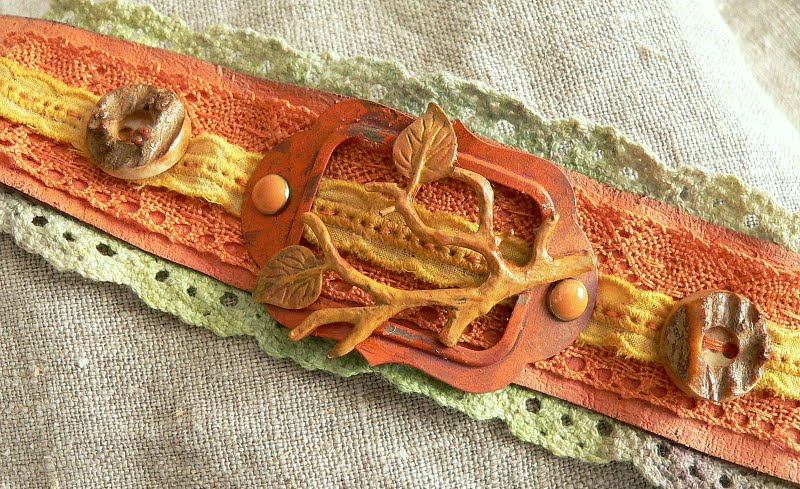
The box for my necklace was made from an emptied chocoloate box into which I inserted a cut to size corrugated card panel. It was covered with some Tim Holtz "Eclectic Elements" fabric that matches my necklace's design perfectly!

The outside of my box was covered with some "Madame Payraud" designer paper and inked around the edges with Ranger "Sepia" archival ink.


The challenge over at Our Creative Corner is open until January 28th. This month's prize sponsor is Creative Embellishments - so don't miss the chance to win a $25 voucher for their store!

http://creativeembellishments.com/


Hugs and happy crafting!
Claudia
xxx


http://ourcreativecorner6.blogspot.co.at/


Tuesday, 20 October 2015

Liquid Glass Pendants

Servus and hello to another short invite over to the DecoArt Mixed Media Blog, where I show you  how to create quick and still good looking jewellery pendants without having to use Resin!

http://decoart.com/mixedmediablog/

Do you need a special Christmas present and want to give away some selfmade jewellery - than you might like my new tutorial! (at least I hope you do ;)

Simply click HERE to get to the tutorial.

http://decoart.com/mixedmediablog/project/348


Hugs and happy (presents) crafting!
Claudia 
xxx


Sunday, 1 June 2014

"Flaming June" - an image impulse challenge at Our Creative Corner

Servus and welcome back to my creative spot!

You are just in time to learn about the new challenge for June at Our Creative Corner for this month which is hosted by lovely Julia this time.

"Flaming June"

She chose one of her favourite paintings from Romantic painter Lord Leighton as an impulse and wants all of us to use the rich orange tones from his painting as the main colours of our makes! To see the painting and to learn more about the details (so you can join in and get eligible for any prize wins or making Top3) hop over to Our Creative Corner!

So Julia says: "use bright orange tones as the main focus".....sounds easy at first, doesn't it? But I found that I really struggled with finding a theme where orange might fit as the main focus....funny thing is: I love orange (especially wearing orange clothes), but I found that I hardly ever use it with my projects...I had never noticed before honestly. 

It was a lucky incident that finally let me come up with something I really like: I had my new Vintaj patina kit out for play and used it to practice on some metal embellishments. And there was an orange lace ribbon lieing on my desk as well (I guess it fell off my box with ribbons when I was searching for some other fabric for a different project some days ago)....when I took both and held them against each other I found that they would make a lovely bracelet! I had always wanted to create one of these gorgeous cuff bracelets made from leather, lace and vintage embellishments!


So I grabbed some beige leather scrap and tried to tint it orange - using almost anything I had at hand: orange mists, orange fabric paint, orange spray paint and distress stains...and it worked (but don't ask me what it was that finally did the trick *lol - I assume the whole mixture)! Yay!


To have a contrasting colour - as is the blue sky in Lord Leighton's painting, which makes the orange of the dress pop even more - I died some white lace ribbon using Colour washes. Then I rummaged my various treasure boxes and drawers (especially the one with the old buttons from my grandma and the one with the metal embellishments I got from fabulous Retro Kraft Shop :


http://www.retrokraftshop.pl/en/


...and after I had coloured the lovely bronze metal branch and the label with the Vintaj patinas, I was ready to sew it all together. And as there is a plant in Lord Leighton's painting, I decided to use a plant (the metal branch) too ;)


It was a bit fiddly as you first have to punch all the holes for the sewing needle to go through the leather and then have to find them again while sewing ribbons to the leather strip from front and back...but the result was so rewarding (at least for me)!


I love how it looks on my wrist and honestly I would never have come up with a colour scheme like this if there hadn't been Julia's tricky challenge theme (so thank you, Julia! xx) ! I had so much fun dyeing all the ribbons and the leather I used and the Vintaj patinas worked great!


I love that I could use some of the buckhorn buttons from my grandmother's collection too and that they add so perfectly to the design! This way I can carry something that belonged to her with me and have her close.


I am sure that this won't be the last bracelet I did, as I had a ball creating it (and still have a lovely collection of old vintage treasures to be used up). I hope you like it too and can't wait to see what you will come up with for Julia's challenge!


We have a prize sponsor too this month and it is Tando Creative! So join in to get the chance to win some of their awesome goodies!


Hugs and happy crafting,

Claudia xx

Tuesday, 30 July 2013

"Collage!"...

...is what we want you to do for this fortnight's challenge over at TryItOnTuesday!

This means that - as always - our challenge is an "anything goes" as long as you show us a collage, which must also include some script somewhere ( ...and of course stick to the challenge rules in general ;)


I recently stumbled upon a lovely book about soldered jewelry and so I decided to take up soldering again. This is a technique I had learned over 20 years ago during my arts studies, but honestly never taken any further. But now was the time:
I created a collaged deco hanging with some of my favourite stamps, book pages and images: insects, script/words and plants!

I also wanted to use the awesome bookpages from an old herbarium, which were given to me by lovely ELLIE during a swap! (Thank you for this rare and wonderful treasure, my dear crafting friend!)
And they were just perfect for this project! I sooo love how they are displayed now.


I used 5x5 centimeter Memory glass plates, self adhesive copper foil tape and the soldering iron from dear hubby ;) - and I had a lot of fun!

In the following I will show you all six sides of the hanging ornament:


To create my six small collages, I used pages from the old herbarium, some script and animal stamps which I stamped onto beige card or scraps from the pages' borders and also some scraps from Tim Holtz papers which I stamped some images of insects on. Most of the scraps were cut to size, some of them were torn. All of them were blended with DI "vintage photo" around the edges. Then I glued them to place and put front and back images between two pieces of Memory glass. I covered the edges of the glass sheets with self adhesive copper foil tape and soldered around them afterwards.

Stamps used are from DeStempelwinkel, 7Gypsies and Artemio, stamping inks: archival black jet and sepia. 

Sssshh....my favourite collage is this one ;) :


Working on such small space is something I really like to do. But of course the collages you enter with the challenge can be of any kind and size you want ;)


I invite you now to hop over to Try It On Tuesday to see what my fabulous team mates created for your inspiration! Thank you for stopping by and I look forward to seeing your awesome collages soon entered with our challenge!!!!

I enter FSC's "Script/Books/Pages/Print" challenge with this make.(Thought I already had, but it seems I deleted this paragraph accidentally during editing :(

Hugs,

die amelie xx


Monday, 15 July 2013

"Captured Memories" at Our Creative Corner

Hello and welcome back to the mid month reminder of  


"Captured Memories" 
challenge!

This month the team from OurCreativeCorner want you to share with us how you capture your cherished memories. All types of art are welcome: cards, tags, canvases, mixed media, etc., but your project MUST INCLUDE A PHOTOGRAPH.

Some of you may already know my passion for using photographs of my ancestors with my projects and I also did this time. I created a necklace using two sheets of thin mica, some satin ribbon, metal findings, alcohol ink and a portrait showing two lovely boys.
One of them might well be my great-grandfather whom I was lucky to know when I was a kid. He died at the age of 93 and I still remember his very own study he used to take me to to listen to his old records or some classical music from the old multi-band radio. I loved the names of cities from all over the world on his world-receiver, the lovely and dark old furniture and paintings there and my great-grandfather sitting by my side - both of us listening to the music.

Some of you also may remember the altered tin I recently made for my very best friend. This is its content ;)


I put the torn image and a chit chat sticker between two layers of mica sheets and punched five holes for the brads. Then I gave the mica a treatment with alcohol ink "rust" and fixed the two hinges to the encased image using tiny brads. The gear was glued to the lower hinge using special crafting glue. Done.


I hope you like it! You have to hop over to our challenge blog to see what my talented team mates created for your inspiration!!!

Happy crafting and I look forward to seeing your entries soon,

die amelie - Claudia x

Wednesday, 19 December 2012

"buttons - part 2"

As I had promised earlier, I am going reveal the content of the altered tin-box with the "buttons" book plate today.


So... drums, please!....here it comes: a buttons bracelet for my sister!


I was working on it for quite a while, as a nasty facial neuritis and/or the medication against it have been slowing me down for almost the last two months, which made tiny crafting and reading (and also commenting - sorry for that, folks!) quite exhausting for me. And it also took numerous attempts to fix the buttons to the bracelet as shown in the "Distressables 2" book by Tim Holtz.

There the buttons were fixed with thin wire, but I wasn't content with the curled up ends of the wire, as they always would stand out (at least a little) no matter how tight I curled the wire and I was afraid they might pull strings from one's clothing or scratch the skin. So after a few failures I decided to sew the buttons to the bracelet rather than use wire.

So I had to sew at least twenty-five buttons to the small rings of the bracelet. (Did I already mention how much I love sewing buttons?).


 But first I had to glue the transparent buttons onto some scraps of design paper, using transparently drying glue. Then they had to be cut out and coloured on the backsides (which I did with Distress stains "brushed pewter" to match the silvery look of the bracelet). I also sealed that with one layer of glossy Mod Podge to make it a bit more "waterproof".


For the inside of the tin box I wanted to have a "mould" that would hold the bracelet in place. Therefore I glued a small oval piece of thick corrugated card to a larger oval piece that fitted the size of the tin box and covered it with the lovely 7 Gypsies "Paris" collage tissue paper. Some more crumpled up tissue paper to cover the bracelet against the lid of the box - done!

(Hope, my sister will like her present!)


I am entering Simon Says Stamp and Show's "gift-spiration" challenge with this project.