Showing posts with label Sizzix. Show all posts

Friday, 20 January 2023

Self Made Winter Decoration with Tim Holtz dies and Quarterly StencilGirl Column Invite

Servus, dear creative friends!

I hope you've all had a good start into the new year! 
Today I am sharing a little self made winter decoration and I am also inviting you over to the StencilGirl Talk blog, where I am sharing my quarterly project and post as a columnist. The picture below shows the stencilled map papers I have made and used for this project (just to lure you into clicking the link at the end of this post to learn more about the how and what I did). 


The three months before Christmas have been meaning a lot of struggle for me in these last years - mainly caused by hormonal imbalance and menopause issues not going together well with my thyroid illness. But this year I've made progress at how to deal with that and I have managed not only to do a little seasonal crafting but also bake three sorts of Christmas cookies (which is three sorts more than in the last years actually ;) - despite trembling hands and panic attacks.

Even though I am not crafting a lot these days I still fall in love with a lot of Tim's 
dies and feel I am spoiling myself by buying them. ;) Especially the two Paper Village dies sets were a must-have for me (honestly - who does not love tiny houses?).

I have also been hoarding some wood chunks that came with the firewood for our fireplace and that I had other ideas for than burning them, as they had a special shape that reminded me of little hills. There were also some wood discs in my stash that I wanted to use as bases for two or three small advent home decoration pieces. 

In the end I decided to keep it quite simple and let the raw substrates do their own magic and just add a little snow and a red dimensional star (the smallest from Tim's "Dimensional Stars" dies set) and a small faux fir branch (bought at a dollar store) to the scenery. 


I did some more of these to give away as little presents. They were all done the same way: 

I die cut the parts of the houses from heavy Kraft cardstock (varying window shapes and positioning, as the dies sets offer this possibility), assembled them using tacky glue and glued them in place using the tacky glue quite generously around the houses' edges. I later covered any traces of dried glue with Opaque Distress Grit Paste and also added more of that to the roofs and bases to create the look of snow. To add even more texture to the paste I mixed in a bit of bird sand. 


The tiny houses on the wood discs also got a little red star to accompany them. I used two die cut star shapes to create one dimensional star and then just put the assembled star into the still wet grit paste. As the wood discs were flat I did the same with the assembled houses, so no additional glue was needed here. 


To fix the fir branches to their spots I first drilled a hole (using a hand drill) to insert the cut to size branches into, filling the hole with tacky glue. I also added more grip paste around these little "trees" as an additional support. 

I really like how the wood, the Kraft cardstock and the texture of the Grit Paste snow go together with the bark of the discs and the wood chunk! And the hints of green and red make for pretty highlights that add that bit of Christmas feel. 

Now I wonder how a summer-y version could look like.... ;) 
 
And here's the promised link to the StencilGirl Talk blog
Hope to see you over there too. 

Hugs and happy crafting!
Claudia 

xxx


Monday, 7 February 2022

A Little Handmade Gift, a (not so) Secret Watcher and an Invite

Hi, servus! So happy to see you pop by my little creative corner! 

I hope you are all well and safe! Austria still isn't back to normal concerning Cov-19 rules and restrictions (due to still not enough people being vaccinated) and this year winter isn't a very charming or romantic one (at least not around our corner) - it has been storming for actually weeks and temperatures are too warm for snow that would last. But I am still hoping for at least a few winter walks in the forest with my dog girlie and in the meantime we are mostly staying at home, making cosy fires in our new fire place and I am bit by bit approaching a new crafting routine that fits in with the new life with two homes (and two crafting spaces). 

My mother-in-law has celebrated her birthday with us this weekend and I had altered a splint box to give to her as a little handmade gift. I really love her a lot as she is a good friend and also mother to me and a really great grand-ma to my son! She is a true treasure! 


I used Tim's gorgeous "Bloom" Colorize Thinlits dies set and the BigZ XL "Vintage" Alphabet die for the Initials. 


I started with priming my splint box with a thin layer of DecoArt Raw Umber Student Acrylic paint and after that had dried I applied an uneven coat of DecoArt Americana Crackle Medium and let that dry too. 


In the meantime I die cut all my pieces from the Bloom dies set from white cardboard using my little Side Kick (one of my most beloved tools I've ever bought to be honest. When I bought it, I thought of it as a pure luxury gift to myself, but it has turned out to be my go-to die cutting machine for all my smaller dies). 


I didn't cut the parts for each layer from coloured papers (which is of course the most clever way to do it), as I had planned to paint all the twigs and blossoms intuitively (and maybe slightly differently), starting with the twigs and then picking each next colour from my DecoArt Americana and media fluid acrylics stash as I proceeded. That meant a lot of fiddly painting of course, but you know me - I love me some thorough meditative fiddling from time to time. ;)

I arranged all the tiny die cut pieces in an embossing funnel tray, so I could see at one glance which layer would go on which base piece. 


In the end I used mostly colours that matched the vintage feel I was aiming for. Only the initials and stamen got a layer of bright yellow. I also used mixes of colours already used - this way everything just fused nicely. 


The box lid still needed a matching crackle background for my blooms and twigs - so I picked DecoArt Chalky Finish Acrylic "vintage" and applied a very thin layer with a soft wide brush to the totally dry crackle medium. The crackling process started almost immediately and as I had applied the medium by using random brushstrokes that went in many different directions, the cracks did so too. 


While the crackling chalk paint was drying, I glued all the painted plant layers in place (using a small detail brush and matte DecoArt Decou-Page) and heat dried everything. Then I added a slightly diluted wash of DecoArt "Patina"Vintage Effect Wash on top to tone it all down a bit and fuse it with the vintage crackle background. 


I heat dried that again and then it was time to glue everything in place with more Decou-Page! 


As a final touch I added a thick layer of DecoArt Triple Thick to the rose bloom and the initials and let that dry over night. 


I had added some DecoArt clear Crackle Glaze to the painted Initials and highlighted the cracks with Raw Umber Antiquing Cream afterwards, before I glued these in place and added the Triple Thick. 


At that time it started to get dark outside and I took a look out of my window - only to discover a secret watcher in a tree in our neighbour's garden...


A pheasant had already prepared himself to go to sleep. The picture isn't sharp, but the colours are there! Isn't he beautiful? He sat there and watched the workers at the site nearby and seemed quite relaxed. I learned only a few years ago that pheasants sleep in trees (to be safe from foxes and martens)...and I think they look a bit funny too (as they seem to be too big to sit high up in trees on thin branches). 

The next morning the Triple Thick on the box had all cured and my splinter box was done! 


I was really pleased with how it had turned out! The design of Tim's Bloom and Alphabet die goes so well with the vintage colour theme, doesn't it? 

So before I wish you some happy crafting there is just one more thing to do: invite you over to the PaperArtsy blog, where I am sharing my first project as a new design team member (just in case you haven't seen it on social media yet). 


The actual theme over at PaperArtsy is "Pattern Play" and my teamies have all come up with some really cool projects and ideas on that one too! So hopping over and checking it all out is a really rewarding and inspiring thing to do! I hope to see you over there! 


Hugs and happy crafting!

Stay safe!

Claudia 

xxx

Friday, 10 September 2021

Faded Splendour - Fall Trio

 Hi, servus and thanks for stopping by! 


It's been such a long time that I have been taking a break from crafting and I am just slowly getting back into the saddle - with two studios in which there is always one or the other medium, stamp, cutting die or paper pad missing because it is in the other place...but I found that this forces me to improvise more and also use stuff I have been hoarding on forgotten shelves for ages - so it is a bit challenging but also a good thing ;)

I also found I am enjoying the freedom to pick and use whichever media and products I want to use with a single project (instead of having and/or trying to do an single-manufacturer-design-team-project). 

So here it is - a little trio inspired by autumn which is already in the air these days and which is still my favourite time of the year (even though it also is the most challenging when it comes to health issues I've learned). 


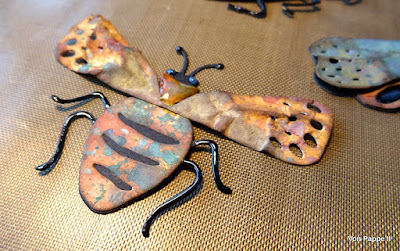
I have already shared this project on the Calico Craft Parts blog (where you can find the list of craft parts I have used alongside the Sizzix "Funky Insects" dies set from Tim Holtz) - simply click HERE to get to their blog to find out about the many cool substrates and add-ons from Calico Craft Parts' wide range of MDF parts. There are also some infos on and pictures of the finished project that I am not sharing in this post...

I really LOVE the Funky Insects dies (which is no surprise as I really LOVE insects in general ;)! 
I want my displayed insects understood as "found beauties" that were already dead and lying on the ground, having been found during a walk in a lovely late autumnal forest (instead of insects having been hunted down and put to death to display them in all their shiny glory). Their wings may be crinkled and the colours already fading a bit, but there is this special beauty in decay and the fact that the splendour is still there and visible is maybe the best proof of their timeless beauty...


I had a pack of self made small background papers - all done using Tim's Distress and Distress Oxide Inks


...and I used some of these to die cut the insects' parts from. I used Tim's Sidekick and fixed it to my Travel Glass Media Mat - two of my favourite products  (I found a "lefty" glass mat on a sale and use it upside down to have the white area to the right) to work with. 


I crumpled the wings and then highlighted the crinkles with gathered twigs Distress Ink. I also used one of the small Detail Blending Tools to blend the edges of all the tiny die cut pieces. 


Using my large Sizzix Big Shot I die cut three of Tim's Décor Frames and primed these with DecoArt Raw Umber Student Acrylic paint. Once that had dried I scraped on some white DecoArt media Crackle Paint here and there and let that dry naturally. 


In the meantime I added DecoArt Triple Thick (using a detail brush) to the insects' legs, eyes and feelers for more dimension and a bit of gloss. 


Once the crackle paint had dried I smudged some walnut stain Distress Crayon with my fingertip across the crackled areas to tone down the bright white and highlight the cracks. 


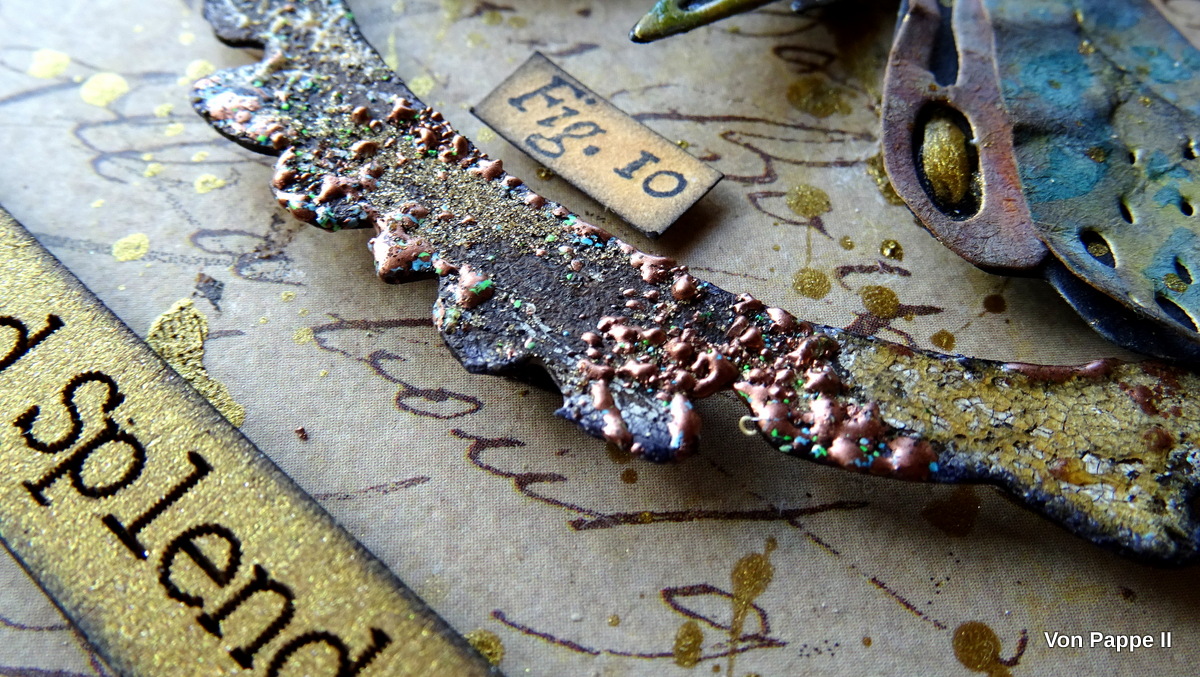
I also added some antique linen Distress Glaze on top and Fran-tage Aged Copper embossing enamel in some of the untreated spots on the frames. 


For a bit of bling I sprinkled diluted DecoArt Vintage Brass Extreme Sheen acrylic paint on the finished and glued together insects, using a splatter brush


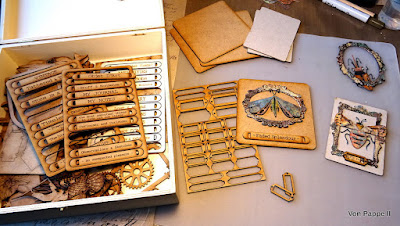
Time to pick some MDF panels from my Calico Craft Parts stash! I decided to go for a slightly different centre piece - so I used a beer mat and two ATC blanks


I also used two label holders and the Faded Splendour Word Element
The ATC blanks and the beer mat got covered with DecoArt Découpage paper using DecoArt matte Decou-Page.


Then the edges were blended using dark brown archival stamping ink, before I fixed the frames, label holders and insects into place using thick black sticky foam pads for additional depth.   


I also like to use the sticky foam pads' excess and cut that to size - that is especially helpful when you don't need a circle shaped pad but a thin square one...


The little signs with the Fig. numbers were stamped in black archival ink using Tim's Classics #12 stamp set and then toned down using Antique Linen Distress Stain


Voilá!
The finished trio.


I hope you feel inspired and like it as much as I do! 

Hugs and happy crafting!
Claudia
xxx


Sunday, 1 November 2020

Snarky Cat's Dapper X-mas - for SanDee&amelie's Steampunk Winter Special Challenge 2020

 Hi, servus and thanks so much for stopping by! 

I am sharing my make (and tutorial) for our annual two-months-long Winter Special Steampunk Challenge over at SanDee&amelie's Steampunk Challenges and as you can see I am already in Xmas swing. 

I recently bought a cheap Christmas themed dome kit and decided to customise it by using one of the absolutely adorable and fun cat stamps from the Tim Holtz "Snarky Cat" stamp sets (in this case I've used one of the cats from the "Snarky Cat Halloween" set). 

And of course I wanted to have lights - so I used one of Tim's Tiny Lights as well! 


Snarky Cat had to dress up for the festivities on Christmas Eve (as is the custom in my family...well, not for the pets actually, but for the human family members of course) - so I decided to give it a dapper hat and bow tie (from the Tim Holtz "Distinguished" stamp set)! 


You can tell from his look that he obviously doesn't like wearing a hat and a tie, but there is a little present for him under the tree - so it is worth the little suffering, right? Or maybe he is already planning on some climbing the tree with its temptingly dangling baubles and the shiny star at the top and doing what most cats love (or would love) to do at Christmas ;) 


Our Winter Special Challenge at SASPC will ("Same procedure as every year, James!")  be open from 1st November until 31st December and instead of the usual three entries each player is allowed up to five this time. Two more chances to win one of our two prizes!!!! And if you need some inspiration, there is a link to the challenge blog at the end of this post, so you can hop over and check out my teamies' fabulous makes too! 

I've created my Christmas tree using an older Tim Holtz Bigz die - the "Evergreen" one (which is still my favourite tree die to be honest). As a base I die cut one tree shape from thick grey board. That was going to be mounted to the dome's base by cutting a wood slice (found at the home decor section of a Dollar Euro store) in two and gluing the finished tree between these two. 


Then I cut two more tree shapes from a piece of white card stock that I had first coloured using Distress Inks, Distress Oxide Inks and Distress Oxide Sprays and Tim's technique of creating this kind of beautifully splattered backgrounds with loads of lovely depth. (Make sure you die cut one of the two tree shapes with white side face down and the other with the coloured side face down so you get two different tree shapes for the front and back sides!)


I added a bit of Distress Glaze on top to preserve the colours and speckles and to intensify them. 


Finally I glued the coloured trees to both sides of the grey board tree using Tacky Glue. 


Next I die cut my dimensional star for the tree top using my beloved Sidekick and the smallest die from Tim's "Dimensional Stars" Thinlits dies set


I then folded the little star into shape and glued it to a piece of left over white card stock. Only AFTER I had painted the star with DecoArt Extreme Sheen "Vintage Brass" acrylic paint, I cut off the excess! This way the small star was easier to hold while being painted and my fingers stayed clean. 


Snarky Cat was stamped onto white card stock using black archival stamping ink and then I used my coloured pencils to colour him (as I find it easier for me to use these instead of Distress Inks and a watercolour brush). 


I also coloured the bow tie and dapper hat and then fussy cut all my shapes. Snarky Cat also got his tail chopped cut off - which explains the look on his face I guess. 


But he got to keep it of course - I just needed it to stick out at a different angle. 

So far, so good. 


Time to prepare the decoration for the tree! I used more white card stock, Tim's "Deck the Halls" Colorize dies set, his "Festive Things" dies set, Distress Oxide Inks and the ink blending tool on my media glass mat


I also added a generous amount of DecoArt media Liquid Glass on top of the baubles (to give these a dimensional and glossy look) and put everything to the side (on the central heating to be more precise) to dry naturally while I went on with decorating the dome kit base. The inner platform got a coat of DecoArt Americana Arbor Green acrylic paint, while the edge was painted using DecoArt Extreme Sheen "Vintage Brass"


I die cut some cogs in different sizes and shapes from white card board, painted these with more Vintage Brass (on both sides) and glued three of them to the back and one as a front piece around the base. 


I also added a self adhesive gold foil trim around the base that was die cut using Tim's 
"Star Trim" 3-D Impresslits folder. 


To create a stand for the Christmas tree, I sawed the wood slice in two (but first I made sure the tree would still fit into the dome when being put between the two pieces) - the smaller wood slice piece pointing towards the back. Next I used my rotary tool to drill two holes - one into the smaller wood slice piece and another through the base (at the exact same spot where the wood slice hole was going to be). 


I also engraved a notch into the bottom of the base - leading from the drilled hole to edge right at the centre of the three glued on gears at the back of the base. I made sure it was wide enough to hold the thicker part of the Tiny Lights' cable. 


Then I glued the wood slice pieces with the tree pinched between them (and more glue) in place and after that had dried I inserted the string of Tiny Lights. 


I used my small hot glue gun to glue the thicker part of the cable into the notch and to fix the Tiny Lights chain to the wood slice in some places. As it got wrapped tightly around the tree it stayed in place pretty well and I only needed two glue spots to fix the lights chain to the wood slice base and one at the tree's back. Snarky Cat, his present and the stamped quote got glued in place using little pieces of MDF left overs at the backs as little stands. 


Before I filled the dome with "snow" (from the kit) and glued it in place permanently, I checked the lights of course. Then I added glue around the dome's edge and put the base with the tree face down in place (otherwise the snow would fall out from the dome) and let that dry. 


Finally I added four pieces of self adhesive felt floor protectors to the base. 


Done! 


Our steampunk/industrial style challenge is open until the end of December - the team and I hope to see you play along with us! Simply click HERE to get to the challenge blog with the actual challenge post. 


Stay safe, enjoy the advent season, merry Christmas and a happy new year! 

Claudia
xxx