Friday 26 April 2019

The Spectacular StencilGirl® Squared Off Swap Hop


Hello and welcome! You have arrived at one of the blogs participating in the fabulous and exciting StencilGirl® Creative Team’s SpectacularSquared-Off Swap Hop.


You have arrived at my - Claudia's - blog now. 

Lovely Carol who coordinates the StencilGirl® design team, organised a swap of paper squares the design team made using StencilGirl® stencils (of course) and the challenge was to create something from the papers each of us got back in exchange for the four papers given into the pot.
The results of this swap are being shared today via our "Spectacular StencilGirl® Blog Hop" and I hope that at least some of the fun we all had becomes visible to you too.

I got four paper squares from lovely Trena Brannon, Jill McDowell, Debi Adams and Sunila and Aditi Maheijan and getting a mix of very lively and colourful papers meant a real challenge for me - but hey - you know me - if there is a challenge I will always try to rise up to it and give my very best. ;)
And that "very best" looks like this:


I call it "The Happy Home" and it can be used as a paper weight or simply put on display as a home decoration piece to look at (to make you feel happy of course).

A happy home to me is a home that is surrounded by lovely trees that have birds sitting in them, singing lovely songs. It is a place you love to come home to and that already makes you happy when you see it from the outside.

The effect that I created reminds me a bit of trees that have become "victims" of some happy "guerilla knitters". Guerilla knitting is also known as "yarn bombing", "kniffiti" (as it is street art much like graffiti) or "urban knitting".


It always makes me happy when I see park benches, trees or sometimes also scaffolds right in Vienna's grey and noisy city being turned into colourful objects. Sadly I myself am not good enough and way too slow a knitter to do this - but it always puts a smile on my face when I see kniffiti in my hometown. But at least I now have my own (tiny) kniffiti decorated trees at home on my desk...


The papers I got from my lovely team mates looked like this:


Loads of different patterns and colours! Perfect for creating a "stencilled kniffiti" effect. ;)

I always have some wooden houses (for altering) in my stash (I always buy any I find in sales sections of home decor stores) and I started with priming my house with two thorough coats of DecoArt Americana Chalky Finish paint "lace".


Then I cut the papers into strips and rectangles of various sizes...


...and collaged these to all the sides of the little house using matte DecoArt Decou-Page.


The result was very colourful and to cover most of it up by adding white Gesso on top really needed a lot of bravery to be honest ;)


I used the beautiful "Leafy Trees Arch" mask designed by Valerie Sjodin and two coats of DecoArt media white Gesso that I applied with a cosmetic sponge.


A single tree on the back and two trees (to put a door between them) on the front.


I also applied more white Gesso around all the house's edges.


Then it was time to add a little quote and a bird. I used a PITT Artist Pen to draw the bird on the branch and a black Stabilo aquarellable pencil to shade in the word tiles. 


A small door shape (from Calico Craft Parts) was covered with a scrap of the papers I got and glued in place. Done!


The papers I had sent over to Carol for the swap were some of these (honestly I don't remember exactly which ones I picked at the end). But I am already veeeery curious to find out who got them and what my teamies did with them....
I have also included some pictures of my happy messy Gelli Plate session. There's a list of the stencils shown and used at the bottom of my post.


StencilGirl® stencils I have used:

Oval Shapes from the "Playtime" Collection
Dune Grass Mask
Fallen Leaves
Deconstructed Zinnia Mask
Curves
Ski Lift Works
Wall of Words

And now it is time for you to hop on, get inspired and have a lot of fun! 
(and maybe even become a prize winner...)


The more blogs you comment on the more chances you have a chance to win one of four $25 gift certificates for stencils from StencilGirl® Products. Comment by May 3, 2019. Winner notified by email May 6th.


Claudia Neubacher (you are now here)


Hugs and happy hopping (and crafting of course)!
Claudia
xxx


Saturday 6 April 2019

Steampunk Traveller's Journal - a Calico Craft Parts Project

A bit late this week I am sharing a make that already went live on the Calico Craft Parts Blog on Monday. But as I had to spend the last week in hospital (with a critical crises of sudden high blood pressure) I am behind with everything and am now trying to catch up with everything.

But the post is still there and the tutorial is too...so I would like to invite you to hop over to the Calico Craft Parts Blog to check out a cool steampunk journal I did using mainly steampunk themed Calico Craft Parts (...and, believe me, there is a wide, wide range of fantastic steampunk craft parts to choose from in their store!) and Eileen Hull's "Passport" book die.


The full tutorial that takes you through the process is over at the Calico blog, alongside with many more pictures and close ups of details. I hope to see you over there!


Hugs and happy crafting!
Claudia
xxx


Monday 1 April 2019

Mini Tag Album for SanDee&amelie's Steampunk Challenges

Servus and welcome to the start of our April challenge over at SanDee&amelie's Steampunk Challenges!

As always the theme is "Anything Goes - Steampunk/Industrial", so our players, the design team and I were (and always are) free to create what they enjoy most (as long as the steampunk/industrial theme is still part of the creation of course).

I unearthed an old dies set recently (I guess it was a Spellbinders dies set), when tidying my studio and immediately knew what I wanted to create with it! A mini tag notebook in steampunk style of course! You know me - I love mini!


Well...so now that you have seen the mini notebook from any possible angle, it's time to also show HOW tiny it is...


Isn't it amazing that you can always put so much mixed media on such a small format? I love it! 

Of course I have taken steps images, so I can share the process with you. 

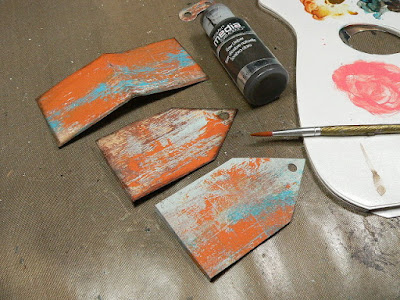
I first die cut all the pieces for the album's cover and signature cover. I cut each piece twice from left over painted paper scraps (from this project over HERE). I had used these to clean the brushes from any excess paint and to create paper-on-paper mono prints to work on (a technique I learned from wonderful Seth Apter!). Now they were the perfect size for my mini tag album and I just love the texture of the brush strokes and all the beautiful layers of paint!


I cut all the needed covers, the closure and signature covers twice as the painted papers were white at the back - so I had to glue two pieces together to get covers that were painted on both sides. I used matte DecoArt Decou-Page for this step.


Then I used DecoArt media fluid acrylic paint "Raw Umber" and a fine detail brush to paint a brown soft edge around all the covers' edges. I first applied clean water around the edges and then applied the paint - this way the water dragged the paint and created a softly blended dark edge.


On the cover's outside I had applied some white DecoArt media Crackle Paint with a palette knife here and there and let that dry naturally. Afterwards I added a mix of DecoArt media Antiquing Creams Raw Umber and Carbon Black on top and only wiped that back a little bit to age it and town down the colours.


A wash of DecoArt media Yellow Oxide was used to tone down the white of the Crackle Paint.


Then I painted the fabulous "Mechanical Hardware" chipboard pieces from our challenge prize sponsor "boozybear". I used DecoArt Matte Metallics "Aged Bronze", DecoArt Dazzling Metallics "Teal" and DecoArt Extreme Sheen "Bronze" on the pieces and toned these down with the Antiquing Cream mix as well.


The left overs from the Extreme Sheen paint on my palette were sprinkled on the cover using a soft fully loaded brush and tapping it with my finger.


 I also used the Dazzling Metallics and Matte Metallics to paint a label holder, some washers and screw heads from a Calico Craft Parts Mini Hardware Wood Shapes Sheet.


Using matte Decou-Page I assembled my mini tag album cover. I also added some DecoArt media Liquid Glass to the small label holder (also a Calico Craft Parts wood shape). Then I set the cover aside to let everything dry naturally.


Once all had dried, I poked the holes for the binding and threaded brown waxed cotton thread through the holes from the outside and simply tied the ends into a knot on the inside. I had also die cut some notebook pages for the signature from beige marbled paper.


Voilá!


I hope you like my tiny tag album! And I also hope to see you play along with us over at SanDee&amelie's Steampunk Challenges too this month! ;)

Hugs and happy crafting!
Claudia
xxx