Showing posts with label Spellbinders. Show all posts

Thursday, 16 May 2019

More Forest Magic in a Shrine - a DecoArt Mixed Media Blog Project

Oh, well....this post was originally just meant as a short invitation over to the DecoArt Mixed Media Blog, where I am sharing my latest project today, but I got stuck somehow right at the beginning and that has then become a longer blurb about some thoughts and feelings that came up while trying to do this write up and coming up with a fun and inviting message to lure you over (obviously "fun and inviting" wasn't really my thing today...lol).

 You do not need to read that at all and I am definitely not offended (as I won't know anyway) if you decide to just click HERE to get taken to the DecoArt Mixed Media Blog post and tutorial. ;)
I just wanted to share what crossed my mind today and what it is that sometimes makes writing up invitational posts or even designing as a design team member a bit tricky for me. And maybe I am not the only one who feels like this at times...It's the the part written in italic letters at the bottom of this post. ;)

So some detail shots will do the job maybe even better than a witty write up...?


You know me...the forest is one of my most favourite themes and source of inspiration and in this project I tried to capture what I love most about the forest: kind of woven visual layers of interesting shapes, amazing textures like bark, lichen on trees, thicket, soil and rotten leaves, ferns, mushrooms and all the other little wonders you can find if you just look closely...

To make this shrine project yours (instead of just a copy) you should of course use your favourite theme, cutting dies and embossing folders. But there's another reason why you should do that: because I am sure that if you combine a theme you love with the designs and colours you love, this will already create magic almost all by itself. Magic right from your heart. ;)

I hope you will like my finished project and tutorial and I would also love to see your "love shrines"!

Hugs and happy crafting!
Claudia
xxx


PS: still not sure what it was that made me fumble with this write up for over two hours...maybe some aftermath from my stay at the hospital and the stressful last weeks. ;)


It's funny...when starting the write up for this post I felt I needed to apologise for sharing once more a forest themed project, but then I also felt this wasn't something I should need to apologise for, right? 

Not just because even though it is a repetitive theme it still is a new and also different project, but also because one should not need to apologise for having a favourite theme that can be interpreted and re-created in countless variations and ways. But still I obviously feel that little fear of maybe boring you with all my "forest love"...

I guess it is my fear of someone just reading the blog post title and thinking "oh, dear...she did it again...just more of the same...how boring!!!" And maybe this fear relates to our quite competitive ('cos most of the time business related) crafting community's need for always sharing something new that surprises or even sets a new trend all (or most) of us want to follow...

And obviously I am infected with this way of thinking too...which is quite strange, because I - as an arts teacher - know pretty well that there are a lot of well known artists in art history that focused on a single theme and/or technique - and therefore became real masters in doing it...and none of their work is boring at all or feels like boring repetition...on the contrary: it is their mastery we enjoy and appreciate. 

Not that I see myself any close to a master, lol. 
But I find I keep returning to a few themes over and over again - because these are themes I love or feel especially well with when being creative. And when I look at my pinterest boards I find I am also looking out for mostly the same "loves" of mine - be it techniques, media used, themes, styles or colour schemes. You know what I mean? We have our specific favourites or "loves" - they make us not only feel good, but they also are what motivates us and feel especially fulfilling when we get creative and kind of "celebrate" them by expressing them in as many ways we can. 

What do you think?


Monday, 1 April 2019

Mini Tag Album for SanDee&amelie's Steampunk Challenges

Servus and welcome to the start of our April challenge over at SanDee&amelie's Steampunk Challenges!

As always the theme is "Anything Goes - Steampunk/Industrial", so our players, the design team and I were (and always are) free to create what they enjoy most (as long as the steampunk/industrial theme is still part of the creation of course).

I unearthed an old dies set recently (I guess it was a Spellbinders dies set), when tidying my studio and immediately knew what I wanted to create with it! A mini tag notebook in steampunk style of course! You know me - I love mini!


Well...so now that you have seen the mini notebook from any possible angle, it's time to also show HOW tiny it is...


Isn't it amazing that you can always put so much mixed media on such a small format? I love it! 

Of course I have taken steps images, so I can share the process with you. 

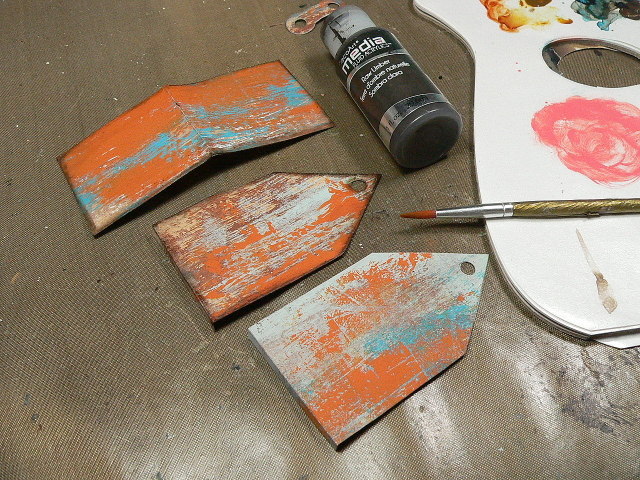
I first die cut all the pieces for the album's cover and signature cover. I cut each piece twice from left over painted paper scraps (from this project over HERE). I had used these to clean the brushes from any excess paint and to create paper-on-paper mono prints to work on (a technique I learned from wonderful Seth Apter!). Now they were the perfect size for my mini tag album and I just love the texture of the brush strokes and all the beautiful layers of paint!


I cut all the needed covers, the closure and signature covers twice as the painted papers were white at the back - so I had to glue two pieces together to get covers that were painted on both sides. I used matte DecoArt Decou-Page for this step.


Then I used DecoArt media fluid acrylic paint "Raw Umber" and a fine detail brush to paint a brown soft edge around all the covers' edges. I first applied clean water around the edges and then applied the paint - this way the water dragged the paint and created a softly blended dark edge.


On the cover's outside I had applied some white DecoArt media Crackle Paint with a palette knife here and there and let that dry naturally. Afterwards I added a mix of DecoArt media Antiquing Creams Raw Umber and Carbon Black on top and only wiped that back a little bit to age it and town down the colours.


A wash of DecoArt media Yellow Oxide was used to tone down the white of the Crackle Paint.


Then I painted the fabulous "Mechanical Hardware" chipboard pieces from our challenge prize sponsor "boozybear". I used DecoArt Matte Metallics "Aged Bronze", DecoArt Dazzling Metallics "Teal" and DecoArt Extreme Sheen "Bronze" on the pieces and toned these down with the Antiquing Cream mix as well.


The left overs from the Extreme Sheen paint on my palette were sprinkled on the cover using a soft fully loaded brush and tapping it with my finger.


 I also used the Dazzling Metallics and Matte Metallics to paint a label holder, some washers and screw heads from a Calico Craft Parts Mini Hardware Wood Shapes Sheet.


Using matte Decou-Page I assembled my mini tag album cover. I also added some DecoArt media Liquid Glass to the small label holder (also a Calico Craft Parts wood shape). Then I set the cover aside to let everything dry naturally.


Once all had dried, I poked the holes for the binding and threaded brown waxed cotton thread through the holes from the outside and simply tied the ends into a knot on the inside. I had also die cut some notebook pages for the signature from beige marbled paper.


Voilá!


I hope you like my tiny tag album! And I also hope to see you play along with us over at SanDee&amelie's Steampunk Challenges too this month! ;)

Hugs and happy crafting!
Claudia
xxx


Wednesday, 18 January 2017

An Emerald Creek Treasure Chest

 Hi and servus!


Today sees the second round of January project posts from the Emerald Creek DT and they are all about the new products Kim will be introducing at Creativations (formerly known as CHA) tomorrow! (There will not only be a lot of awesome new products to check out at her booth but also some of my projects I made for Emerald Creek, which makes me a very proud and happy bunny! Yay!)

One of the most impressive new goodies are the lovely gemstones Kim sent me - and I knew immediately what I wanted to create with them.


Last November I went to Munich with my son and husband and there we visited the residence and the treasury. I was deeply impressed by the wonderful treasures and by how much love, skill and labour had gone into their makings! There were crowns, golden boxes, house shrines and many other wonderful things - and all of them were outstanding pieces of craftsmanship!


So I decided to create my own little treasure chest using the lovely gemstones and Emerald Creek's fab embossing powders!


My treasure chest is not that shiny and golden, but you know me...I am a grunge crafter and love all things old and heavily worn...which is why I wanted to go for an aged look with my project (imagine that the chest has just been found in a dusty attic or crypt!).


But let's start from the beginning...lol.


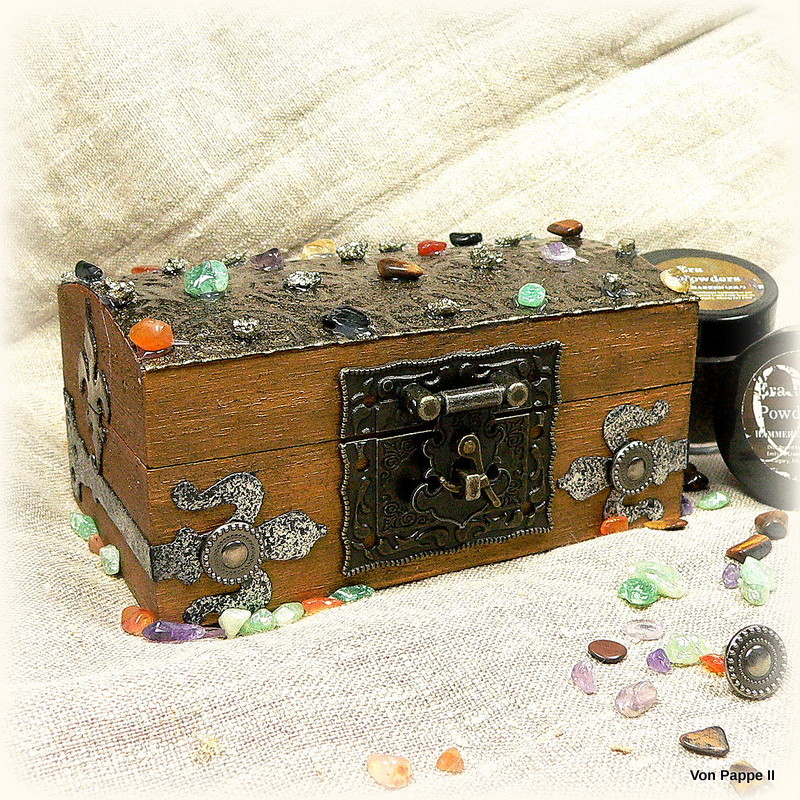
I dry embossed a piece of black cardstock using a Spellbinders embossing folder and my Sizzix. Then I painted the embossed card and the balsa wood box with DecoArt Venetian Gold Dazzling Metallic paint.


 The dry card was glued to the chest's lid using matte DecoArt Decou-Page. Then I dabbed on some clear embossing ink directly from the inkpad and heat embossed the lid using Emerald Creek Charred Gold embossing powder. I used it on some die cut fleurs de lis too.


I also die cut two metal fittings from black cardboard and heat embossed these with Emerald Creek Hammered Metal embossing powder. 


The box was toned down using DecoArt media black Antiquing Cream.


Then I glued on the closure and the other pieces.


I added two of the new Emerald Creek Circle brads to the metal fittings. As the balsa wood is quite soft I just had to poke a hole first with a pokey tool and then insert the brad.


The gemstones were fixed to the lid using a hot glue gun.


Voilá! 


Some close ups:


Inside the box the balsa wood is still in its original state - so you can see what a little bit of paint and media can do to turn something new and boring looking into an aged looking artefact... ;)


I love the look of the gorgeous gemstones against the Charred Gold!


If you want to find out what my teamies have used the gemstones for, simply hop over to Emerald Creek Dares and check out their makes too! I hope you like my treasure chest (and the CHA projects if you happen to stop by Kim's booth during the next days ;)!!!


Thanks for visiting and 
hugs and happy crafting!

Claudia 
xxx