Wednesday 24 September 2014

"VonPappe Wednesday" - Sneak Peek

Servus, dear crafty friends!

 Today I am honoured to bring to you the start of a new feature over at the That Craft Place Challenge blog , which is meant to provide readers and players with monthly inspiration on what to create with all the fab stuff Lisa - my lovely "boss" and the owner of That Craft Place Store - offers.

You will find a full tutorial over at That Craft Place - so I will just share a tiny sneak peek over here and hope that it will lure you over to my post on the challenge blog to have a closer look and learn about the how to! 


There's a bi-weekly challenge over at That Craft Place challenge blog - so you will always find a bundle of DT inspiration too if you decide to visit Lisa and her fab team!

Hope to see you over there soon!

Hugs and happy crafting,
Claudia x


Thursday 18 September 2014

Studio Table - The Reveal (celebrating the Studio Table with Seth Apter)

Servus, dear readers, crafty friends and followers!

Today Seth Apter from The Altered Page wants us all to celebrate the Studio Table in its most messy state (which I think is the best and most inspiring way to look for a studio table ;)  and a lot of creative folk joined in. Seth provides you with a list of links to studio tables from all over the world - so you should hop over to his blog to learn more and have some sneaky peeks around other artists's studio tables (which is something I really love to do).

 Just click the image to get to his blog post:

http://thealteredpage.blogspot.co.at/2014/09/studio-table-reveal.html


I almost missed this event - but gladly Seth set up a new deadline for people to join in. (Learn about the details over here).

So here comes my studio table in its actual state (which is the usual state as I only clean up my table before I start a new project).


To the right you can see my étagère that holds my spray paints, distress stains and paints and other "magical" stuff. The wooden tray with the handle holds my acrylic paints. You can see my metal smith hammer in the container that holds the tools for cutting, hammering, distressing,... and I just find that I haven't put back the tin with my palette knives to the shelf it normally sits in...

You can also see some new steel dies lying on my table, texture stamps (which I love to always have nearby), dictionary pages, plastic lids which I use as one way containers for mixing colours or tinting pastes or media in them, jars holding my fine tip brushes and sculpting tools, my storage that holds the distress inks and embossing powders...


and right to my chair the small drawer container that holds my beloved watch makers cabinet and my Big Shot on top. In the drawers I use to store the stamps I use the most as well as the stamping blocks. The cabinet drawers contain a lot of fossils, shells, watch parts and other fleamarket finds and found objects, my mica tiles, metal embellishments and other vintage treasures. I also store my heat tool and soldering iron on that wheel container.


If you look at my studio table from the other side you can see my often used letter stamps in the wooden box sitting on top of some old books and dictionaries and next to the paper weave basket that holds cloth for painting and dabbing.


Inspirational reading and more colours and containers holding embellishments, ribbons and die cuts on the shelf behind my desk...


...and all my Sizzix dies, colour pencils, charcoal pencils, felt tip pens, markers, stencils, alcohol inks, UTEE containers, guilding waxes and mixed media stuff are on the shelf behind my seat. So I just need to turn around and grab what I need.

Often all the stuff from the shelves tends to somehow diffuse to my studio table, so my working space almost always ends up the size of a postage stamp. ;)

So - this is it: my studio table right now. Waiting to be cleaned so I can start a new project ;)
I will hopefully find enough time to visit all the other artists' tables - I really love to see how other artists work and keep their personal order with their stuff. Traces of the latest happy mess always inspire me the most!

Hope you found some traces with my spot too and leave inspired!

Hugs and happy crafting!
And thank you, Seth, for that great idea and putting up this inspirational event!

Claudia x

Tando Creative Sponsor Spotlight - Sneak Peek

Servus and welcome back to my tiny crafty corner near the beautiful Alps!

Before I come to the point of today's post, I want to thank you all so much for your congratulations and for celebrating my "firsts" with me (for all those who don't know what I am talking about, scroll to the previous post ;)!!! It really means a lot to me to learn how much you all care and your kind words touched me deeply! Thank you so very very much! xxx


http://ourcreativecorner6.blogspot.co.at/


Today it's Sponsor Spotlight time over at Our Creative Corner and I am sharing an awesome new technique I happened to "invent" recently - I like to call it the "splintered enamel surface" effect! Yay!

Just to give you a slight impression of what you will get:


If you want to see more just hop over to Our Creative Corner! I have prepared a very detailed tutorial that's waiting there for you  so you can create that effect too!

I would love to hear what you think about my "invention" ;)

Hugs and happy crafting,

Claudia xxx


Tuesday 16 September 2014

A Lot of "Firsts"

There are personal "firsts" throughout our whole lives - and they are what makes life "special", aren't they?

So I decided to do an additional "first" to the "first" I want to share with you today.
Those who know me a bit better may already have spotted that I am a rather shy person, when it comes to showing myself or talk about my progress on my artistic journey. Maybe this originates from the fact that I don't think of myself or my work of being "special". "Individual" would more be the word that comes to mind... ;)

But today I received my "artist complimentary" copy of the "Somerset Apprentice" autumn issue, which not only features a lot of awesomely talented artists I really admire, but I am one of them this time!

Why is this so special to me - even though I have been writing articles for the Craft Stamper for some months now (so I should have gotten used to this already)? Well - the great difference is: I received a lovely mail about a year ago in which I was asked by the editor of the magazine if I would be willing to send them one of my projects she had seen on my blog and write an article for her, so she could feature it in this autumn's issue. Imagine my joy and pride - my artwork had been "discovered" and found printworthy! Yay! If there exists a special reward for an artist, I guess, it is exactly that!

So here's an image of my copy I received today - sorry, but this time I couldn't resist sharing my excitement with you (well, some might want to call it showing off...lol).


and there's my name (really MY name?) on the table of contents, see?


My first publication I was asked to write for one of the coolest magazines out there!
It made me so high-spirited today that I decided to do my first "selfie" and share that with you too. So bear with me 'cos here goes:


Of course it took several attempts before I came up with a photograph of me which I dare share with you, but I had a lot of fun looking at some of the failures and this one made me ...no makes me chuckle everytime I look at it...I look like a teacher (no more denial - I obviously am what I am...lol):


Giggle...I look as if I am planning to examine that issue very earnestly before I give my approval, don't I? I spare you the one image where I look like Wallace (from Wallace and Gromit), who has just discovered a special new cheese brand....(same grin, same teeth, same gesture)....lol.Well, at least this image doesn't show my kitchen and laundry chaos as shown with the first one... *rollingeyes.

So two firsts that is - and I hope you aren't too shocked now... ;)

Oh, and before I forget, I also want to share the latest treasures I was given to by dear Uncle Helmut when visiting his lovely family this summer:


Cool, huh? AND there is also some ribbons and buttons galore I wanna show you - given to me by my very dear friend Babsi, whom I had a wonderful crafting session with lately:


Hach! So many reasons to feel like the happiest person in the world today, aren't they? Thank you so much, Uncle Helmut and Babsi! Those awesome treasures will be hoarded (and hopefully used) caringly! ;)

Hope you are having a great time too!
Thank you for stopping by and sharing some joyful goofiness with me! ;)

Hugs and happy crafting,
Claudia xxx

And now I will hit the "publish" button, so there will be no turning back
 ;)

Tuesday 9 September 2014

A Deco-Crackle-Art Paintboard Tutorial

http://decoart.com/community


Servus and welcome back, my dear crafting friends, readers and followers!

Time for a new DecoArt tutorial, don't you think?

DecoArt are just releasing their new fabulous media line (which was developed by none less than the fabulous Andy Skinner himself!), which will provide you with a load of new crackle media goodness, fantastic antiquing creams, a new modelling paste or the stunningly vibrant spray paints - to name only just a few.


Experimenting with these I came up with this paintboard:


Materials list:

- from the new DecoArt media line:
  - white Modelling Paste
  - Matte Medium
  - white Crackle Paint
  - white Gesso
  - Raw Umber and Patina Green
    Antiquing Cream
  - Cobalt Turquoise Hue,  
    Cobalt Teal  Hue, 
    Quinacridone Gold,
    Pyrrole Orange  fluid acrylics
  - turquoise Shimmer Mister
  - white and orange Misters

- other DecoArt products:
  - matte Decou-Page
  - Raw Umber Traditions acrylic paint

- other materials: 
  - an 8x8 inch piece of paintboard
  - MDF flourish (exclusive design from That Craft Place Ltd.)
  - palette knife, fine tip brush, wider brush, baby wipes, water
  - metal findings (thanks to dear Uncle Helmut, my stash has once more grown this summer ;), old watch parts    xx(available at Retro Kraft Shop)
  - scraps from an old dictionary or book
  - texture plate or stamp
  - idea-ology alpha parts or chipboard letters
  - optional: script/pattern stamps and black archival stamping ink


Step 1 


 Tear scraps from old dictionary pages and glue them to your paintboard using matte Decou-Page. 


Step 2


Apply white Modeling Paste to various spots using a small palette knife. 


Stamp some texture into these spots. I used a texture plate which I lightly sprayed with water first.


Step 3 

Use Matte Medium to glue the flourish to your paintboard and give it a top coat with the Matte Medium too. 


Step 4

Once dry paint the flourish with the white Crackle Paint (I used a very thin soft brush as it helps spreading the Crackle Paint more easily) and let dry naturally. 


Step 5 

Use a small palette knife and also spread some of the white Crackle Paint on your paintboard by scraping it on. This will create beautiful random shapes of crackled areas. 


Step 6


Paint the remaining areas with white Gesso. Blend in the glued on dictionary scraps by painting over the edges with diluted Gesso. 


Step 7

In the meantime the Crackle Paint should have done its magic on the flourish. Rub in some Raw Umber Antiquing Cream to make the cracks more visible. Let it sit for a minute or two. Wipe off the excess with a baby wipe while the Antiquing Cream is still wet.


Step 8

Glue some old watch parts or gears to your flourish using matte Decou-Page. Paint them with white Gesso to add some "tooth" for the colours we are going to add later. 


Step 9

While the Gesso dries, paint the spots of dried Modeling Paste with Traditions "Raw Umber". Blur the edges around these spots by spreading some of the colour with a water loaded brush. 


Your project should look something like this so far:


You can see the dried Crackle Paint and how the white Gesso helped with blending in the dictionary scraps with the background. 


Step 10

Paint a "shade" around the flourish using a fine tip brush. This will create a better contrast and thus highlight the flourish. 


Step 11

Take the new media "Cobalt Turquoise Hue" and paint some areas with it. 


You will love the new media fluid acrylics as they really are highly concentrated pigment, which makes a little of it (or even using it as a wash) create a wonderfully intense effect! 


Step 12


Paint the watch parts with "Quinacridone Gold" and let dry. 

 Also spread some of it on the still white spots of your paintboard:


Step 13

Pour some white Crackle Paste into a small container and add some "Cobalt Teal Hue"  to tint it to a light teal colour tone. Randomly scrape the tinted Crackle Paste onto your paintboard, overlapping it with some of the already covered spots.


 Let dry naturally! 


before x       xxxxxxxxxxxxxxxxxxxxxxxxxxxxxxxxxxxxxxafter 


Step 14


Stencil some texture/text/numbers onto the paintboard using Traditions Raw Umber acrylic paint. 


Use the same paint to dab it around the edges of your paintboard to create an irregularly shaped "frame" that will hold your design together:


Step 15

Make a wash with the  Patina Green Antiquing Cream and apply it to the previously painted Modeling Paste and the painted watch parts:


Glue on some old and worn metal findings or embellishments using matte Decou-Page. It really is my first choice when having to fix bulkier and heavier items to my canvases! Let dry.


Step 16

After all has dried spray on some splatters of various DecoArt media Misters. I used the turquoise Shimmer Mister and the white and orange Misters for my paintboard.


The white from the white Mister is awesomely opaque:


as is the orange:


Step 17

Add a sentiment using alpha parts or chipboard letters and dab on some Pyrrole Orange media fluid acrylic.


Step 18
(optional)

Stamp on some script or other patterns for more texture.


You're done! 

***


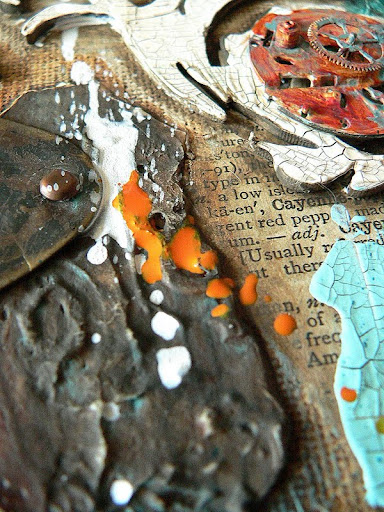
Some close ups as usual:


Thank you so much for reading this far and stopping by! I hope you leave my spot inspired and ready to create your art out! ;)

Hugs and happy crafting!
Claudia 

xxx


Two brilliant challenges I enter this paintboard piece to:

The Mirror Crack'd - Anything goes

Anything But A Card - Steampunktember