Showing posts with label art journaling. Show all posts

Friday, 31 July 2020

Travel Journal - a StencilGirl Project and Column

Hi, servus and thanks for stopping by!
How's your summer been so far? Travelling has become quite difficult and even more of an "adventure" these days, but you don't always have to travel far to experience new things and inspiring new locations.

Anyway, having a travel journal can never be wrong.
I always use a small travel journal to have information about timetables, train connections, locations to visit and other important stuff at hand without having to switch on my phone and connect with the internet. I simply am a dinosaur when it comes to electronic devices and always will be and do not trust them totally (or maybe my ability to have their batteries re-charged properly all the time). And I love journals and notebooks of all kinds. ;)


So I have created this one for my first post as a StencilGirl Columnist over at the StencilGirl Talk blog - and you will find loads of steps images and detailed descriptions of the how-to if you hop over to their blog (by clicking HERE for example).

It also has pockets to store tickets and other ephemera in and you can adjust the tutorial to any size of cheap bought notebooks to use on the inside (so you do not have to make your own signatures, which can be quite time consuming)!


And the flaps do not only help to keep the tucked in content in the pockets safe and in place, but also work as bookmarks if needed! And it all is made from just a single sheet of A3 Mixed Media or heavy drawing paper!

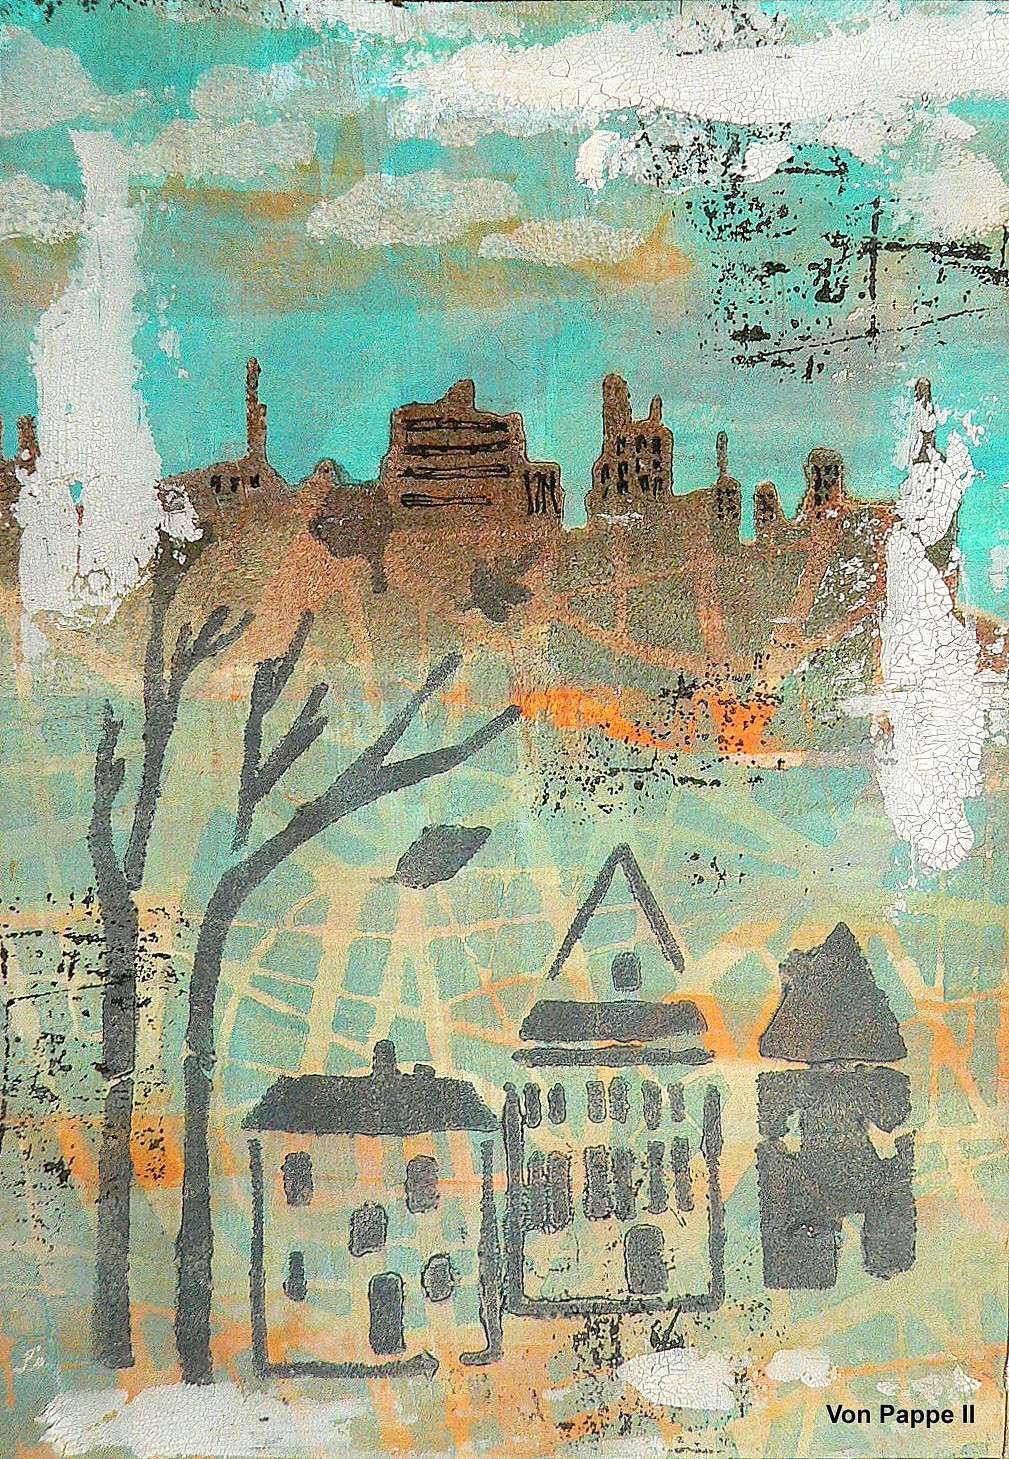
Here's a little scene from the back cover - just to make you even more curious and check it all out in the blog post. As a columnist for StencilGirl I will be sharing stencilled projects with a focus on "Textured, Weathered, Grungy" - my personal favourites when it comes to surfaces and designs - every three months on their blog.


Hope to see you over at the StencilGirl Talk blog!
Have a wonderful summer
and safe travels!

Claudia
xxx


Monday, 6 July 2020

The Start of a "House Journal" - a Calico Craft Parts Project

Servus, hi and thanks for stopping by! I hope you've had a lovely weekend!

It's Calico Craft Parts time today and over at their BLOG I am sharing the first piece of a kind of House-Journal I have been wanting to create for a long time, but haven't found the courage yet to start. But finally I took the first plunge and the first house is waiting for you to be visited ;)

A sneak peek should give you a first impression on what kind of mixed media project is waiting for you. Of course there is a step by step as well as loads of pictures and the lists of the Calico Craft Parts and DecoArt media products and paints used as well. Simply click HERE (or on the picture) to get taken to the blog post.


Hope to see you over there soon!

Have a good start into the week!
Claudia
xxx


Tuesday, 14 April 2020

Stencilled Poetry - an Art Journal Cover

Servus and welcome to my blog today! I am so happy you're stopping by as today I am sharing a  make that is really close to my heart as it is about poetry - not only "stencilled poetry" (which I hope I have managed to achieve on my journal cover) but also the poetry from song lyrics and music that have deeply influenced my love for the English language and for music and for song lyrics that evoke images, feelings and stories in my head.

One of the very first songs - or maybe THE very first song - that did this for me was "Eleanor Rigby" from the Beatles (and the lyrics were written by wonderful Paul McCartney). I have been loving the song and also the "Yellow Submarine" movie since I was about twelve years old - and that love has never changed until today.

"Stencilled Poetry" is this month's theme for the Creative Team at StencilGirl Products to go by and a special line from "Eleanor Rigby" immediately came to my mind for this theme. So I created an art journal cover, trying to capture visually what that special line from the song evokes in me and how it makes me feel.


I have done a video of the process again - so you can watch and find out how I built up the layers on the journal cover and how some of the effects were achieved. So I hope you will hop over to the StencilGirl Talk blog to check out the video, some of my other thoughts that went into the design and also some more images of the finished journal.


Hugs and happy crafting!
Claudia
xxx


Tuesday, 17 March 2020

Art Journal for MarteLAB

Servus, hi and I hope you're all well and not affected too much by the spread of the Corona virus and whatever this brings along!

All over the world nations are trying to starve out the spread and to cope with how this affects everyday life and keeping one's spirit up while facing extraordinary times in isolation...over here in Austria people are advised to keep to themselves and not leave the house other than to shop for food or medicine (or walk their dogs) at least for the next four weeks (but very likely we will have to stick to that for longer than that).

It's spooky having the tele on to not miss any new announcements and directories from our government and one of our two main Austrian TV stations is reserved for broadcasting info on Corona crises developments and measures being taken all day only instead of the usual children's and entertainment program.
Seeing people hoard toilet paper (of which nobody really understands and knows why) and buy survival stock of canned food, water and what have you as if preparing for an atomic threat makes the whole situation even more unreal and weird to be honest. And the fake news that spread so easily across the internet these days bring the most ridiculous "facts" that either make people panic even more or get them to think it is all once more just a joke or the usual conspiracy of the industry or something like that.


Staying at home can be hard for people who are used to leave the house to go to work or school and who have mainly out door hobbies - but luckily crafters and mixed media fans never are at risk of not knowing what to do with their spare time, right?

And to brighten up the mood I have made something play- and colourful for you - another art journal cover - this time using Eileen Hull's "Passport" die, some Aall & Create stamps and stencils and DecoArt media fluid acrylic paints and my Gelli Pate.


Over at the MarteLAB blog there's a stepped out tutorial as well as the list of what I have used to create this art journal. Simply click HERE to get to the tuto with a lot of steps images. I hope this will brighten up your mood! Hang in there, all of you!


Stay safe!

Claudia
xxx


Thursday, 18 July 2019

Pod of Whales Notebook - a Gelli Arts & DecoArt Project

Hi, servus and thanks so much for stopping by!
I hope you have been enjoying a lovely summer so far!

Today's post is meant to invite you over to the DecoArt Mixed Media Blog, where the DecoArt Mixed Media Design Team are sharing projects throughout this month that were all done using Gelli Arts products (Gelli Plates and Gelli Arts gel printing tools) and the wonderful DecoArt premium acrylic paints. A round up of all the projects for July can be found HERE.

The team were all given Gelli Plates and brayers, so we could go wild and experiment and indulge in heavy gel plate printing with creating piles of beautiful prints, some of which we used to create a bundle of summer themed inspiring projects that will all be shared on the Mixed Media Blog during July. You even get the chance to win a fab bundle of Gelli Arts and DecoArt products! Information on how to enter the giveaway can be found over at the DecoArt Mixed Media Blog as well as the Gelli Arts blog.

My project that goes live today was inspired by my love for the ocean and especially for whales, so I went for refreshing blues and greens when picking paints for my gel plate prints ;)


Here's a picture of my work space covered with the Gelli Arts texture tool (the Gelli Plate is hidden somewhere underneath the prints), DecoArt premium (and Americana Titanium White) paints and the prints I had picked for creating my Mixed Media Blog project.


...and here (yay...just found it again!) is the picture that shows all the DecoArt premium paints and Gelli Arts Gelli Plate and special tools I used (and also the die cut masks and foam stamps I used to create my collage papers). Somehow the brayer I used didn't make it into the picture, but it is somewhere close by... no gel plate printing without a proper brayer to spread the paints, right?


In my tutorial that can be found over at the DecoArt Mixed Media Blog today, I am not only sharing a detailed step by step on how to make gel plate prints using masks and stencils and how to create an art journal using these prints together with grey board and cutting die, but I am also sharing how to use the papers you clean the brayer on and make them part of the finished project.


Curious? Good! 

I hope to see you over at the Mixed Media Blog. And good luck with the prize draw!!! ;)

Hugs and happy crafting!
Claudia
xxx


Monday, 8 July 2019

Quick Hand Made Travel Journal - a Calico Craft Parts Project

Hi, servus and I hope you have enjoyed a lovely weekend!

Time to kick off the new week with my usual invite over to the Calico Craft Parts Blog, where I am sharing the how-to on a quick nautical themed travel journal and cover.


There are plenty of nautical and seaside themed craft shapes to choose from and especially the Mini Craft Shapes sheets are always helpful to add that little extra and interest to projects!


In the step by step I am showing how I did this amazing crackled background and how to make your own acrylic paint spray misters besides how to make a quick journal from packaging and gel printing left overs.


Hope to see you over there! Have a good start into the week!


Hugs and happy crafting!

Claudia
xxx


Saturday, 6 April 2019

Steampunk Traveller's Journal - a Calico Craft Parts Project

A bit late this week I am sharing a make that already went live on the Calico Craft Parts Blog on Monday. But as I had to spend the last week in hospital (with a critical crises of sudden high blood pressure) I am behind with everything and am now trying to catch up with everything.

But the post is still there and the tutorial is too...so I would like to invite you to hop over to the Calico Craft Parts Blog to check out a cool steampunk journal I did using mainly steampunk themed Calico Craft Parts (...and, believe me, there is a wide, wide range of fantastic steampunk craft parts to choose from in their store!) and Eileen Hull's "Passport" book die.


The full tutorial that takes you through the process is over at the Calico blog, alongside with many more pictures and close ups of details. I hope to see you over there!


Hugs and happy crafting!
Claudia
xxx


Thursday, 26 July 2018

My Notes, Thoughts and Plans - a DecoArt Mixed Media Blog Project


Hi, servus and thanks for stopping by! I hope you are enjoying the summer holidays!

Summer calls for bright and vibrant colours and light and fun projects, right? So I have come up with something really bright and fun and altered a plain cardboard notebook to turn it into a journal to make notes to myself in so I don't forget to think positive and hold on to my dreams and wishes....just in case I loose self-confidence (which I tend to do way too often). 


There's a full detailed tutorial waiting for you over at the DecoArt Mixed Media Blog. Simply click HERE to get taken to the post with loads of steps images and the solution to the secret of how I have made the vibrant background ;)

I hope to see you over there soon!
Enjoy your holidays!

Hugs and happy crafting!
Claudia
xxx


Saturday, 24 March 2018

Meet Miss Maisie Greyfur!

Hi, servus and thanks for stopping by today!
It's still quite fresh outside, but at least the snow has gone and I am optimistic that spring has finally arrived by now!

The last weeks with snowstorms and icy temperatures were well spent indoors at my studio desk which I am - to my own surprise - still managing to keep organized and tidied up most of the time. ;)

I recently was very lucky to get some of the fab StencilGirl® stencils to play with and this is the result of my first happy stencilling session using their designs:


It's a journal I made using Eileen Hull's "Journal" die and left overs from packagings. The back and front covers show a single scene:


Please, meet Miss Maisie Greyfur, who is enjoying her first cup of tea (I'm sure it is a strong tasty Yorkshire blend!) of this year in her outskirts garden plot while admiring the first buds on the still bare trees.


I used the Wolf, City Stories and City Scape StencilGirl® stencils alongside some DecoArt media products to create my little romantic early Spring garden scene.


As I always feel quite uneasy with starting from the plain page, I love to create a patterned background by scraping on paints with a palette knife. Some wet on wet, others on top of already dried layers. This time I've used DecoArt Chalky Finish paints alongside some white premium Gesso. 


Once that had dried I sprayed on some Orange DecoArt Mister and spritzed that with water to let the paint run down my cover. Spritzes of white Shimmer Mister were added too. 


I then started with adding the skyline, dabbing on premium paints Carbon Black and Prussian Blue Hue wet on wet with a cosmetic sponge. I also went in with a bit of white and let that mix with the wet paint on the cover to create an ombre effect.


Miss Maisie was stencilled on using white premium Gesso and Carbon Black - mixing them on my palette first before sponging them on.


That was followed by adding the houses and tree shapes in Carbon Black.
Later I also added raindrops and parts of the flowery border from the City Stories stencil to form a part of the garden fence at the very bottom of the back cover. 


Using a detail brush and white DecoArt media Gesso, I painted Miss Maisie's fur and the cup she's holding. I also went in with a dark grey that I mixed from white Gesso and Carbon Black premium paint to paint some shades to the hind legs and the fur. 


Black archival stamping ink was used to stamp my quotes to the back and front covers.


I added some details with a white gel pen. 


The pages for the journal were made  by folding and cutting to size some sheets of heavy printer paper to form three signatures. These were literally "bound" to the cover's spine with some dark grey cord. I simply inserted each of the signatures and tied knots in their centre folds. What I like about this very simply binding, is that the pages can be removed and/or replaced quickly and easily without having to undo the binding. 


I hope you like Miss Maisie's garden and view as much as she does. She always loves to escape the noise and hectic of the city and enjoy some piece and quiet in the outskirts...

A huge THANK YOU to the kind ladies from StencilGirl® for letting me have some awesome fun with some of their stencils! 

Hugs and happy crafting!
Claudia
xxx


Monday, 5 February 2018

Always remember that...


Well, that's definitely something I lately found I seem to have somehow forgotten, so  I decided to create a project to remind me of this and some other - seemingly - simple truths, so I don't loose myself in frustration along my creative journey.

The whole project (as this isn't a journal page, but actually a detail shot from a larger project) can be seen at the Calico Craft Parts Blog - together with loads of colourful mixed media goodness and a how-to with steps images as well of course.

I hope to see you over there soon!

Have a good start into the week! 
Claudia xxx


Sunday, 8 October 2017

"Where You Are Planted" - acetate box with three acetate cards

Servus!

I am feeling truly blessed at the moment because my creativity seems to be at maximum level. Autumn always is "my" time. The autumnal Vienna Woods are a well of inspiration that never dries out. Nature standing on the brink of decay, bursting with last intense colours and textures...it is the visual intensity of that time of year that I love most and that I hope to one day be able to capture in my work accordingly.

At the moment I feel I am still practicing on it...but I am getting closer ;)

I also love to turn trash into treasure and I can never throw away packaging materials like corrugated card, acetate or little boxes and all that stuff others regard as being trash. I have a whole box filled with the acetate packages the Sizzix dies come in, as I love their sturdiness. This time I have created a little acetate box with three acetate journal cards. I hope you'll like it!


This is how the box looks when being closed and with the cards inside. 
It is tied up with a black leather cord. 


The beautiful images on the acetate journal cards are stamped to the backsides of the front acetate sheets and are Indigo Blu and Penny Black designs.


The cards' backsides were decorated with acrylic paints and quotes stickers and then covered with another acetate sheet.


This image shows the front acetate layer with white Gesso painted to its back. 


The three layers (acetate, black cardstock, acetate) are held together by eyelets. 


The acetate box is decorated with a quote as well. 


 Some pictures of the finished project:


Thanks for stopping by!
Claudia 
xxx