Monday 26 June 2017

The Moustache Metal Mystery

Servus, hi and welcome!

Yes, it is "Every Other Monday Time" today for me over at Calico Craft Parts and I would like to invite you over to their blog where I am sharing my latest project for your inspiration.

If the title of my post made you wonder what on earth "Moustache Metal" might be, I can only tell you that you have to hop over to the Calico Craft Parts Blog to find out. ;)
And I can already give away you that you will find some steampunk fun over there (who would have guessed ;).


Oooh, that looks like corrugated card, doesn't it? Curious now? Good! I hope to see you over there! Simply click HERE to get to the project post and how-to. Have a good start into the week!

Hugs and happy steampunk crafting!
Claudia
xxx


Friday 23 June 2017

Guesting at A Vintage Journey

Servus, hi and welcome! Today I have the very special pleasure and honour to guest over at A Vintage Journey where I am sharing a little canvas - especially created for their wonderful "Canvas" challenge hosted by lovely Nikki Acton!


Nikki says: "Let's work with canvas this month in our vintage; shabby; mixed media, art journalling, industrial, timeworn or steampunk style.  It doesn't matter how as long as some canvas is a dominant feature of your project. Perhaps you may use a canvas in the traditional way or use the reverse to create a shadow box? Canvas boards are fabulous to work on or perhaps you have some canvas sheets which can be cut and adhered to another surface."


I did not only use a canvas to work on as my substrate but also a strip of canvas in a very special way to create some extra interest and dimension.


On this piece some of my favourite materials and media to work with came together - raw canvas (which I have learned to love being part of the Canvas Corp Brands design team), some cool steampunk MDF wood shapes from the fantastic and wide range of Calico Craft Parts and of course some of my beloved DecoArt media as well.

My goal was to create something precious or "worthy" by partially using gilding flakes on the MDF parts and in some other spots on my canvas) and then partially "stain" and/or "hide" them - which in a way draws even more attention to them. (we often only find out what things (or persons) mean to us when we find them being taken away from us or in danger of being damaged or stained, right?)

And I have recently promised myself to have more faith - in myself, my body, and life in general (seems I have lost a good deal of that during the last years of struggling with bad health).  But sometimes things happen - unexpectedly - that make us aware of the fact that we have just quit trying again or believing that things can get better).


Hence the gilded wings - to remind me to be more daring and try to fly again without fear of falling or not even getting off the ground.

So this is the motto of my canvas - one that definitely is worth being lived by and that I hope to never forget again.

If you want to find out more about my little faithful canvas and the how-to, simply hop over to A Vintage Journey. I would love to see you there!
Thanks so much for stopping by!


Hugs and happy crafting!
Claudia
xxx

Wednesday 21 June 2017

Surf & Turf at Emerald Creek Dares

Servus, hi and welcome, dear crafting friends! :)


Surf & Turf

is this month's theme over at Emerald Creek Dares and Kim will add an extra prize to the challenge (besides the usual $50 voucher to spend at her store) if you are able to combine both - sea AND land animals with your makes!

I stayed with sea animals this time and did a little art journaling on heavy white cardstock:


other products used available at Emerald Creek:

Believe it or not: I only used Distress Stains and Inks alongside the fab Emerald Creek embossing enamels to create my art journal page and I love how versatile these products are!


Let me quickly take you through the steps (please, click on the images for a larger view):


Using embossing ink I stamped the lovely whale's image from Emerald Creek's awesome "Native Art" collection and heat embossed it (one after another) with Hammered Metal, Mercury Rising, Fractured Ice and Verdigris Sparkle. Then I grabbed my Distress Stains and used them like a wide brush to create layers of the different tones in circular motions. The picket fence Distress Stain had to go first - it would later act as a bit of a resist and come to the surface again. I also used saltyocean, weathered wood and tumbled glass. Then I cut my paper to size and blended the white spots with evergreen bough, faded jeans and chipped sapphire Distress inks using the blending tool. To finish the background off I also used the emboss it dabber like the Distress stains and added some "swirls" that I covered with Fractured Ice embossing crystals and boosted.


Then I went in with a baby wipe and did the same: wiping in short strokes that followed the circular motion of the Distress stains. That made the picket fence swirls visible again. Next I stained an old dictionary page scrap with wild honey Distress stain, drew a little crown for my prince of whales with a black marker and fussy cut it. The central wave image was stamped with embossing ink and heat embossed with Mercury Rising embossing powder. Then I cut out the wave's image in circular shape and glued both - wave and crown to my piece using a glue stick.


The corners of my art journal page were stamped with little waves images from Nicole Wright's "Upstream" stamp set. The quote was stamped with black archival ink to top and bottom of a dictionary page, heat dried and then tinted with wild honey Distress stain. The cut out quote was applied to the page using the glue stick again. I drew a white border and little white highlights using a gel pen. The waves image was shaded in using a black aquarellable pencil and a brush.


My prince of whales has a huge smile on his face. I wonder why?


I am really happy with the swirling effect I managed to create with the Distress stains!


I hope you like my fun art journal project as much as I do! The story about my "Prince of Whales" can be found on the Emerald Creek Dares blog alongside with some awesome makes of my teamies! So I hope to see you over there soon!

Hugs and happy crafting!
Claudia
xxx


Thursday 15 June 2017

Steampunk Notes - for SanDee&amelie's Steampunk Challenges

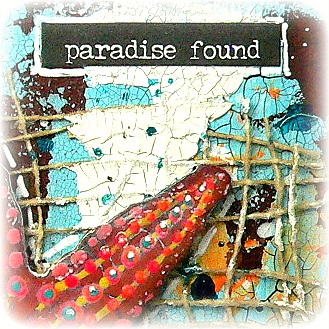
Servus, hi and thank you very much for stopping by my blog today! As it is the 15th it is time for "Team B" from SanDee&amelie's Steampunk Challenges to share their inspirational makes.

The theme for our June challenge is once more

"Anything Goes - Steampunk/Industrial"

- so you are free to create and craft away and have some creative steampunk or industrial style fun!


I definitely had a lot of fun and my project for June is another notebook (yes, I never tire of making them...I only have to work on using them too...lol).

When I saw the new "Industrial" Sizzix die (designed by Tim Holtz) I knew I had to have it - finally I could make my own nuts and washers for all my industrial style projects!!! Using the real ones doesn't work because they are way too heavy and bulky...but die cutting them from heavy card and stacking them gets very close to the real thing! I love it!


I also used my beloved "passport" Sizzix die (designed by Eileen Hull) and some card from old packaging to create my notebook with. And not to forget about another "must have" that I used - the awesome Tim Holtz idea-ology "Type Lower" cling foam stamps!


But let's get back to the start:

Often I get inspired by some scrap paper or left overs from previous projects on my desk and this time the idea for making another little book emanated from using up the washes and paint residue on my palette that I used on this project HERE


I tend to use large white sheets of paper when painting objects and taking pictures for tutorials as they do not reflect the light like the craft sheet often does. It also shows the colours more clearly.

So I already had a lot of marks and other random patterns on my paper, but then I also simply turned over my plastic palette that still held the left overs from several paint washes and let the paint drip on the paper. Even the paint that remained on the edges of the palette during this process was used too by dragging the palette's edge across the paper in various directions. I didn't spend a single thought on where to add paint and in which direction. I just tried to use up all of it. ;)

I ended up with a beautifully randomly patterned paper and loved the colour combo - so I glued the dry sheet to some cardboard (left overs from packaging) using matte DecoArt Decou-Page.


As you can see the dry card tends to warp. But as I was going to use two of these for each cover that would not be visible anymore once both pieces would be glued together.

I die cut four cover pieces and then decided which ones to use for the covers' out- and insides.


I added a beautiful industrial style pattern to the covers' insides using a Carabelle Studio stamp. 


The stamped on word on the front cover was outlined with a white gel pen for better visibility.


I stacked three die cut nuts each so I had four of these and two of the large rings for the focal piece. 


Once the glue had dried I used Andy Skinner's quick rust technique and stamped on some rust texture in black archival stamping ink. I also blended the edges using a piece of blending foam.


I heat dried everything before I added a thin layer of DecoArt media Quinacridone Gold using a soft brush.


I used more Quinacridone Gold to create some beautiful drip lines on the covers.


For the book's spine I used another of Andy's quick rust techniques: I sprayed on some DecoArt media carbon black Mister and made sure I pressed the nozzle only half way down - this created lovely spreckles instead of an even mist - perfect for creating faux rust!


The dry spine was given a thin coat of Quinacridone Gold as well.


Time to assemble my book! Yay! 
I used matte Decou-Page and made sure there was enough glue added to all the outer edges so the both pieces for each cover would stick together really well and neatly. 


Then I glued the stacked and painted nuts and washers in place.


For my focal piece I chose one of the lovely persons from the idea-ology "photo booth" pictures and glued the cut out image behind the opening. I filled the inner circle to the brim with DecoArt media Liquid Glass and set everything aside to dry thoroughly (at least half a day). 


The whole note book was given a thin coat of DecoArt media Ultra-Matte Varnish to make it more durable. 


The dry focal piece was glued in place before I die cut my signatures...


...and sewed them to the spine using an upholsterer's needle and rough cord.


Done!


I hope to see you over at our challenge blog to check out my teamies' awesome projects - and to play along of course! ;) The challenge is still open until the end of the month and there are two fabulous prizes by DecoArt media and boozybear to be won - all you have to do is enter a project and be a lucky winner if random.org decides to come up with the number of your entry ;)

Hugs and happy crafting!
Claudia
xxx

Grab our badge for display on your blog!

Monday 12 June 2017

Already found your little paradise?

Do you know a place that you call your "paradise"? A place where you love to go to to forget about everyday life and stress and just be happy? Well, I hope you do - or - if you haven't already found "your personal paradise" - will find it! Everyone needs a place like this to relax, enjoy and fuel up new energy!

Or sometimes a beautiful journey or a trip to the ocean or the countryside can do the job as well.

Anyway - a little travel journal or album to keep memories of a beautiful holiday in might be what you need (or what would make a lovely gift). So if this or the little sneak peek image can lure you over to the Calico Craft Parts blog where I am sharing my latest make and tutorial today, I hope to see you over there! ;)


Hugs and happy crafting!
Claudia
xxx


Friday 9 June 2017

Metal Tag Pendants for DecoArt Mixed Media

Servus, dear creative friends from all over the world, and thank you for stopping by my blog!

I would like to invite you over to the DecoArt Mixed Media Blog to check out my latest project and tutorial that I have made for you.

You know me - I can never throw away anything - so I had some broken plaster cast left overs that I had put aside some weeks ago without any idea back then on what to use them for...and then the right moment and project came along so they found their "home"...


...on these two metal tags that I had almost forgotten about. (I know I still have to practice a lot when it comes to using moulds and plaster...but hey - as long as the "failures" can be turned into something "right" everything's fine...lol).

If you want to find out about the finished pieces simply hop over to the DecoArt Mixed Media Blog. I would love to see you over there and I hope you'll like my project!

Hugs and happy crafting!
Claudia
xxx