Showing posts with label Art Podge. Show all posts

Monday, 19 September 2016

Meet Don Consuelo!

...over at the Calico Craft Parts blog where I am sharing my latest project with you today!


If you want to know how to make your own tattooed jumpin' jack or art doll the style of the early 1900s ...

Don Manuelo, the tattooed man, German photo dated 1908:

...there's a how-to on the Calico Craft Parts Blog. I hope you like it!

Hugs and happy crafting,
Claudia
xxx


Wednesday, 23 September 2015

He/She is a ...


We all are several "persons".
I am a mother, then a wife, an artist, a friend, a sister, an aunt, a daugther...not always in the same order.

And there are days for example when I would like to be more of an adventurer than having to do my household stuff or walk the dog along the same old paths. Sometimes this feeling from inside breaks through and I end up for example  having bought a piece of clothing I thought was perfect for feeling and showing my inner adventurer's nature....not daring to wear it, because the feeling from that day has gone.

Do photographs show what we really "are"? And are we aware that we see more than a one-dimensional person when we look at photographs? I'm not so sure. And my series of four altered playing cards is an attempt to make the beholder think about the persons he sees...

 I used Distress stains and Distress marker ("ground espresso"), designer papers, ephemera, washi tape, used and dried tea bags, DecoArt Decou-Page,  DecoArt media black modelling paste and stencils and word stickers for my four cards. For a larger view click on the images.


Thanks for stopping by!

Hugs and happy crafting,
Claudia 
xxx

Saturday, 15 November 2014

Steampunk Destinations

Servus and welcome to the mid-month reminder for our challenge over at SanDee&amelie's Steampunk Challenges!

This month the team travels to various


and we are eager to learn about your favourite places or sights you love(d) or would like to visit!

Just hop over to our challenge to find out about my teamies' "hot spots"! Team B have prepared another bundle of inspiration for you and if you haven't seen the makes of team A yet, I highly recommend you do so too!

I found some old photographs from my ancestors which show a group of people hiking a glacier. I don't know who they are (or if they show some great-grand-uncle or -aunt or great-great-grand-parents) but I love the adventurous feel there is to these wonderful pictures!

I decided to make them the focal pieces of a kind of scrapbook-lay-out-journal-thingie and had a joyful play with various media like acrylic paint, distress inks, DecoArt white gesso, DecoArt Metallic Lustres, die cut cogs and gears and stamped ephemera.


I also used a portrait of my great-great-grandfather (left bottom corner) and a colour copy of my great-great-grandmother's old passport.


She was the beautiful lady whose photograph I used on this tag. (the portrait on the charm is an ancestor of mine too...possibly her mother or her mother-in-law...sadly most of the photographs of my ancestors do not say who is who).


http://vonpappe2.blogspot.co.at/2012/06/vorfahren-ancestors.html


But back to my actual project and some more close ups:


I smudged on the white Gesso with a palette knife. It always helps bring a lot of different elements together and gives designs a great time worn and weathered look.


The cogs and gears were die cut from heavy black card and coloured with DecoArt Metallic Lustres and other guilding waxes.


Distressing the edges of the glued on ephemera and the copies of the old photographs added to the weathered look just perfectly. Stamped texture with script and label stamps helped create more depth.


I hope you like my project and leave my place inspired to create something steampunk-ish - maybe even for our challenge...;)
 Thank you very much for stopping by! Hope to see you over at SanDee&amelie's Steampunk Challenges!

Hugs and happy crafting,
Claudia
xxx


Tuesday, 12 August 2014

Crack Those Flowers! (a DecoArt Tutorial)

Yes, you are right....It really was about time that I shared a new DecoArt tutorial with you....

...so here we go:

some of you may remember the fantastic blog hop the International DecoArt Design Team were invited to by Stampendous some weeks ago. We were lucky to get some of Stampendous' fabulous Fran-tage embossing powders (one of my favourites) and I used some of them on this project alongside the wonderful new media line from DecoArt that has a lot of fantastic new media for you to conquer new and yet unknown creative territory with!


I created a lot of crackle and heat embossed goodness on this one and hope you will have fun creating your own ;)


Materials I used:


- DecoArt media Antiquing Creme "Carbon Black"
- DecoArt media Fluid Acrylics "Primary Cyan" and "Interference Gold"
- DecoArt Americana "Zinc"
- DecoArt Traditions "Raw Umber"
- DecoArt media Crackle Glaze
- DecoArt Weathered Wood Crackle Medium
- DecoArt Dazzling Metallics "Worn Penny"
- DecoArt matte Decou-Page

- a small wooden box
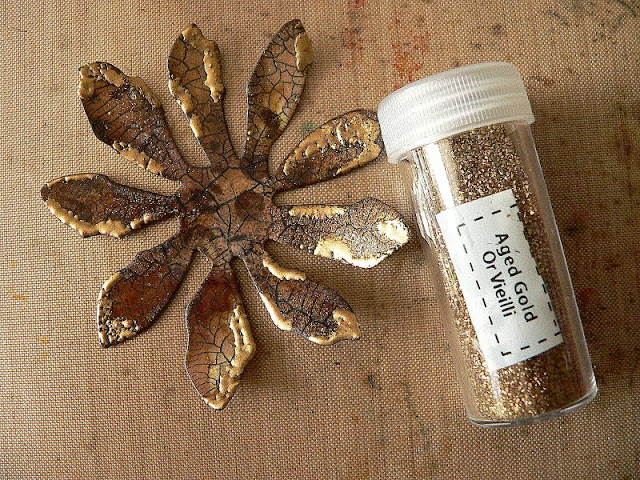
- Stampendous Fran-Tage embossing enamels "Aged Teal" and "Aged Gold"
- embossing pen
- heat tool
- Ranger Distress ink "Walnut Stain"
- Idea-Ology "Linen Ribbon"
- two glass beads
- thick thread
- hand drill
- soft brush, baby wipes, blending tool, palette
- flower die (I used the Sizzix Tattered Florals Alterations die)
- die cutting machine


Steps 1 and 2

I used some left overs from various backgrounds I did with background stamps and Distress inks to diecut my flowers from, but you can use any background left overs you like - as long as the aren't too detailed in texture, so the fine crackle we will add later will show really well!


I blended the edges with DI "Walnut stain". Then I took a soft brush and gently applied a layer of matte DecoArt Decou-Page as a sealant.


Step 3 


Once the Decou-Page had dried I brushed on a coat of DecoArt media Crackle Glaze and let dry naturally. The Crackle Glaze is self levelling and produces very tiny cracks when applied rather thin and larger ones where the coat is thicker.


You can see the cracks in the image above - but we still have to make them more visible ;)


Step 4


To highlight the cracks I rubbed some Carbon Black DecoArt media Antiquing Creme into them and wiped off the excess with a baby wipe.


Now that makes a difference, doesn't it? 


Step 5


I gave my tiny wooden box a coat of Raw Umber DecoArt Traditions and let dry. 


Step 6 


While the box sat aside to dry I heat embossed some of my flowers' edges with Fran-Tage embossing powders and enamels.


Step 7


The smallest flower received a treatment with DecoArt media fluid acrylics "Interference Gold".


 I love that stuff as it gives a subtle sheen to your make that is only visible when the light hits right.


Can you spot the difference? 
Looks awesome, doesn't it? 


Step 8


I painted the backsides of my flowers with DecoArt Dazzling Metallics "Worn Penny"


Step 9


I applied a heavy coat of DecoArt Weathered Wood Crackle Medium to my painted box and let touch dry. 


Once the Weathered Wood had dried to the touch I painted my box with a mix of DecoArt Americana "Zinc" and DecoArt media Fluid acrylics "Primary Cyan" (to match the colour of the embossing enamel).


And when that had dried I brushed on some more "Interference Gold".


I love how the colours from the Interference range still let the original base coat shine through but show and shine when looked at from the right angle.


 Step 10 


I painted a piece of linen ribbon with DecoArt media "Interference Gold" and glued it to the lid using matte DecoArt Decou-Page.


Step 11


To fix the assembled flower to the lid of the box I used a small drill to prepare the hole.


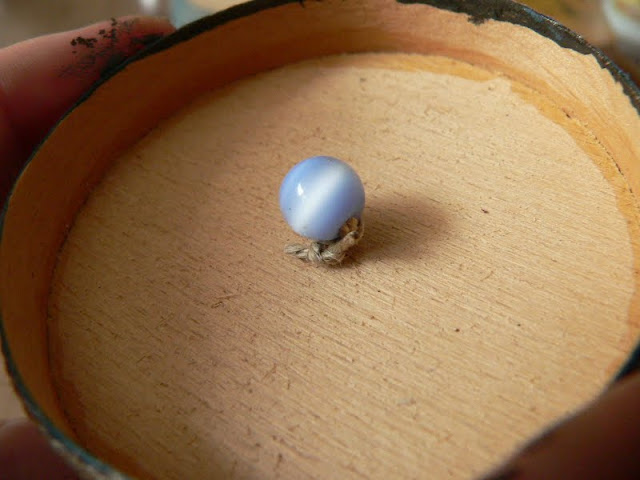
The flower leaves got punched too and a piece of rough thread was threaded through them from the top together with a glass bead of matching colour as the flower's center.


To keep the flower in place I threaded another bead from below and fixed the thread tightly with two knots.


Done!


Some more close-ups so you can see all of the crackle and embossed goodness:


I hope you liked what you saw and that my tutorial manages to encourage some of you to give the fantastic new DecoArt media line a try!!!!


Hugs and happy crafting,

Claudia xxx


Tuesday, 15 July 2014

A "Stand Alone Tray Canvas" Invention

Servus, dear crafting visitors, readers and followers old and anew!

As you may already know the theme for July's challenge over at SanDee&amelie's Steampunk Challenges is


Inventions&Inventors.


I still am not fully back on track and struggling with trembling hands and ideas only seldomly hitting my mind (and then most of the time not working out)...but after several weeks of procrastinating I finally managed to come up with a project I dare share with you and call an "inspirational piece".


As I simply couldn't manage to focus on a project long enough to make it feel like "the right one" (still being very nervous and hectic most of the time) I decided to get out my stash and browse my collection of designer papers - hoping that this might spark an idea for a project I would find worth creating. It was some sheets from various Tim Holtz paper stashes and a copy of a students booklet about electrical engineering I found at a flea market that finally did the job for me.


I found an old shoe box and used its lid as a "canvas" (as it turned out to fit my copy perfectly). I covered it with that copy (using Mod Podge as a glue) and then gave it a heavy treatment with Distress stains of all sorts.


I held the lid upright during the process so the Distress stains would create traces from running droplets. I also added some DecoArt Carbon black Traditions acrylic paint through a Red Lead numbers stencil  and stamped some stitching onto it.


Box feet and handles (from Agnieszka's fabulous Retro Kraft Shop) were mounted to the lid using tiny brads. Washi tape was added here and there for more detail. I also sprinkled diluted white and burnt umber acrylic paint onto my "canvas" using a soft brush.


Some idea-ology, the lovely Prima light bulb (which I got as a surprise goodie from Agnieszka) and the alpha tiles were glued in place using DecoArt matte Decou-Page - followed by some more clockfaces (also from Retro Kraft Shop) and a brad. A chipboard gear was cut into pieces and given a coat of "Iced Espresso" DecoArt Metallic Lustre before being added to the project.


I applied some of the brand new and fantastic DecoArt media "Crackle Glaze" through a dots stencil from Red Lead with a soft brush and let dry naturally. Then I rubbed in a mix of "Patina Green" and "Carbon Black" DecoArt media Antiquing Creme and took off the excess with a damp cloth to highlight the creases.


I absolutely adore this stuff! It was partially added with some more spots here and there...


The gorgeous wind up tin toy birdie was a fleamarket find and finally found its perfect new home next to one of the fab halogen bulbs from Angieszka's Retro Kraft Shop!


The lovely box feet are from her store too!


Some Prima embellishments and distressed paper edges were added to create a lot of texture and depth.


So "who invented Steampunk" then? Science fiction writer Jeter only invented the name - but it is the works of Jules Verne, Mary Shelley and others who show that huge fascination there is for us all to the relationship of mankind and machines ever since machines were invented and started taking over what was once a human's job.


So Steampunk is kind of an expression for this ongoing search and dialogue between us humans and the machines we invent. I am not surprised that this obiquitous matter has found its way into a whole new art genre! Art is about asking questions, exploring, creating possibilities and imaginative answers. Where does fiction end and reality start? Where is our place in a world full of machines?


Steampunk is so much more than just a fun thing or simply putting gears and cogs onto stuff and canvases! But I definitely had a lot of (pure and simple) fun creating my "Steampunk Stand Alone Tray Canvas" ;)


I highly recommend you hop over to our challenge blog to find out what my teamies have in store for you (a lot of goodness this is) and visit their blogs too for the full injection of mojo! 
I hope you enjoyed your visit and leave my spot inspired (so I can see your fabulous projects entered to our July challenge soon! Yay!)

Hugs and happy crafting,
Claudia xx