I have finally managed to take the time to create my own little haunted manor! Yay!
I think I am not the only one who fell in love with Tim's "Village Dwelling" and "Village Manor" dies at first sight. ;) These are just so brilliantly designed: with just one roll through the Big Shot you get all the pieces you need to create a little gorgeous house. And the addition of the Village Manor die is all you need to take your little house to the next level and turn it into a manor - I just love love love this! I also had to help myself to the genius "Village Rooftops" die that provides me with three different types of roof tiles!
With these plus Tim's "Brick Wall" and "Cobblestones" Sizzlits dies I had all I needed to create the Village Manor of my dreams! ;) And it was very easy to be honest. There's a list of the number of parts needed and steps instructions on how to build up the house and tower on the backside of the Sizzix packagings!
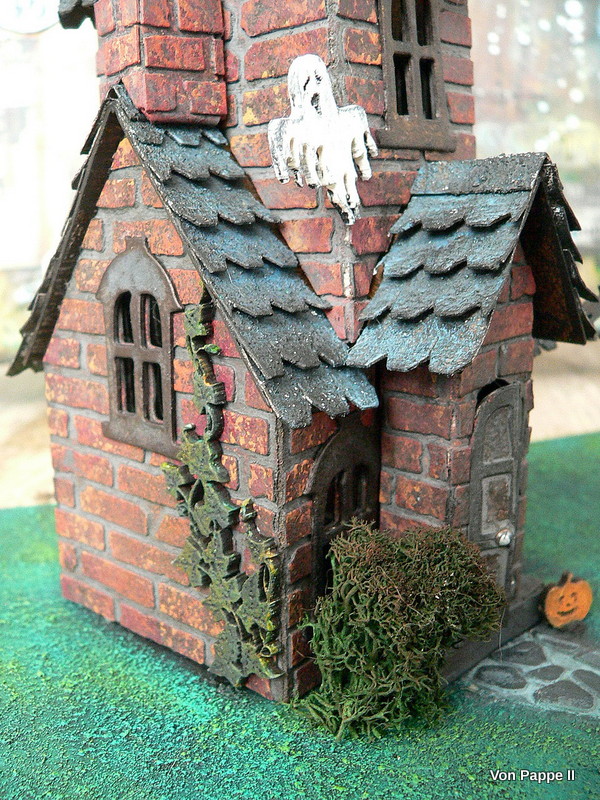
I just love how "real looking" the brick wall turned out! It was a lot of fiddly work to get it done, but soooo worth it! (and a very meditative thing to do too ;)
I die cut the parts I needed for building the house and the manor's tower from heavy cardboard. I love to use left overs from packagings for this. It's sturdy - and cheap! ;)
Then I die cut two strips of Tim's "Brick Wall" and glued on each single brick separately.
I used tacky glue but next time I will rather use matte medium. I also found it helps a lot to seal the painted (and dried) brick walls with matte medium so the bricks don't come off when wiping back paint from added washes! Ah well....I'm still on a learning (and experimenting) curve with this ;)
To create the front door I die cut two more window frames from the Village Manor die...
...cut off the parts like shown in the picture below...
...and put them together with two tiny half pearls (as door knobs) for my door.
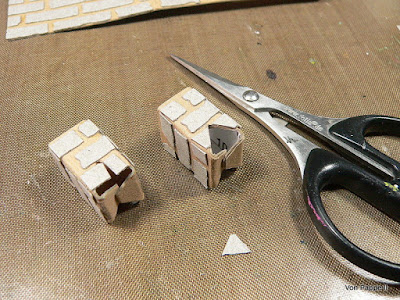
Building up the bricks on the two chimneys was especially fiddly. I simply glued longer bricks across the sides with the V-shaped openings and cut off the excess once the glue had dried.
I did the same with the tower that sits on top of the roof...I simply glued the bricks first and then cut off the excess where the V-shaped openings were.
To paint the brick wall I simply dabbed on some dark brown, red, orange and dark yellow wet on wet using an artist's sponge but you can as well use the cleanly and easy to use Distress paint dabbers. Simply layer the paints until you are content with the look. Once the paints are dry, seal them with some matte medium (I forgot to do so, which caused some of the bricks to nearly come off when wiping back excess paint from the wash that was to follow). Heat dry or let air dry.
Then I added a wash of dark grey acrylic paint. Wash means that you add water to dilute the paint. Then spread it with a wide soft brush quickly across the brick walls. Work section-wise so the paint does not dry, because once it is applied you quickly need to wipe off the paint from the bricks with a baby wipe or soft cloth. This way the paint only remains in the crevices between the bricks and visually works as a "joint compound". The wash will still darken your bricks...so don't worry about using bright reds and oranges!
I am sure I would have got a brighter result if I had not forgotten to seal the painted bricks with the matte medium. But hey - as it was meant to be a haunted mansion, a bit of "darkness" was more than okay.
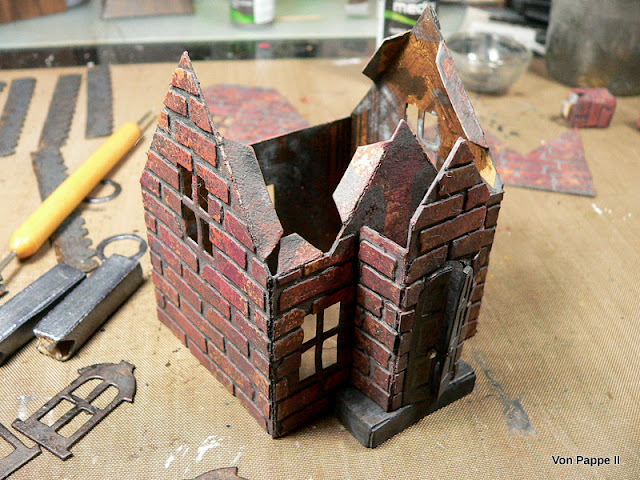
Time to "build" my house.
As you can see I also painted the backsides of my die cut house parts with a dark brown for a darker look (and for hiding any printing on the packaging left overs in case it could be seen through the windows).
Looking at the primed roof plates I think the paint streaks would also look good on a different kind of house type. Maybe a shed in a forest...but of course I wanted to have beautifully textured roof tiles for my mansion!
So I die cut 25 strips using one of the three rooftop styles from the Village Rooftops die (which was quite close to my estimated number of strips needed for a mansion...I found I needed 21 or 22 in the end). I gave them all a priming with texture/grit paste that I stippled on with an old and worn bristle brush. I let the texture paste dry thoroughly so it wouldn't come off during the next steps.
Then I stippled on a mix of black and dark brown acrylic paint and let that air dry as well. (Maybe I will use spray paint next time because it is much quicker and also makes sure you do not miss tiny spots).
To finish off my rooftop strips I dry brushed them with a mix of shabby white and dark blue heavy body acrylic paint. Dry brushing means that you use a very soft wide brush and only dip its very tip into the paint, brush off most of the paint on a dry kitchen towel and lightly brush over the raised areas of the textured roof tiles. This way you just add very little paint to only the raised areas - so the dark priming still remains visible but the texture gets highlighted beautifully.
If you happen to find that your result is too bright you can simply tone everything down with another wash of dark grey acrylic paint or also dry brush some black paint on top.
The spikes for the roof top were given a coat of silver paint and once that had dried I dabbed on some black paint here and there to tone them down. I used a soft cloth to dab off any paint where I had added too much. I did the same with the metal chimneys and circle window frames.
I used mica sheets for the windowpanes, but also asked for alternatives in the Tim Holtz Addicts facebook group (which is a nice spot with helpful people to meet, share and discuss all things Tim). Some said they use acetate that they colour with alcohol inks, transparencies or frosted panels. Loads of beautiful options there...
So before I glued the finished mansion's roof top in place I glued the mica sheets behind the windows. You see that most of the sheets have the same shape. That is because you can first cut the needed shape from your mica tile (I used scissors but you can also die cut mica) and then used my finger nail to split it into several thin layers. The thinner these are the brighter the tint of the mica.
You can see the light reflecting on the mica in this picture...
I went over my finished mansion with some more dry brushing with black arcylic paint because I thought the colours still didn't look dark and spooky enough in some spots. But then I was done and my Haunted Mansion was ready to be spooked up with some ghosts, spiders, pumpkins, bats and ravens....yay! I am really REALLY happy with how my first try on Tim's gorgeous Village Manor turned out! And I can see sooo many variations that are worth being tried out! And maybe my niece will want to create her own haunted mansion sometime....that would be great fun too!!!!
If you want to learn more about the setting I created for my haunted mansion, simply click HERE.
Well, I guess that's more than enough talk for now....here come the close ups and views. I hope you'll like them! Thanks so much for stopping by! And happy Halloween crafting! (I can't wait to see your spooky mansions, haunted houses on hills and villas....!)
Claudia xxx
xxx


Looooooove it ! Hugs
ReplyDeleteWhat an AMAZING project!! Love all the details... thank you so much for step by step tutorial, Claudia.
ReplyDeleteGENIAL - ein einzigartiges Haus!
ReplyDeleteIn die Hütte ziehe ich sofort ein, ruf doch mal den Makler an ;-)
ReplyDeleteund ein ganz dickes Dankeschön für das ausführliche Tuto, grandios!! LG Kerstin xxx
Spectacular haunted Village Manor. Absolutely spectacular. I don't think I have the Tim Holtz brick strip, but I do have the stone one and I can't get it to cut cardstock. Obviously I am doing something wrong. The ghosts - how did you make the ghosts? They are wonderful as well. Again, what a great Manor!!
ReplyDeleteThank you so much, Lucy! :)
DeleteThe Sizzlits dies are a bit tricky to use...I know. Try different cardstock as an additional shim for your Sizzix sandwich. The ghosts and other wood shapes I used to spook up my manor are all Calico Craft Parts. If you want to learn more, simply check the previous blog post. There's a link to the shop and the Calico Craft Parts Blog with a tuto on the decoration as well!
Hugs,
Claudia x
Claudia, this is absolutely amazing. And your instructions are so clear and complete that I am emboldened to try it. I've owned these dies for some time and haven't yet used them, but here I come! I think I'm using a stencil for the bricks though! :)
ReplyDeleteThis really is a fabulous manor Claudia, I love the brickwork and the roof is amazing! Great tutorial too! xx
ReplyDeleteI just had to pop in and tell you how much I love this house!! I’m in love with the bricks and the roof tiles, what an absolutely stunning creation
ReplyDeleteHugs
Donna xx
This is totally GENIAL and even more (we would say "géniallissime!!!!!!" in French).
ReplyDeleteMerci Claudia, j'ai adoré le voir et aussi les détails sur le blog Callico crafts!!!
Et merci pour le fabuleux tutorial aussi...
Hugs
Corinne xxx
Amazing! What a fantastic creation. I am just blown away with all of your detail.
ReplyDeleteAn amazing creation! Thank you.
ReplyDelete