Tuesday, 5 November 2013

Colour Explosion - Try It On Tuesday

Servus!!!

Time to start a new challenge over at Try It On Tuesday! This fortnight we want to see some

Colour Explosions

which means you should use bright or seasonal colours for your makes.

I had played around with Distress paints and Tim's marbleing technique as I recently added some more colour tones to my stash. The "explosion" of colour was definitely intense - but then I didn't know what to use this background for. I knew - if I made  a tag I would cover up a lot of that background (which I actually did not want to this time).

Finally I decided to create two ATCs.


As the background was the thing I wanted the focus to be on, I only added some stencilled words done with DecoArt Metallic Lustre "Gold", stamped leaves (in black jet archival) and stencilled stripes (using one of the new Tim Holtz stencils and distress ink).

To make the gold letters pop out a bit more, I gave them some shading with a black felt tip pen. Done.


I hope you like them and look forward to seeing your personal colour explosion entered to our challenge soon ;)

Hugs and happy crafting,
Claudia x

FunwithATCs - a Round Lot and a Good Bye

Hello and welcome back, dear readers and crafting friends!

It's time for a new challenge over at FunwithATCs and as it is the 100th challenge the theme is

100


But not only do we celebrate challenge No. 100 (and the fact that you have been with us for so many challenges - entering such a lot of fantastic ATCs) - we also have to say "Good Bye!" as Caro, our blog owner, decided that she can no longer run the blog as there are a lot of new (and good) things in her life that use up all her time and effort.

We hope you will play along with us one more time and enter some fab ATCs for the "100" jubilee! Thank you to all of you for making FunwithATCs such a fab place by entering your awesome art! Thank you, teamies, for all the fab inspiration and comradeship! I loved creating alongside all of you talented bunch!


Hugs and happy crafting!

Claudia x

Monday, 4 November 2013

"Dia de los Muertos" at Tag Along

Good morning, dear crafting friends!

I thought I would share a quick make from yesterday evening with you - a tag for Tag Along's challenge "Dia de los Muertos".

I love the theme and this very special kind of folklore art (and especially what artists like Michael DeMeng for example make of it) - so I HAD to join in and give it a try myself.


The tag is made rather simple this time: I stamped a skull image with black jet archival ink and did some colouring, handwriting, doodling and painting with felt tip pens and white acrylic colour and a detail brush, some additional blending with DIs and a stamped border.


Hope you like it!
Thanks for stopping by and happy crafting!

Claudia x

Friday, 1 November 2013

Our Creative Corner - the November Challenge

Hello and "servus" again, dear visitors!

Not only have I brought to you the new challenge over at SanDee&amelie's Steampunk challenges an hour ago today (please scroll down to the previous post to learn more), but I also have the special honour of hosting this month's challenge over at


and I decided to do one of my all time favourites ;)
There are also some important news on the challenge blog that you might want to check out ;)


This month we want you to play

Steampunk Tic Tac Toe 

with us!

All you have to do:
 choose three ingredients from the diagram 
in a straigth line (horizontally, vertically or diagonally) 
and use them for your Steampunk make.


I decided to go for the middle vertical line that says "gears - texture - transport" and alter the cover of a sketchbook or art journal.


I played around with stencils, dry brushing or dripping acrylic colours onto various surfaces, decorating paste, colour sprays, metallic rub ons, white gesso and opaque white embossing powder, some die cut gears and metal embellishments to create a lot of yummy texture, which is what I really love and enjoy to do.

It seems my team mates over at Our Creative Corner enjoyed playing around with Steampunk elements too - just hop over to the challenge blog to see their awesome creations they made for your inspiration!

But now onto a bit of info about the making of:

as I recently fell in the shower and hurt my side (and ribs, which makes moving rather hurtful), I skipped taking photos during the process this time - I hope you bear with me for just providing you with a single "before"- picture and more images of the finished project.

This is how the cover looked at the mere beginning: DecoArt raw umber acrylic paint is being applied to the card and the areas where I glued on some die cut gears or used some decorating paste through a stencil.


I prefer stippling the colour onto the surface to brushing it, as I love the texture the bristle brush creates. I hope you can see it in the picture...


The panel with the stamped on and heat embossed image of a zeppelin is a scrap from a glossy cardstock which I had treated with alcohol inks for an earlier project. I fixed it to the cover with four tiny brads.


The word "art" was applied to the surface using a stencil, Deco Art acrylic white gesso and a bristle brush.


"Create" was applied using a stencil and DecoArt Metallic Lustre "Copper Kettle".
I also gave the cover some strokes of metallic rub on using my finger tips and pressing down firmly while dragging the paste in vertical lines.


I sprinkled some Mr. Huey's "gold" onto the cover for a bit of "bling" to pop out from the warm, dark colours.


I love the texture and the white letters popping out - thus having some texture AND contrast - two elements that go together so well!


The traces of colour running down the cover were made by diluting acrylic colours to not too thin washes and holding the cover upright and pressing the heavily loaded brush on top to make the fluid squeeze out and run down the surface.


I hope that you like my altered journal, have a lot of fun playing Steampunk TicTacToe with us and enter your awesome make with our challenge soon! See you there! ;)

Hugs and happy crafting!

Claudia xx

I enter this make to the following challenge/s:

http://www.simonsaysstampblog.com/wednesdaychallenge/simon-says-anything-goes-2/

http://www.simonsaysstampblog.com/mondaychallenge/challenge-anything-goes/

http://craft-roomchallenge.blogspot.co.at/2013/10/stencils-and-masks_29.html (dots and gears stencils used)

"Balloon, Balloon!" - the November Challenge at SanDee&amelie's Steampunk Challenges

Welcome back to another edition of SanDee&amelie's Steampunk Challenges! This month we want you to create something with the theme

"Balloon, Balloon!"

It is totally up to you how you interpret the theme and whether you create a 2D or 3D project - as long as it is Steampunk and the theme is visible with your projects (and we don't have to search for a relating item with the magnifying glass *lol). 

I had a lot of started projects for this one that went into the bin but finally I found myself messin' around with Distress inks, wrinkle free distress technique, creating stamped layers and textures... I LOVED it! 


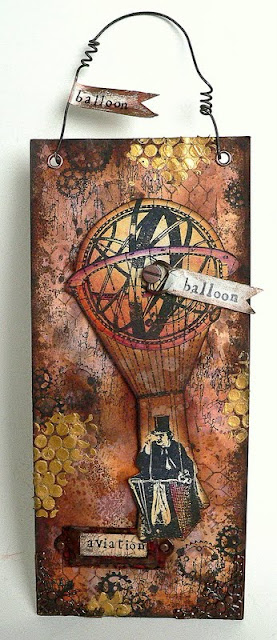
I made a wall hanging from some manila card which I glued onto a piece of heavy cardstock. 


But before glueing the layers together I treated the manila card with the Tim Holtz "Wrinkle Free Distress Technique" (something which I never get tired of doing) using Distress inks "rusty hinge", "vintage photo", "pumice stone" and "walnut stain". 


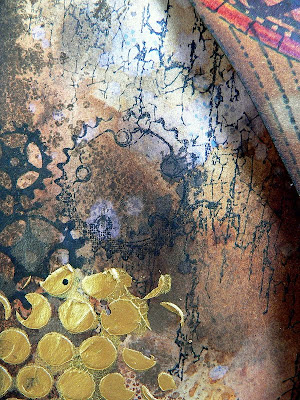
I added some gold texture paste dots with some areas and also some stamped gears images here and there. 

I also stamped some crackle texture onto the hanging using the fab Donna Salazar "Crackle" stamp. 


The balloon driver is a stamp from the wonderful "FrenchFlight" collection from
Artistic Outpost. As it has no balloon on top I combined it with the mechanic globe stamp from the Papermania "Chronlogy" collection.

I stamped it with black jet archival ink, coloured the image with crayons and cut it out as I wanted to glue it to the background using thick foam sticky pads to add some dimension.


The label was treated with alcohol inks and its insert was given some crackles by giving it a medium coat of clear rock candy Distress crackle paint and some rubbed in Distress ink "walnut stain". 


For the hanging I bent some black wire into shape and attached it to the card in which I had punched two holes and inserted some rivets. 


I also added two pennants which were stamped on using my HeroArts "letter stamps" and given some strokes of DecoArt Metallic Lustre using my fingertips.

Some metal embellisments with the lower corners - done! Hope you like it and get inspired to do your "Balloon, Balloon" - project for our November Challenge over at SanDee&amelie's SPC very soon ;)


Hugs and happy crafting!