Showing posts with label Hero Arts. Show all posts

Monday, 28 April 2014

CC3C - Challenge 01 - Paint Marbling

Servus, dear readers, crafting friends and creative folk out there!

Today I finally managed to do my first ATB (Artist Trading Block). I haven't got the much celebrated Eileen Hull die, but it wasn't too complicated to create my own template as it just needed a bit of measuring, calculating and drawing.

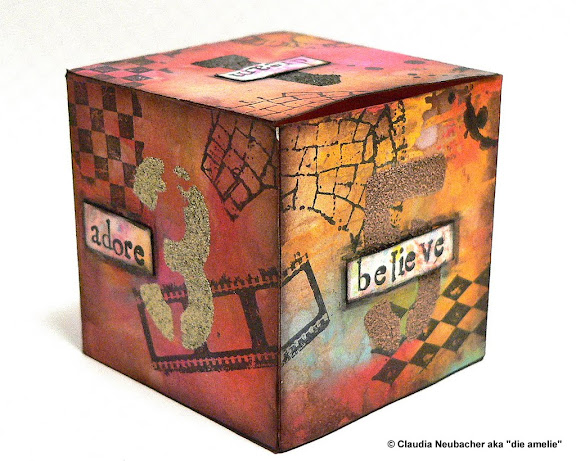
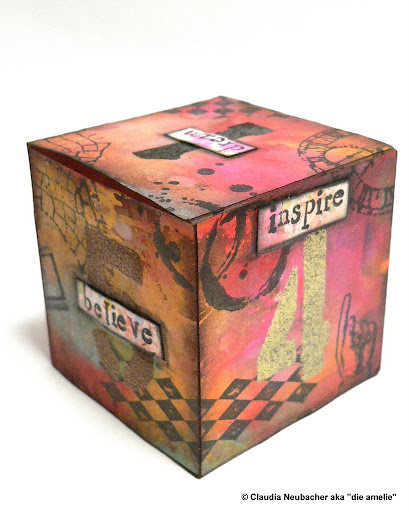
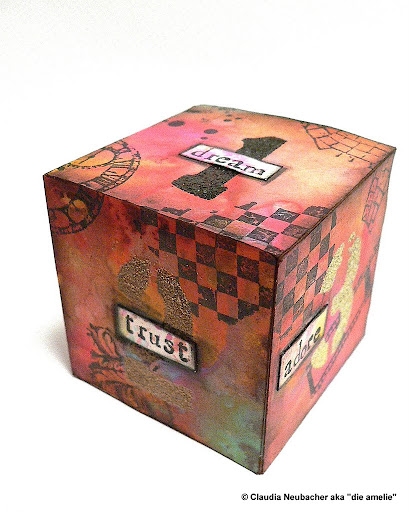
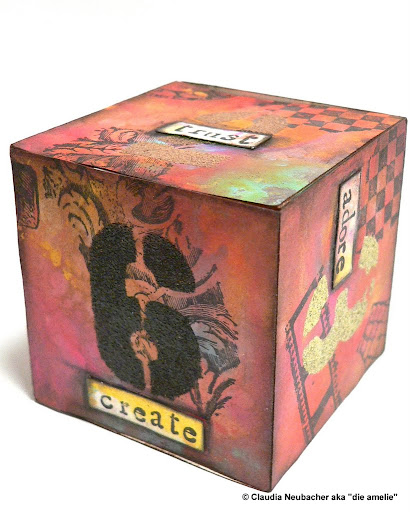
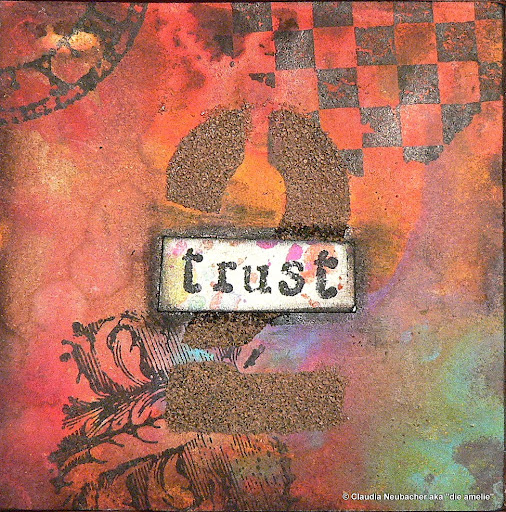
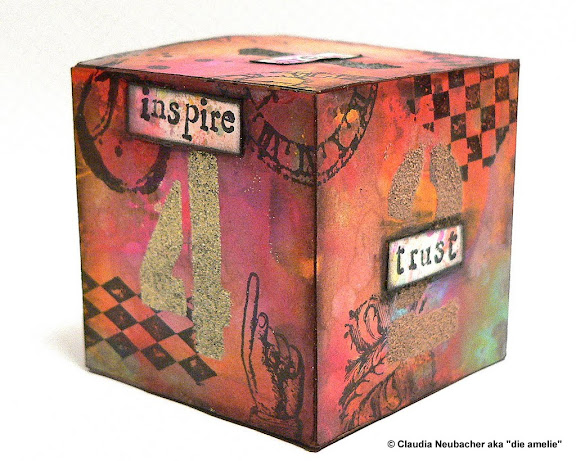
I love the distress paint marbling effect and I thought I would use it on my first ATB and see how heavy distress paint marbling in vivid colours might look like when displayed as a cube...

...and as the fabulous "Compendium of Curiosities Challenge Vol. III" - hosted by Linda Ledbetter - just started, this was the perfect occasion to join in the fun!


There's a prize sponsored by 

http://www.inspirationemporium.com/

this time! Yay!


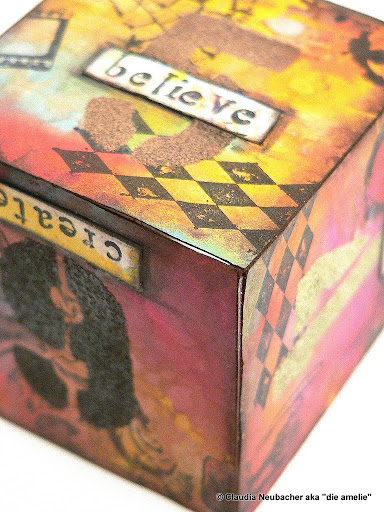
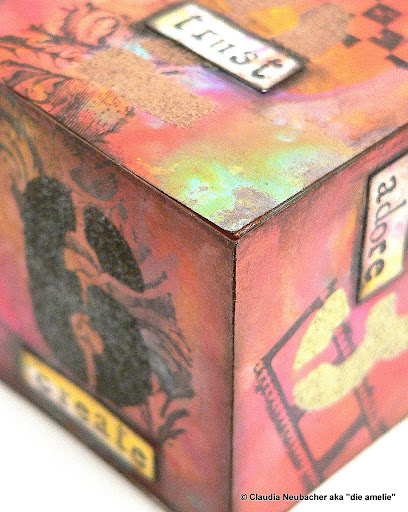
As it is a cube I thought I might create an "artist's die"...a die to roll in case of loss of artistic confidence or mojo. It tells you what to do to get back on track ;)


This time the distress paint marbling went really well and I was excited to watch the distress paints do their magic on the once white card!


It was fun fiddling with the right sides to put together while stamping so the designs would run around the corners and edges!


The numbers were heat embossed using one of the TH stencils and various distress embossing powders (walnut stain, brown puffs, tea die).


Before I put the cube together I blended all edges with DI "gathered twigs". The six encouragement words were stamped onto a scrap on which I used the left overs from the paint marbling, cut out and glued in place. I blended them in with Distress markers.

I had a lot of fun messing around today and I hope a bit of it shows with my encouragement artists die! Thanks for stopping by!

Hugs and happy crafting,
Claudia x

Tuesday, 1 April 2014

With a Song in Your Heart - April Challenge at OCC

Alison (aka butterfly) is hosting this month's challenge over at Our Creative Corner and of course she chose a word related theme - this time connected with song lyrics you are to use and display with your creations:

With a Song in Your Heart!

I have always been very much drawn to songs because of their lyrics and there is an album I really never tire of listening to: Nik Kershaw's "15 minutes" from 1998. 
Honestly I really couldn't decide for some days which song to choose for my DT project as they are all together just brilliant observations on daily life issues and "being too human" in many situations, relationship problems or even philosophical reflections on life in general and the journey we are all on. 

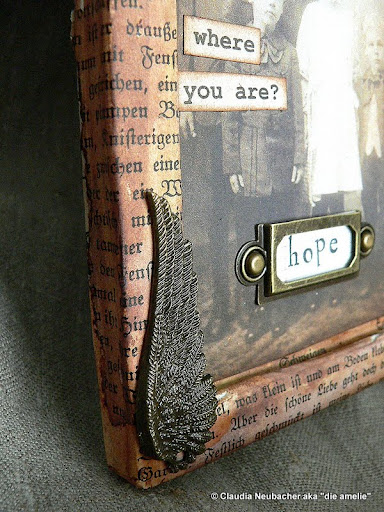
I finally decided to go for "What Do You Think of it So Far?" as it matches some of the new Tim Holtz "Found Relatives" images so perfectly.


The song's chorus says 

"What do you think of it so far?
Do you wonder there might be something better?
Do you think about where you are?
Do you wonder where you're going?"
and these are simply the most essential questions there are to life, aren't they?


You will find that I didn't put the single phrases in their order of appearance in the song but I assigned them to the appropriate stages of life shown in the pictures. Which gives the questions even more meaning as if I would have done one after another.


The words in the metal labels at the bottom of each compartment on my tray are meant to express some outer or more general view on that stage instead of the one person's view who's life stages are shown. I believe that we are never completely free from seeing "us" and "our lives" from society's (or other peoples') point of view too. Which sometimes makes it hard for us to stay true to our very own believes and goals.


 Taking time to rethink our lives can be a good thing! And I am definitely not talking about quarrelling with all the bad things that happened to us in the past. I am sure we all will find things we are proud of or which made us happy and things we'd rather leave behind if we looked back at our journeys so far. Maybe this helps with recognising that mistakes are an essential part of the process and of life in general. We are meant to make them so we can learn from them and find out about ourselves: what we really love to do and where we are only following a call that hasn't been ours from the very start. We don't have to be perfect and we will never be - but we can try to find the perfect balance between our very own duties and dreams, wishes and responsibilities, between loving and letting go.


I know - the question seems rather selfish or even harsh when seeing it combined with the great "quest" of successful marriage ;)
But we have to make a lot of decisions during our lives that we have (or at least think we are meant) to stick with for almost the rest of it. So wondering if there might be something better often prevents us from getting lucky I suppose...waiting for the better thing to come and letting slip a good thing from our hands.
But "love" makes this question vanish, doesn't it?


I remember my son asking me about two years ago why he was born at all and what he is meant to do, fulfil or become "here on earth". The one big question above all the others! And rather difficult to answer....
I told him he was here to make of his life everything he thinks might be good for him and which will make him happy and feel meaningful. And that mankind is here because of some kind of "accidental" evolutionary process (just like all the other creatures and plants on earth) and that it is not our duty to live up to some unreachable higher noble goals or having to follow any of society's actual ideas of living a "successful life".
Well...he surely didn't like my answer as it didn't help him then, but it was the best I could come up with and I believe that I said the right thing. ;)
I really hope for my son that he will be able to live a life that will make him happy!


 Children still are able to trust. And have to have someone and something they can trust in. So the question to "do you wonder where you're going?" might rather be a "no" at that stage ;) When we are children we feel the world is lying at our doorstep and just waiting to be conquered! (Sadly we loose most of this feeling almighty and being great conquerors while growing up).


I made my tray from thick corrugated card (that was a left over from the packaging of our new kitchen's fridge and furniture) and old book pages scraps which I glued over some washi tape using matte DecoArt Decou-page glue and sealant. After all had dried I gave the tray some washes with Ranger Distress stains "vintage photo", tea dye" and "antique linen".


The chorus was printed out on heavy copy paper,  blended with DI "vintage photo" and glued in place. The metal labels were fixed to the images before I glued them into their compartments.


 For a finish I embellished my tray with some goodies I mainly got from Sandra (SanDee1899) and Brigitte (coutureuse)! Thanks again, girls, for all the lovely stuff you sent me! xoxo. I chose of course embellishments that partially are meant to work as symbols with the images and texts they are combined with.


The DecoArt Decou-page holds them  in place perfectly well! I used the gloss version for the fractured doll to add some porcellain effect to it (as it was a plaster done in a mould).


I hope you like my tray and give Nik Kershaw's fabulous song (or even album) a listen! Hope to see you entering the "With a Song in my Heart" - challenge at Our Creative Corner soon! I will love to hear some new songs and see your interpretations! There is a prize to win, the chance to become the challenge winner and therefore get a guest designers spot or the chance to make Alisons's Top3! So get your favourite songs out and start creating! :)

Hugs and happy crafting,
Claudia x

Saturday, 1 March 2014

Let's Get Scrappy !

UPDATE (March 4th): due to some unforseen problems that have to be cleared the OCC is shutting down for the month of March. Sorry to all players, who already have worked on a project to enter the challenge. The events that caused this time out were unpredictable...but that's how life usually just "happens", isn't it? 

I hope you enjoy getting inspired by the DT makes anyway and also have enjoyed coming here for some information and/or inspiration. 

See you at OCC soon.
Claudia x


Hello and welcome to another edition of Our Creative Corner's challenges!
This month Linda, the Funkie Junkie, is your host and she wants us all to

Get Scrappy!


"Use your scraps and left overs from previous projects, pieces of paper, scraps of ribbon, embellishments made and never used.  If you are like me and can't bear to discard all those yummy scraps, you'll have a variety of possibilities to use for this project.  Let's put some of them to use!"...

...Linda says and that's exactly what I did on this birthday card. Yes, you read that right - I made a birthday card.... being no card maker at all I was suprised how much I love the outcome of this one (and that is has not a single fingerprint on it too. Yay!).


I am sure some of you can remember the project, where my scraps originate from. I really hardly ever throw away scraps... don't ask me why. I guess it has something to do with my love for paper in general...and for the traces left on it.

So I had this pile of lovely torn and cut off scraps and paper strips and I also remembered how much I loved the colour design when I originally painted the paper... so I decided to use it again.


After playing around with some of the coloured strips and the torn book page piece, everything found its place and I glued all my elements to the white card.

I added some stamping as I had done on the other project - the lovely feather stamp from Red Lead seems to have become one of my favourites (as has the numbers stamp from Kaisercraft).


The label stamp and die were a gift from dear SanDee1899 and I really love it as it gives sentiments a wonderful frame and makes them focal points on every make ! Thank you so much, Sandra! xoxo!


It's a clean and simple design, but when you already have a lot of texture on the elements you use, you are better off with working with a more static design. So I focussed on verticals and horizontals only, which makes the traces of the acrylic colours and the shape of the stamped feather image more prominent.


This month our sponsor at Our Creative Corner is Tando Creative


and you can win their prize (or become our winner, Top Talent Spotlight or one of our Top3) by joining in our challenge and entering a make that follows the challenge theme and general challenge rules properly! Can't wait to see how you use your scraps!


Thanks for stopping by and happy crafting,
Claudia x

Sunday, 9 February 2014

A Toilet Roll Steampunk Tag Album - and a DecoArt Tutorial

Hello, servus and welcome back for another tutorial for the DecoArt International Design Team Blog (featuring Andy Skinner) which I am proudly part of!


http://decoart.com/andyskinner/


Browsing the net I recently found some wonderful mini tag albums made from toilet rolls and I felt the urge to finally do one of these myself!

And as some of you might already know Meresanth from "Meresanth Krafts" has recently opened her brand new online store "Retro Kraft Shop" where she offers the most wonderful vintage steampunk crafting goodies.

http://www.retrokraftshop.pl/en/

She generously sent some more of her treasures along with my order so I could have a play with them and create a project for her shop blog - and this is the result:


It was a lot of fun to play with all the watch parts and lovely embellishments, lace ribbon and designer papers! But now on to the promised tutorial:


To make your own mini tag album you will need:


- DecoArt white Acrylic Gesso
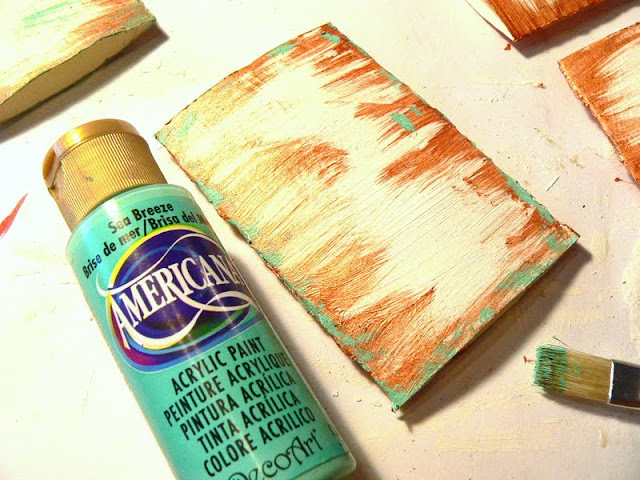
- DecoArt Americana Acrylic colours "Red Iron Oxide" and "Sea Breeze"
- DecoArt Dazzling Metallics "Bronze"
- DecoArt Decou-page matte


- some bristle brushes
- 5 toilet rolls (and your Sizzix or Cuttlebug to get them real flat)
- a tool for making eyelets
- wire and some pliers
- designer papers of your choice
- scissors, glue, eventually some sticky foam pads
- some small tags (or the Sizzix "Tag and  Tie" die, which I used for my tags)
- some stamps and stamping ink for further embellishment
- Distress ink "rusty hinge"
- various kinds of washi tape


Items used for embellishing this project that are also available on Meresanth's Retro Kraft Shop:
- Prima "Printerie" stamp set
- Vintage Neutral - K&Company Paper Pack
- Bronze Metal Branch
- Bronze Metal Key 4
- Watch Dials and other Watch Parts
- White Lace 
  

Step 1

Flatten your toilet rolls using a bone folder or (even better) your Sizzix or Cuttlebug.


Step 2


Give the rolls a thick coat of white DecoArt Gesso.


Step3


Take the DecoArt Dazzling Metallic "Bronze" and paint your rolls once the Gesso has dried.

To do so load your brush with some colour and stipple the colour onto the edge of your roll:


Then use the same brush (or your fingertips) to direct some of the applied colour towards the roll's center with gentle and fast strokes:


See to it that you don't work too evenly. Let Mr. Random be your guide ;)


Step 4 

Next apply some DecoArt Americana "Sea Breeze" - but this time the colour has to be stippled on and around the edges - that way it looks like spots of verdigris patina.


Step 5

Load a brush with some heavily diluted DecoArt Americana "Red Iron Oxide" and sprinkle a lot of stains on your rolls and do this from both sides. This will add a little more depth to the bronze look. 


Step 6

Punch some holes for the eyelets. You can set the eyelets right now but can also add them later.


Step 7

Cut five tags from designer papers using the Sizzix "Tag and Tie" die and your cutting machine. 


Step 8

Choose some designer papers for all sides of your painted rolls and cut them to rectangles that don't cover the eyelets and leave an edge about at least half a finger's width - so your beautifully painted edges remain visible. Leave one of your painted rolls untreated - we will later use it to create the cover.


I also distressed and then blended the edges of my cut to size paper panels with DI "rusty hinge"before I glued them in place.


Step 9

Add some pieces of washi tape here and there. Create layers and overlaps.


Step 10

To make the cover wrap some lace around the "front roll" and glue it in place. Then embellish to your liking. 


I used some watch parts, metal embellishments and some stamping on the cover. But you can do whatever you are up to.

Step 11

Cut two pieces of wire to size (depending on how many pages your album shall have). (leave a bit more on both ends to form two tiny rings at each end - but for now leave the ends straight so you can insert them through the eyelets). 
Bend your two wire pieces into circles by "wrapping" them around one of the DecoArt colour bottles' caps. They have the perfect diameter for book rings ;). Assemble the album before you finish the wire ends!


Step 12

Assemble your mini album once you have embellished all the pages. 
Insert your cut out tags. 
Curl up the wire ends at least once (see picture above) to close the rings. Then use pliers to form small rings at all ends, so no one gets hurt by any sharp and pointy wire ends. 

Done!


On the inside of my album I used some of my newly "found relatives" from my last visit at the flea market at the famous Vienna Naschmarkt. I made colour copies and blended the edges with DI "rusty hinge".


I hope you can see at least a bit of the shine of the DecoArt Dazzling Metallic "Bronze" - as it looks so very cool!


I love the colour contrast of the "verdigris" and the shiny bronze! It is what keeps the album's design together.


I had to fix the spring to the cover with a brad. All the other embellishments were glued on using DecoArt Decou-page matte and/or sticky foam pads.


The tiny metal branch was fixed to the clock face using a small piece of thin wire.


And don't these calendar rings look just great? The bell jar image is a stamp from the Prima "Printerie" stamp set (as are the stamped words and the "Welcome" at the back cover).


I hope you will be making your own toilet roll steampunk albums soon! Thank you ever so much for stopping by and the encouraging comments! (Ssssst...he's my personal favourite: ;)


Hugs and happy crafting,
Claudia x