Hi, servus and welcome to today's post which is all about our annual "
summer special challenge"over at
SanDee&amelie's Steampunk Challenges!
As every year we are having a two-months long challenge that runs from the start of July until the end of August. This is meant to provide our players and my wonderful design team with as much time to spend outside in the summer sun as possible and still have enough time to create a little something to play along with us and get the chance to make our Top 5 or win one of the two prizes donated by our wonderful and true sponsors
DecoArt and
boozybear.
More info on any differences to our usual challenge rules and an amazing bundle of steampunk inspiration by the design team wait for you over at our challenge blog (I have added a link to it at the bottom of this post).
My project for our summer special makes me especially (hahah...sorry for the pun...I just couldn't resist) happy this time as it was not only a lot of fun to create but I am also more than content with the outcome.
I guess you all know how it is sometimes...you have an idea in your head...of something fantastic looking and magical...but when you try to make it become real in a project it just doesn't seem to work out. That's one of the most frustrating things that can happen and often these are projects that I put to the side to return to several days (or weeks or months) later to find out if it can be saved, worked over, recycled or will just finally go into the bin (which is the worst case of course as it means I wasn't able to reach a goal I had set for myself. Luckily that doesn't happen too often. But it does happen from time to time).
This time though everything went as well as one could wish for...I had enough time, I was sufficiently relaxed and not too focused on an already very detailed version of the project I had in mind. There was plenty of room for changes and for just following my gut or let the project take the lead at some point. And this is my result - my Time Machine Artist Trading Block! Tadaaaahhhh!
I have used loads of Calico Craft Parts from my stash and DecoArt and DecoArt media paints and products on it and I will try to name each and every single one I have used in this post (just in case you would like to get and use one or the other for your own projects). If you head over to the Calico Craft Parts shop site you can use the "search" tool in the top right corner there to find a particular craft part more quickly. You can get there by clicking on the according design team badge on the right side bar of my blog.
This is the date I set my time machine to travel to. Which one would you pick? ;)
The project was also a great opportunity to use up some of my found objects and bits and bobs from my several boxes in which I hoard watch parts, vintage buttons, wire, bulbs and other junk that makes us steampunk mixed media crafters happy ;)
The MDF wood block I worked on is part of a
Calico Craft Parts "
Storage Cube Kit" (the other cube that originally is the drawer that goes into this larger cube was used for this project
HERE). As this cube has an open side I could hold it by putting my hand inside the cube and work on all other five sides simultaneously (usually you have to wait until at least two sides are dry so you can touch it and continue working on it).
This is how the finished block looks seen from another angle and from the top:
I started by adding some
DecoArt media white Modeling Paste through the
Americana "Short Circuit" and "Pixelated"
stencils (using a palette knife).
While the Modeling Paste dried, I primed the Calico Craft Parts I wanted to use with
DecoArt Raw Umber Student Acrylic paint. I stippled on the paint using an old and worn bristle brush to get a textured paint layer. I also rubbed on some
DecoArt media Texture Sand Paste with my fingertips once the Modeling Paste had dried.
Once the Modeling Paste had dried, I stippled on my base paint layer using "heritage"
DecoArt Chalky Finish paint.
That was heat dried and then I went in with
DecoArt premium "Cobalt Teal Hue
" acrylic paint and dry brushed that onto some spots around my cube.
Then I added some industrial style numbers and words using
DecoArt Americana "Light Buttermilk"
paint, a stencil brush and
Andy Skinner's "Industrial Elements" stencil.
After that had dried, I started dry brushing all sides of the cube with more
Raw Umber Student Acrylic paint to highlight the stencilled on circuit areas and pixel dots and the cube's edges.
To get a shiny contrast against the rough areas where the Texture Sand Paste had been applied, I rubbed on several different tones of
DecoArt Metallic Lustre. I used my fingertips to add it into the crevices and a piece of sturdy, flat cut and dry foam where I only wanted the Metallic Lustre to go to raised areas.
Copper Kettle for starters...
...then some Black Shimmer...
...and finally some Gold Rush.
I also used
Metallic Lustre "Silver Sparkle" to sponge it onto the two
Calico Craft Parts Steampunk Word Elements I used on top of the cube. This way the laser engraved words weren't covered up by too much paint or paste.
Metallic Lustre Black Shimmer was also applied around all the cube's edges.
The large "
Mechanical Cogs" element on top, the wood corner "
Cogs & Clock Hands" and the other wood corner "
with Hanging Edison Bulbs" were painted using
DecoArt Matte Metallics paint "Pewter" and some later sprinkled with diluted
DecoArt Dazzling Metallics paint "Venetian Gold" (after the two
Word Elements bands had been glued to each side to form the stand for the top element).
Before I glued all the painted Calico Craft Parts and found objects in place I used the left overs from the
Light Buttermilk Americana paint, diluted it and sprinkled it onto all the cube's sides. I repeated that step using diluted
Zinc Dazzling Metallics paint.
The cool "
Diving Helmet" was painted with
DecoArt Extreme Sheen paint "Bronze" (as well as the little screw heads, washers, the wings (from one of Calico's
Mini MDF Wings Sheets) and the
Ornate Key. To that I added
DecoArt Dazzling Metallics "Zinc" and "Moss Pearl".
The same paints were used on the side where I had glued the gears and beautiful "
Ornate Key" shape to. I think this is the side with almost all the different
DecoArt Metallics paints used - Moss Pearl, Venetian Gold and Zink
Dazzling Metallics,
Extreme Sheen "Bronze", "Pewter"
Matte Metallics and "Metallic-Silver"
media fluid acrylic paint (on the label holder that shows the set date).
Some of the parts were painted before assembly, others - like the smaller gears, washers and screw heads were painted after - simply because I wasn't sure which colour I wanted to use on these or changed the previously painted colour by painting over it.
For the little silver panels (I used some "rectangle
Mini MDF Tags" for these) with keys, screws and washers I used
DecoArt media fluid acrylic Metallic-Silver.
To fix the coated wire pieces to the cube I
drilled matching
holes using my Dremel tool. The wire ends were then inserted and glued in place with
matte DecoArt Decou-Page.
The
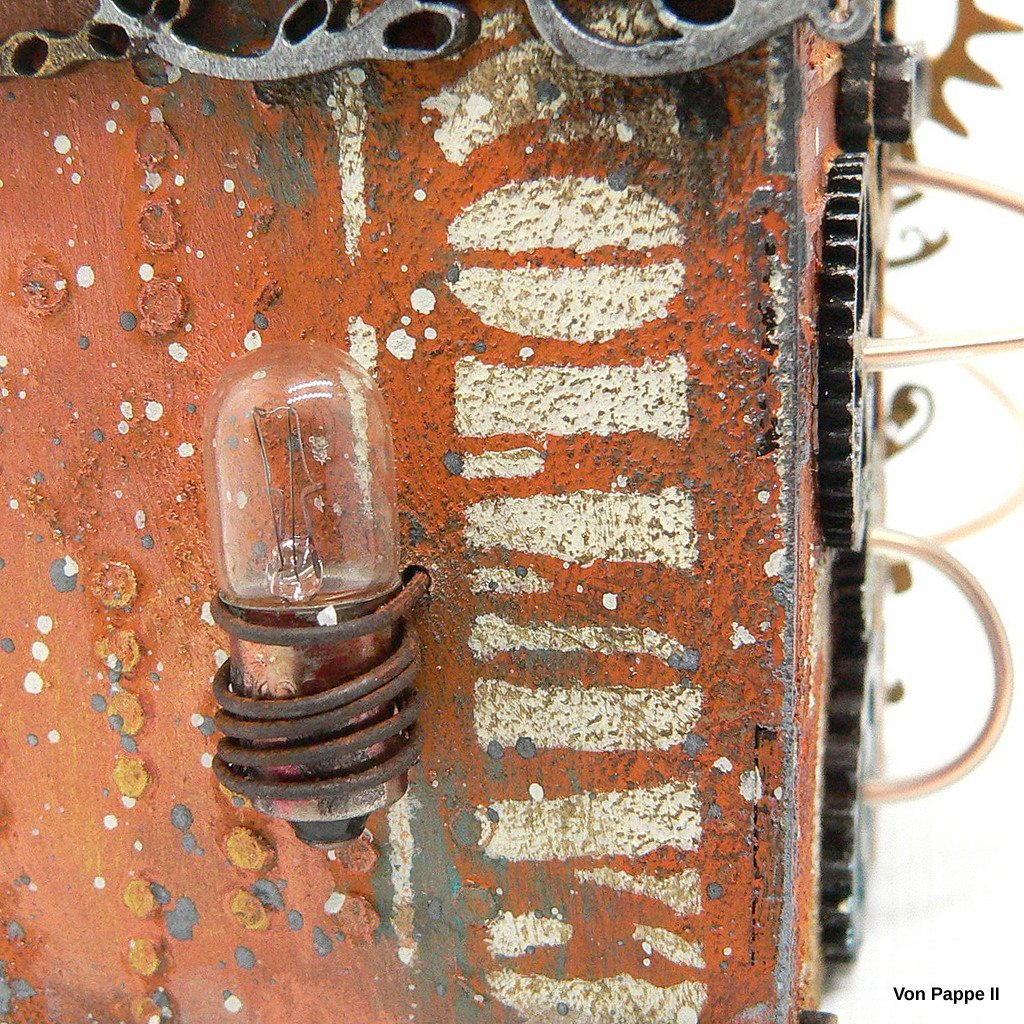
light bulbs were wrapped with rusty wire and the wire ends were inserted into drilled holes as well and bent over on the cube's inside and glued in place from there.
An old clock face and hand were glued to the top element using super glue.
This is a picture of all the products used and the mess I created on my craft desk ;)
I already liked my time machine cube at that stage (without the wires, bulbs and tubes added), but it looks so much cooler with all these little gadgets, doesn't it? I have added these a day later, enjoying some more hours of happy crafty playtime at my craft desk.
Some close ups:
and once more the finished ATB:
I hope you're enjoying a wonderful summer! But I also hope you will use one or the other rainy day (not that I wished there would be too many of these) to create a little steampunk somethin' to play along with us this
July and/or August! The team and I would love to see you play along with us over at
SanDee&amelie's Steampunk Challenges!
Hugs and happy summer crafting!
Claudia
xxx