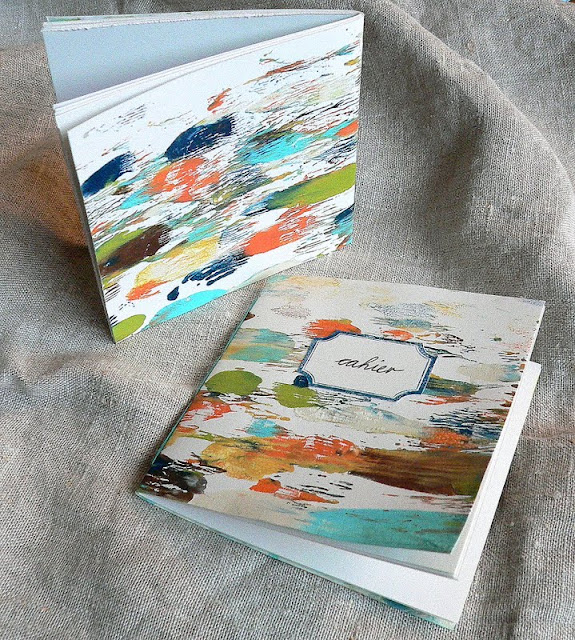
If you are as addicted to collecting unique booklets to write or doodle in as I am and/or you know other people who are too then this is the right project to make ;)
All you will need for making notebooks like these are:
 - DecoArt Americana acrylic paints ( I used Bleached Sand, Yellow Light, Bahama Blue, Coral Blush, Olive Green, Green Mist, Dark Chocolate, Pumpkin, Golden Straw and Navy Blue)
- a spray bottle filled with water
- a brayer
- some sticky tape and some glue
- baby wipes
- kitchen roll
- a pack of white dividers (available at any bureau shop) - which will spare you a lot of cutting to size
- a transparent sheet (from your bureau stuff) and a white sheet of paper to stuff in
- thread, scissors, a punching needle, a sewing needle, a punching mat
- a label stamp
- a brush
I recently bought a Gelli Plate (after half a year of rolling all the pros and cons in my mind), but before I owned that really fun and easy to handle tool for monoprinting I used a lot of different surfaces for the monoprints I did with my pupils.
One of them was simply a transparent sheet fixed to the table with some sticky tape (and filled with a sheet of white paper so the colours can bee seen more clearly).
1. Well, let's get started: get your transparent sheet and fix it to your table too. (as I know me being a very messy crafter I fixed it to my craft sheet first).
2. Get a stack of dividers ready and the DecoArt Americana acrylics. Apply dots of various colours randomly onto your transparent sheet.
3. Now comes the most important part: the trick with the brayer!
Don't roll it over the whole sheet in different directions but keep moving it with hardly any pressure(!) from left to right only (or right to left only if you are left-handed) and do only very short distances at once - then lift the brayer and put it down some centimetres further to roll on...and so on.
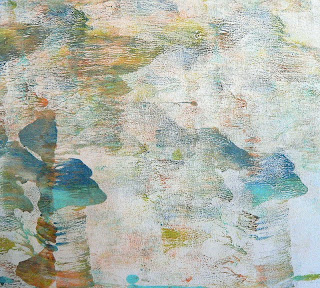
That way the colours will not mix too much and a lot of space will remain uncovered (which will let the white of the paper you print on show through). Don't clean your brayer after this - put it aside. You will need it in a sec. Your transparent sheet should look like this now:
4. Place two dividers onto the transparent sheet and use the colour covered brayer to press them down. Roll the brayer firmly over the whole sheets, then lift them off the ground (if you brayer too long some of the paper might stick to the transparent sheet as the acrylic colour then works like a glue once it has dried too long).
The sides you covered with your brayer will become the insides of your booklets' covers. They will look like this:
The outsides should kind of look like this: bright and colourful. Let dry (or speed up with a heat tool). Clean your brayer and surface with some spritzes of water and some kitchen towel.
5. Take a pile of dividers (depending on how many pages you want your notebook to have), put one of the prepared covers on top and cut off the side pieces where the two holes are.
Use one of the dividers to create a stencil for the holes you will have to punch for the sewer binding. Fold it in half and mark four spots.
Punch holes through all the layers using a punching needle and a punching mat.
6. Choose a thread of a matching colour for your colour design of the cover and take a large sewing needle. Use doubled thread and the length of about your arm. This should do for sewing the binding twice.
Start with the second hole from the left and from the inside, then slide the needle through the hole left to it from the outside to the inside again. Then through the hole you started with to the outside again and through the third hole to the inside and through the fourth hole to the outside again. From there through the third hole to the inside again... then repeat the whole procedure.
This way you should have done a kind of weaving and the thread should be doubled everywhere. Tie the ends together on the inside of your booklet with several knots. Then cut off the excess thread.
Now you can carefully fold your booklets. The only thing left to do is create a label.
7. Get a label stamp (mine is from Red Lead), the DecoArt Americana Navy Blue, a soft brush and the transparent sheet again and spread some of the colour on it. Dip the stamp into the thin layer of paint and stamp onto some white card.
8. Cut out your labels, do some handwriting on them (or leave them plain for the person who will receive this lovely gift) and glue them to the covers. Done!
Hope you have a lot of fun making your own and will be giving away a lot of these colourful booklets! They are so easily and quickly made!
Hugs and happy crafting!
Claudia


eine schöne Idee.. klasse Dein Workshop!
ReplyDeleteWhat a great present idea. We'll definitely be making some of these for furry friends.
ReplyDeleteFantastic idea Claudia!! I am always late and this is really great and unique gift! Thank you for sharing
ReplyDeleteThey are so cool, Claudia - fun and funky, and they also look like quite a lot of fun to make!
ReplyDeleteAlison xx
Das ist ein tolles Geschenk und danke für die Anleitung ;o)
ReplyDeleteLiebe Grüße, Dagmar
How fun, cute and clever!! Great tutorial! waving hi from the brrrrr hills of North Carolina ♥
ReplyDeleteSieht total klasse aus diese Effekte, immer wieder neu und anders. Echt schickes , modernes Design und ganz toll als Hefteinband. Super gemacht!
ReplyDeleteLiebe Grüße
Sabine
Ow, I love those, two of my favorite things, playing with paint and making books! Great idea!
ReplyDeletexx Monique
Very inspiring Claudia...a stunning idea...the books look great
ReplyDeleteThanks for sharing your step by step, Claudia. I really love those covers.
ReplyDeleteWhat a great fun make, love the cool colourful covers and very cleverly put together too, - great idea!
ReplyDeleteA super tutorial Claudia and a real good idea for a gift.
ReplyDeleteYvonne
Great idea Claudia! So cute and a lovely gift idea!
ReplyDeletefantastisch kann ich nur sagen, liebe Claudia! ganz toll - und vielen dank für deine Anleitung!
ReplyDeleteherzlichste grüße
margit
Your tutorial is excellent Claudia, the books are beautiful and your binding is so neat and professional. Love the colours too. Hugs, Anne x
ReplyDeleteThank you for this great tutorial, love it!
ReplyDeleteGreat idea. Thanks for showing us how this is made. I think I might be able to do this :) Lovely colors -- so simple but such a great visual impact. -- Mary Elizabeth
ReplyDeleteFabulous, great tutorial
ReplyDeletelove the colours and textures on the fab note books
Jools x
Such beautiful presents Claudia. Love the way the colours blend just enough without smudging into a messier colour. Jenny x
ReplyDelete