

Servus to all my true and new readers out there!
I finally managed to finish two panels that had been lying on my table for almost two months as I simply got stuck in the middle of the process...not knowing with what I would like to finish them.
But I have learned to be patient with things like these and today - when searching for something in my embellishments box the right things just lay there....waiting for me to put them on the prepared paint board panels! :)
And this is how they look like:

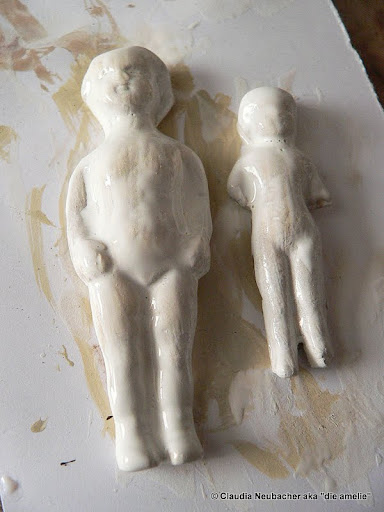
The two casts of fractured dolls were given to me by lovely Brigitte from "La maison de coutureuse" (as were the two bottlecaps with the wonderful French text on them). Thank you so much, Brigitte! Bisous!
Of course you can finish your fleur de lis boards with any objects you have in your stash, but I included the treatment with which I finshed the dolls off too.
To create the panels you will need:
- DecoArt Americana "Fleur de Lis" stencils
- DecoArt Americana acrylic colours "True Red" and "Bahama Blue"
- DecoArt "Dimensional Effects" paintable texture paste
- two paint boards
- Vaseline and a piece of cloth
- a soft brush

For giving the dolls and metal parts their colour and crackle finish you will need:
- DecoArt Traditions acrylic colours "Medium White", "Opaque White", "Burnt Umber", "Transparent Yellow Iron Oxide" and "Quinacridone Gold"
- DecoArt Traditions Glazing Medium
- DecoArt Decou Page matte
- DecoArt One Step Crackle
- water, brushes, a soft towel or piece of cloth
- two hinge clips and some metal corners
- casts of fractured dolls and bottle caps

The panels:
Step 1
Using a palette knife apply DecoArt Dimensional Effects through two of the Americana "Fleur de lis" stencils and try to create a lot of texture by lifting off the palette knife several times when applying the paste. Let dry.


Step 2
Paint them with DecoArt Americana "True Red" and let dry.

Step 3
Apply Vaseline in various places using your fingertip. This will act as a resist for the next coat of colour we will put on.

Step 4
Quickly paint over it with DecoArt Americana "Bahama Blue". Try to apply the colour generously and lightly, not going over a spot more than one time.

Step 5
Once the colour is dry take a soft cloth and gently wipe off the colour with the areas you had covered with Vaseline. This will reveal the red underneath and give the panels the timeworn look of peeled paint.

(Sorry for the change of colour with the images...seems the light changed during the process).
Your panels are finished. Next I will show you how I altered the fractured dolls casts.
***
Step 1
Seal the surface of the casts with a coat of DecoArt Traditions "Medium White". Let dry.

Step 2
Give them a wash of heavily diluted DecoArt Traditions "Burnt Umber".

Step 3
While you set the dolls aside to dry stipple some DecoArt Traditions "Burnt Umber" onto your metal embellishments and the clips using a bristle brush.


Step 4
While these have to dry too seal your paper collaged bottle caps with a coat of DecoArt Decou Page.

Step 5
Make a mix of DecoArt Glazing Medium and Traditions "Opaque White" and water it down to achieve a medium wash. Apply it to your dolls after you have tried it on some piece of paper first to see if it is as translucent as you want it to be.

Step 6
Stipple some "Transparent Yellow Iron Oxide" and "Quinacridone Gold" onto your dry metal embellishments to create a rusty look.

Step 7
Apply a thin coat of DecoArt One Step Crackle to your dry dolls and the bottle caps. Let dry.

Step 8
Once these are dry rub in some DecoArt Traditions "Burnt Umber" and wipe back the excess with a damp cloth.


Step 9
Arrange all the pieces on your boards until you are content and then glue themto your panels using DecoArt Decou Page matte.

Yay! You're done!
***
Hope you liked the tutorial and the panels! Hugs and happy crafting,
Claudia xx
As usual I have some close-ups for you:


***

What an amazingly awesome project Claudia. The details and work you put into it definitely pays off. I love you painted the metal clips - makes it look so nice and rusty - I love that old metal effect. The crackled doll is my favourite. I had to look twice to see whether it was a real vintage ceramic doll or not. The texture you created with Dimensional paste is fantastic - I think you have made me add a new item to my crafty shopping list. Thank you also for stopping by my blog and leaving such a lovely comment!
ReplyDeleteWow, amazing work, Claudia! I love the distressed look! Thank you for the tutorial! So many great techniques. I read and then re-read some parts - there's so much learning one can do here. I truly admire your knowledge and your talent!
ReplyDeletewundervoll sehen die aus!!! WOW!
ReplyDeleteThis tutorial is stunning!!! What a great background, such a nice colors!
ReplyDeleteClaudia some fab techniques here, great walk through for a fab project
ReplyDeleteLove
Amanda x
They're really haunting... the finish on the dolls looks amazing and I love the rusting effect too.
ReplyDeleteAlison xx
herrlich gemacht, liebe claudia mit tollem material!
ReplyDeletewird zeit, dass wir uns mal wieder sehen..... ;-)
glg
margit
Fantastic tutorial Claudia, those dolls look fantastic against the panels you created,
ReplyDeleteYvonne
Great project and very good, clear instructions. Thank you!
ReplyDeleteLove all the textures and transformation. Really beautiful
ReplyDeleteSo stunning - I love it! I always am full of ideas after visiting your blog! This post is so full of inspiration! Thanks so much for sharing - Love from Laura xxxx
ReplyDeleteLove these fleur de lis panels and the peeled paint technique with using the Vaseline! Love that effect--it never gets old! Thanks for sharing! I'm a new follower and commenter to your blog :) Loving what I see :) XOXO-Shari
ReplyDeleteErste Sahne (:o) Die großen Clips habe ich mir auch gerade besorgt. Ich liebe ja deine Farbzusammenstellung. Auf ein Mold für die kleinen Püppchen bin ich ja auch noch scharf, habe aber bis jetzt nur einen Shop in Übersee gefunden.
ReplyDeleteClaudia...Thank you so much for the comment you left on my blog. That means so much to me! I have to say that I love your piece as well! That little crackled fractured doll is amazing! It really looks like something that was dug up in the old factory yards of Germany!! I also love your fleur de lis that you have created as your background. Love the colors and the chipped paint look. <3 Candy
ReplyDeleteGreat tutorial Claudia! Thanks for sharing with us!!! You dolls are scary, but absolutely beautiful! Barbarayaya
ReplyDeleteFantastic art as always Claudia and thank you for sharing such detailed process steps xx
ReplyDeleteLove, love, love this background! I sat looking at it thinking how has Claudia got those red splodges so randomly, doh having a rough day lol! Gorgeous technique and wonderful use of colour and texture Karen x
ReplyDelete