Showing posts with label Stampotique. Show all posts

Wednesday, 26 March 2014

Friendly Monster Notes

I recently discovered the fun in using colour copies of my own abstract paintings for other artsy projects (as can be found on my rather new Von Pappe art blog over HERE).
And as I believe that one can never have enough note books I decided to use some of them with the awesome matchbook die.


The insides of the die cut matchbooks were covered with old book pages that I gave a wash with white Gesso first. I stitched the pages to the booklets by hand using black thread and drew the "stitched" border around the outsides by hand.


I also used my new stamp from Stampotique to add the "friendly monsters" to the covers. And you can see the backs of the notebooks too.


I hope you like my little fun project!


Wednesday, 16 October 2013

Stampotique Designers Challenge # 121 - "Halloween"

Well, if this isn't the perfect occasion to bring out once more my beloved "friend" stampotique stamp.... ;)

I know, I know - you saw him a bit too often maybe on this blog lately, but it is one of the only two stampotique stamps I own at the moment... and I admit I could use both of them all the time as they are so utterly brilliant! ;)
So I guess you will just have to bear with me. In Austria we would say "Close your eyes and go through it!" *lol


I also had to do the crumpled tree again, which you might have already seen over here.


It's as easy as that: glue some crumpled tissue or sandwich paper to your card and then cut out the branch tree shape after it has dried. Blend the creases with Distress ink - done :)

The background is made with Distress paints - love the new colours I recently added to my stash ;)


The hanging bat shapes were cut freehand and glued to the tree. The fence and the tiny flying bat are from the Halloween Tim Holtz Sizzlits strip die. The spider was cut with a memory box die and coloured with felt tip pens.


This tag is of course meant to be entered to Stampotiques Designers Challenge # 121.

Happy halloween crafting!

die amelie x

Thursday, 26 September 2013

"Washi Tape" at Stampotique Designers Challenges

Well, I know, I know, you've seen these owls before, but first: I love them so much and second: it's one of the only two Stampotique stamps I own at the moment. So I have to be a little inventive... ;)

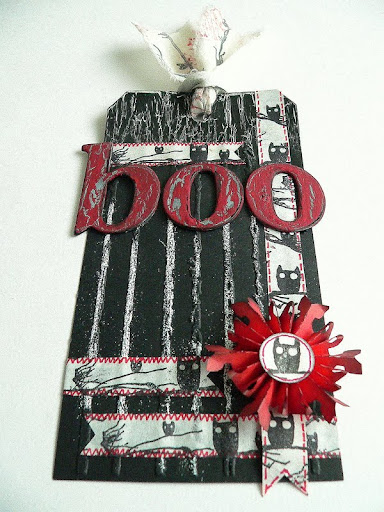
Their actual "Washi Tape" challenge inspired me to make my own washi tape - using Stampotique stamps. And as Halloween is near and I had no choice anyway (*lol), I used the gorgeous owl stamp to create two washi tape pieces to be able to enter their challenge once again. (Thank you, Stampotique DT, you really get my mojo flowing!).


Here are the ingredients I used for my washi tape recipe:


And it was so much fun!I used some sandwich paper and glued some double-sided
sticky tape to it. Then I cut out the strip and stamped it with jet black archival ink. To find the correct position of the owls I pressed the tape to the face up positioned stamp. Then I doodled some red borders. Done!


For the background of my tag I used some heavy black card and ran it through my Sizzix using an awesome "grunge stripes" embossing folder I bought on sale recently.

I partially heat embossed the raised areas with opaque white embossing enamel.

The top of the tag was given a coat of white acrylic colours first, then a coat of DecoArt Weathered Wood Crackle Medium and later a coat of black acrylic colour.


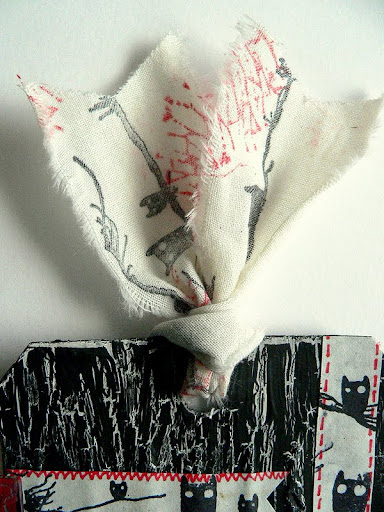
I stamped some owls and branches onto a piece of white fabric ribbon with black jet archival ink and added some red crackle accents using a Tim Holtz "grunge textures" stamp.


Then I covered some chipboard letters with light grey colour first, then again some Weathered Wood and some deep red for a finish.


I embellished the tag with my washi tape elements and glued the letters on top. Done!


I hope you like it and have a lot of fun too with creating your Halloween tags or some selfmade washi tape!

Hugs and happy crafting,

die amelie x


edit: my 10 year old son, who (obviously) has a good view for details and composition, said that the lower part of the tag looked a bit "empty" - and he was absolutely right! So I added a paper rosette for further embellishment. 

This is how it looked before I followed his advice:


Thursday, 19 September 2013

A quick Stampotique Designers Challenge Tag

Hi there!

Just a quick share today of a tag I made for SDC's "Birthday Theme" challenge. The idea just hit my mind when I went to bed yesterday, so today I couldn't wait to get to my craft desk and try to catch it! I hope you like it!


I just imagined our "friend" at a birthday party... jumping with joy and excitement...or so...*lol. So here he comes ...and he even has some confetti, a present and some garlands on offer. So let's party....y...yay..... ;)


The background was made with Distress paints and later stamped on with black jet archival ink for a nice border and some confetti. The garland is made from the Tim Holtz barb wire stamp and some doodling with black and white gel pens.


I hope you like it! :)


Hugs and happy crafting!

die amelie x

Monday, 16 September 2013

Try A New Technique - Stampotique Designers Challenge #116

As I was recently reminded of my two fabulous Stampotique stamps I own, I had to bring them out and use immediately. I really love that poor lonesome guy and the owls in the tree! All of them staring at you - and you don't know: are they sad, just very, veeeery tired or do they plan something evil? Perfect for Halloween, aren't they?

SDC want us to "try a new technique" and I decided to give the "Smackin' Acetate Technique" (shown over here by lovely Mynnette) a try to create the tag's background. It is as simple as effective and if you choose the right colours that technique can create a truly spooky mood. LOVE it! Thank you, Mynnette, for the awesome tutorial!


After I had stamped the owls in the tree and the "lonesome fellow" (as I use to call the poor budy) with jet black archival ink, I highlighted the eyes and some details with a white gel pen, doodled a black thin line around the tag's edge, stamped some additional splatters in "black soot" DI, some twigs and the "Trick or Treat" quote and added a ribbon - done! It was a quick tag, but also great fun to make! I hope you like it too.


I enter this of course to SDC's "Try A New Technique" challenge. Thanks for the inspiration by the way, SDC team! ;)

Hugs and happy crafting!

die amelie x

Thursday, 23 May 2013

Poor lonesome friend! - Melt Art Mania

has taken over here too, I am afraid.

I have been hoarding some UTEE for quite some time now but never had the guts to use it with all those awesome techniques like stamping in UTEE or creating high gloss embellishments with UTEE... but this has changed since I read Candy Colwell's "Ranger Melt Art Mania" post over here. Her project is sooo awesome and her stepxstep really gave me the feeling that I could not go wrong. So I tried and this is what I came up with:


Yes, you are right: I had some put aside backgrounds from my various tries to create a yellow background tag for the DDTIO "Yellow, lightbulbs and wire" - challenge.  They were too dark to fit what I wanted with the lightbulb theme, but for using my brand new Stampotique stamps they were just perfect!!!! They are sooo cool - I haven't bought any Stampotique stamps until now, but when I saw these I just had to have them. NOW! *lol

The "melt art" techniques I used were: covering the die cut bat with some layers of clear UTEE, which was a lot of fun to do.


Then I stamped the frame image from IndigoBlu partially on top of the tag and covered the image with black embossing powder for heat embossing.

Next I experimented on stamping into UTEE - which was my very first time (I always was afraid of breaking my stamps by getting them stuck forever in UTEE or something like that ;).


For a first try I was quite content with the outcome. (So, please, be gentle with me *lol).

I also used melt art as a resist by stamping the Tim Holtz barbed wire image and covering with Ranger Ultra Fine Detail clear embossing powder for heat embossing. Afterwards I blended the area carefully with "black soot" Distress ink, trying to create a kind of border.


The eyes of the poor lonesome friend were heat embossed using black embossing powder too to make them look more intense.

The Stampotique Owl Tree image was the perfect background image for the sad scenery.

The tag's background texture was added by using a LaBlanche "burlap" stencil, DI "pumice stone" and a blending tool. I masked the spot, where I later stamped our "friend" on by covering this area with a cut out shape of the image.


Then, by pure accident, I stumbled upon a really cool "technique" while pimping up the ribbon I wanted to use with this tag:


as the ribbon was originally bright white with only the barb wire image printed on it, I first blended it with DI "black soot" to match the dark look of the tag. As the ribbon was a rather shiny material and less absorbent than cotton or linen for example, the DI stayed very much on top, which I only realized when I stained the ribbon using Distress paint "wild honey", dapping dots directly onto the ribbon... which caused the ink to build black edges around the yellow stains...which looked more than just perfect for the tag's theme!!!!


Cool, huh? I heat dried the ribbon and adhered it to my tag after I had distressed the edges and blended them with DI "pumice stone".

Now let's hope someone soon will find the courage to play with our sad friend! ;)


Most images were stamped with my favourite two inks: black jet archival ink from Ranger and Distress ink "black soot", so I enter Simon Says Stamp and Show's "Favorite Ink" challenge with this tag.

Hope you like my tag! Thanks for stopping by again!

Hugs,
die amelie x