Monday, 4 March 2019

Tea Time and Steampunk

...go together really well I found. ;)


See?
I was so happy when I found out that "Tea Time" is not only part of "Steampunk Time", but that you can also arrange the letters symmetrically. How cool is that? (and those who know me know that I love me a good dose of word and letters play ;)


There are some new fab wood shapes out in the Calico Craft Parts store - like the plain scrabble tiles I have used to put my letters (also from Calico Craft Parts) on...or some amazingly cool Mechanical Clockwork wood shapes like this one:


I have come up with a new way of painting these intricately detailed wood shapes so they look even more dimensional and defined and yet still keep all of the beautiful laser engraved texture and detail (because it easily gets covered up with acrylic paint if you apply it too generously).


Oh, and what a pleasure it always is to browse my stash of Mini MDF Wood Shapes - just to find perfect matches for designs I have in mind...and also one or the other bit to add to a design and create even more interest...


Of course I have used some of my favourite DecoArt products and paints to create some matte metallic bling (love the new Matte Metallics!), a subtle interference paint effect and - of course - cool crackle.

There's a detailed tutorial and loads of images over at the Calico Craft Parts Blog. I hope you will join me over there!

Hugs and happy crafting
and - as always  -
have a good start into the week!

Claudia 
xxx


Friday, 1 March 2019

Recall for Robot BR0730am! - a Tag for SanDee&amelie's Steampunk Challenges

Attention, attention, dear customers!  Robowell are doing a recall for Robot BR0730am due to malfunction and possible danger of fire!!! There seems to be a severe malfunction with the GMS ("Greet the Morning with a Smile") and the FS ("Fried Sausages") modes that in a worst case scenario could even set your home on fire!

Customers have reported several issues of severely burnt sausages and grim looks and also sent image proof:


NOTE: do not try to fix your BR0730am yourself! Instead return the product with bill and - if possible - in original packing to Robowell asap! All electronic shops are advised to accept returned robots of this type and will assist customers with refund procedures! 

***


Hi, servus and welcome to today's project for the launch of our March challenge over at SanDee&amelie's Steampunk Challenges

I had so much fun creating this little robo chap with an obviously faulty circuit! (and I really would love to be able to get these delicious British breakfast sausages over here in Vienna too...sigh...not burnt ones of course). 

Just look at this cute grim face! giggle


I really adore this dies set from Tim Holtz's latest releases. It's great fun and the possibilities for creating whimsy little robots of all kinds seem almost endless. The idea for my grim little breakfast robot came from the die cut pieces lying on my desk...I suddenly saw the angry "eyes" in the filament...and the grim expression on the "mouth"....and the sausage pan...and there it was....a breakfast robot gone mad! (do I need to mention that I am a huge fan of Nick Park's "Wallace and Gromit" films? ;)

I also enjoyed taking out my alcohol inks again after not having used these for ages...


I used Tim Holtz's "Foundry" 3D embossing folder and silver metallic foil to create the tag's background. The tag itself was cut from really thick greyboard, using the "Tag & Bookplate" die from Tim Holtz. All the layers were glued together using DecoArt matte Decou-Page

Then I added a coat of sprayed on matte varnish, so I could paint on the alcohol ink background without having it being reactivated or coming off. 

I painted a background for the lit bulb with DecoArt media Translucent White. 


Black soot Distress Crayon was used to darken the tag's edges and the white one to create a subtle brightness around the bulb.


I had cut out the robot's pieces from black cardstock. To make my filaments shine really bright I needed to first paint these with DecoArt Titanium White media fluid acrylic paint...


...before I could add some bright light in Hansa Yellow Medium.


The robot parts were painted using a huge variety of DecoArt Metallic paints...


Here's an image showing all the different metallic paints (and other DecoArt products) I have used:


DecoArt Metallic Lustre "Radiant Red" was used on the little gauge. And I varied matte and shiny metallic paints for more interest. I used the new and fantastic DecoArt Matte Metallics "Pewter" and "Aged Bronze" alongside the DecoArt Dazzling Metallics "Moss Pearl", "Teal" and "Copper" and DecoArt Extreme Sheen paints "Vintage Brass" and "Bronze".


The gauge window first got a coat of DecoArt Triple Thick. Later I decided to add some DecoArt media Liquid Glass to it for even more dimension.


The burnt sausages were painted using DecoArt Chalky Finish paint "timeless" (as a base layer) alongside DecoArt media fluid acrylics "Transparent Red Iron Oxide" and "Carbon Black".


Then I made a mistake (already half knowing that it might be one...) and tried to use the Liquid Glass to glue the die cut acetate bulb to the finished robo face. 


Uh oh! What I had already feared happened: the Liquid Glass reactivated all the layers underneath and the painted bulb background came off the silver foil...as did the alcohol inks. All the paints and inks mixed with the Liquid Glass and created a brown muddy glue liquid on top of silver foil shining through here and there. Arggghhh! I had hoped that the varnish and the acrylic paints on top would be enough of a barrier but sadly they weren't.

So after waiting for a while (hope fading) and watching disaster grow and take over, I removed the acetate and tried to clean off whatever I could. Gladly the Liquid Glass had at least fixed the top layer of the painted die cut face pieces to the back of the acetate - so didn't have to redo these.


I die cut another bulb background from some beige paper I had at hand and painted a new bulb with DecoArt media fluid acrylics Titanium White and Hansa Yellow Medium again. Then I glued that bulb layer to the tag and fixed the acetate as a top layer to the background by only applying the matte Decou-Page with a detail brush to the backs of the filament and mouth. That's something I will try to remember doing when next trying to fix acetate to a background without wanting any visible traces of glue. ;)


Phew! So rescue was a success! There were still some smudges and stains from the Liquid Glass and the alcohol inks that had been reactivated by it on the acetate, but that actually added beautifully to the worn and grungy look of my tag. 

The other bits and pieces were glued to the tag using the matte Decou-Page and my detail brush again. 


Taking good pictures of shiny projects always is a challenge....sigh...


Some detail shots:


I hope you like my little robot as much as I do! 


My teamies have come up with more steampunk fun and/or goodness to fuel your inspiration! Check out their makes by hopping over to our steampunk challenge blog. I would love to see you play along this month. Remember - we're giving away two fab prizes each month (being donated by our wonderful prize sponsors DecoArt and boozybear)!!! 

Hugs and happy crafting!
Claudia
xxx


Monday, 18 February 2019

Happy Bird Project at Calico Craft Parts

Hi, servus and I hope you've all had a nice weekend!

As usual I am inviting you over to the Calico Craft Parts Blog to check out my latest project with a very detailed step by step and loads of images. ;)


Inspired by a book from wonderful artist Geninne D. Zlatkis I painted this bird using one of the lovely wood shapes from the wide range of Calico Craft Parts bird shapes.


It is part of a larger project of course. So this is - as always - just a sneak peek to lure you over to the Calico Craft Parts Blog ;)

I would love to see you stop by and I hope you will like what I have created for your inspiration!

Hugs and happy crafting!
Claudia
xxx


Friday, 1 February 2019

"Let's play good bulb, bad bulb!"

...is probably my worst pun ever. LOL

...but I have been hoarding a cute little bulb dies set in my stash unused for ages it seems and when I recently tried to reorganise my cutting dies it (re-)caught my attention and the idea for a fun little mixed media steampunk tag was born.


Welcome to the start of our "Anything Goes - Steampunk/Industrial" challenge over at SanDee&amelie's Steampunk Challenges! And no need to mention that the reorganising of my dies came to a sudden halt because I had to create this tag...lol

It has been quite some time since I have shared a tutorial over here on my own blog and I guess I needed a bit of a time out from it...but this time I just felt I wanted to share the process with you (even if I still sometimes think that there are so many people out there who do much more inspired and professional projects and tutorials...). 


I used the Tag & Bookplate die to cut a tag from black cardstock. The cut out tag was embossed using the Foundry 3D Texture Fades embossing folder and to make my tag  more sturdy I glued an MDF tag from Calico Craft Parts to its back and then cut off the excess once the glue had dried. 


I simply made sure the holes of the MDF and the cardboard tags matched when gluing both together.


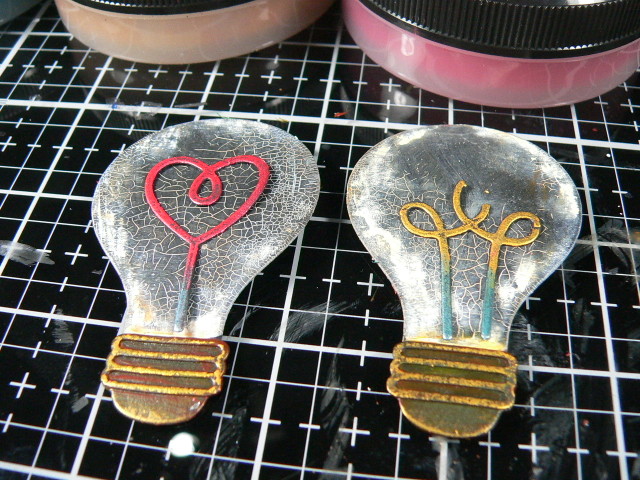
I had also cut two light bulbs and their filaments and threads from black cardstock and covered the glass part of the bulb with a thin coat of matte DecoArt Decou-Page because I later wanted to use DecoArt media clear Crackle Glaze on top.


While the bulbs were set aside to dry, I die cut some extra gears using my newly bought Sizzix Sidekick (which was a treat to myself after ten months of bravery with (almost) regular visits at the dentists, having three implants and several root treatments and extractions done...thanks to my former dentist who managed to make me feel on the safe side when in fact there would have been several teeth to be taken care of urgently).


But enough whining...let's focus on some good and fun stuff instead! I put the two bulbs in place (without gluing them on) to find good spots for my gears to go in and then glued these to the embossed background. The bulbs though still needed more treatment before they could be fixed to the tag for good.


I even used some of the cut off sections of the same gears and glued them in places where they looked as if they came out from behind the embossed riveted plates.


The bulbs got a thorough coat of clear Crackle Glaze that I brushed on with a soft wide flat brush. Then I put these on the heater to speed up the crackling process.


In the meantime I dry brushed the tag using DecoArt premium acrylic paints Cobalt Teal Hue, Diarylide Yellow and Quinacridone Gold Hue. These are perfect for dry brushing! I always started from the outside and worked my way towards the centre area but left that black. This way the focus gets drawn to the centre with the bulbs in it.


Voilà - first layer of Cobalt Teal Hue finished!


A mix of the Quin Gold Hue and Diarylide Yellow gave a lovely colour  to brush on top of the Teal.


In the meantime the heater had done its job and the crackling had turned out just beautiful!


To make the cracks more visible I used DecoArt media Titanium White Antiquing Cream.


Brush on, let dry and then wipe back with a soft damp cloth until you're content with the look. It's as easy as that!


On top of the Antiquing Cream I added a quick wash of the same mix of Quin Gold Hue and Diarylide Yellow. As the Antiquing Cream gets reactivated during this process and could be washed off, I only loosely and in one single soft stroke added the wash and dabbed off any excess with kitchen roll.


I also painted some rusty tones to the threads of the bulbs...

...and a thin border around the tag in the same colour and in dry brushing technique again.


DecoArt Metallic Lustres Radiant Red, Brilliant Turquoise and Orange Flicker were used to add a bit of metal bling and sheen to the raised areas of the embossed tag and the bulbs' filaments and threads.


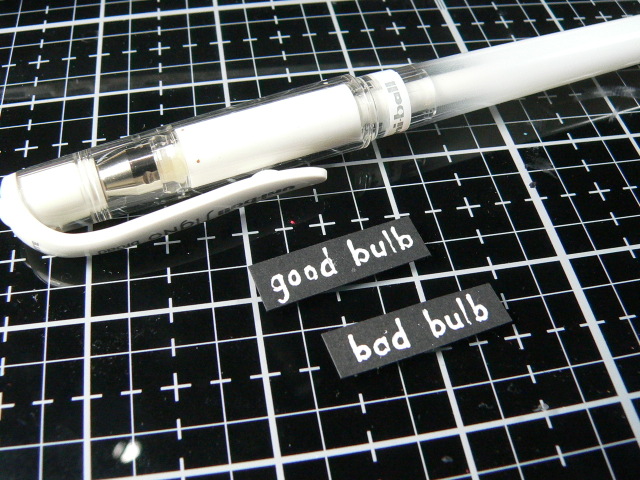
I hand wrote my words on some black cardstock scraps using a white gel pen and cut them to size.


Now all my finished pieces were ready to go on the tag. I used black sticky foam pads to fix everything in place.


Done! 


Some close ups:


and once more the finished tag.


It was great fun to create (oh...by the way...the bulbs dies set is an old one and was from memory box I think) and I hope you like it as much as I do. With that said I would like to invite you over to our February challenge and to take a look at my wonderful teamies' makes for another dose of steampunk/industrial mixed media inspiration! Simply click HERE to get taken to our challenge blog. There's time until 28th February to play along and maybe make our Top5 or win one of our two fantastic prizes! I hope to see you over there and can't wait to see what you will create!

Hugs and happy crafting!
Claudia
xxx