Monday, 25 May 2020

#11 from my Collection of Steampunk ATCs

Hi, servus and...yes, I promise this will be the last steampunk themed ATC for now. lol

But there are so many awesome steampunk ATC frames to find in the Calico Craft Parts online store...and I love them all to be honest...so I cannot promise I won't be doing any more at some point this year. ;)

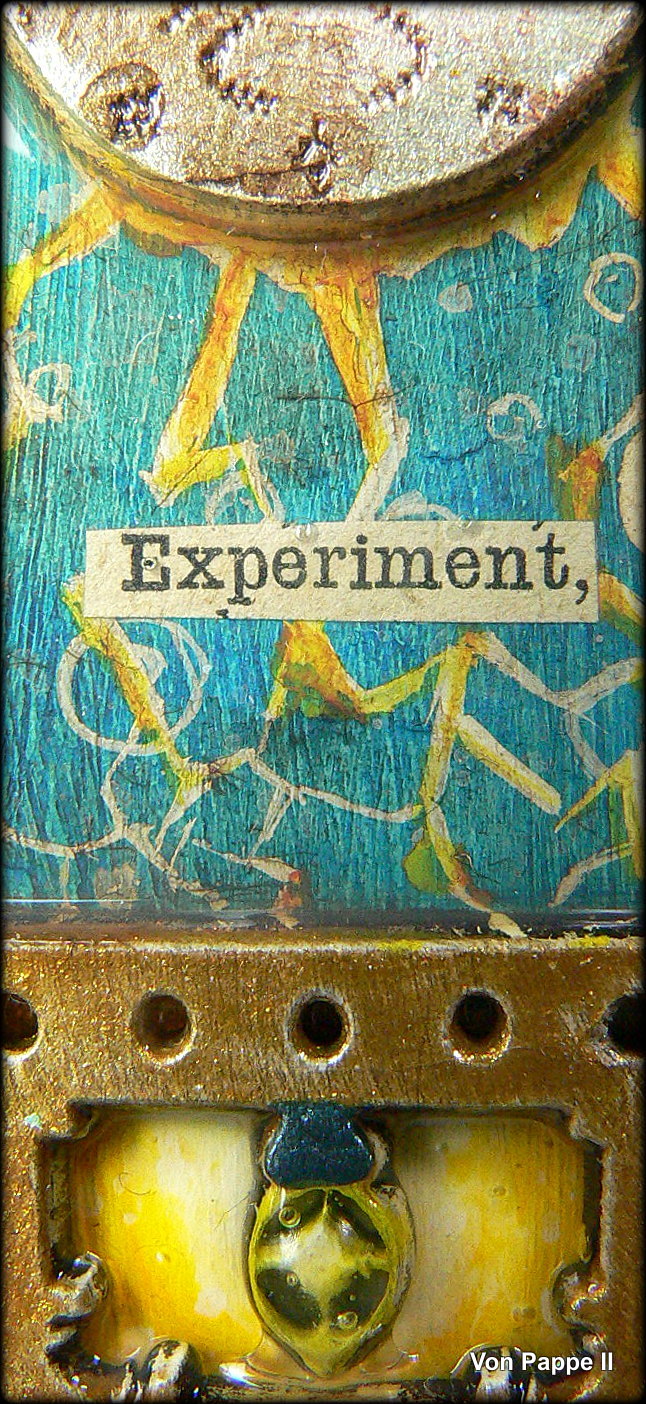
#11 has a story to tell and that story is kind of connected to the ATC I shared two weeks ago, as it might show the origin of the octopus-diver-creature - a machine created by an insidious inventor...


Lots of gears, light bulb indicators, electricity and a cruel experiment...


If you want to find out what I have used to create  #11 and check out the whole finished ATC, simply hop over to the Calico Craft Parts blog by clicking HERE.

I hope to see you over there soon!

Have a good start into the week!
Claudia
xxx


Monday, 11 May 2020

Steampunk ATC #10 - for Calico Craft Parts

Hi, servus and thanks for stopping by!

I am sharing another steampunk themed ATC today - this time over at the Calico Craft Parts blog.
Recently Helen, the owner of the Calico Craft Parts family business has released several new steampunk themed ATC blanks with beautiful frames and I fell in love with them all! So there will be more ATCs in the future ;)

#10 (counted from all my count-worthy steampunk themed ATCs so far) was a wood shapes match made in heaven! The awesome Deep Sea Octopus Diver wood shape (one of my all time favs) in smallest size and the ATC frame went together just beautifully!

And this is the result - or at least a sneak peek. The full finished project and a bit of a walk through and lists of Wood Shapes and paints and media used can be found over at the Calico Craft Parts Blog of course.


Hope to see you over there soon!

Hugs and happy crafting!
Take care!

Claudia
xxx


Friday, 1 May 2020

The Inventor - for SanDee&amelie's Steampunk Challenges

Hi and servus! Time to kick off our new challenge over at SanDee&amelie's Steampunk Challenges!
Our April challenge is once more an "Anything Goes - Steampunk/Industrial" themed one and my make for your inspiration this month is another ATC.

I just love this format and I found some beautiful Victorian style ATC frames at Calico Craft Parts! They are made of MDF and therefor quite sturdy - which means they can take a lot of mixed media! Perfect for me!


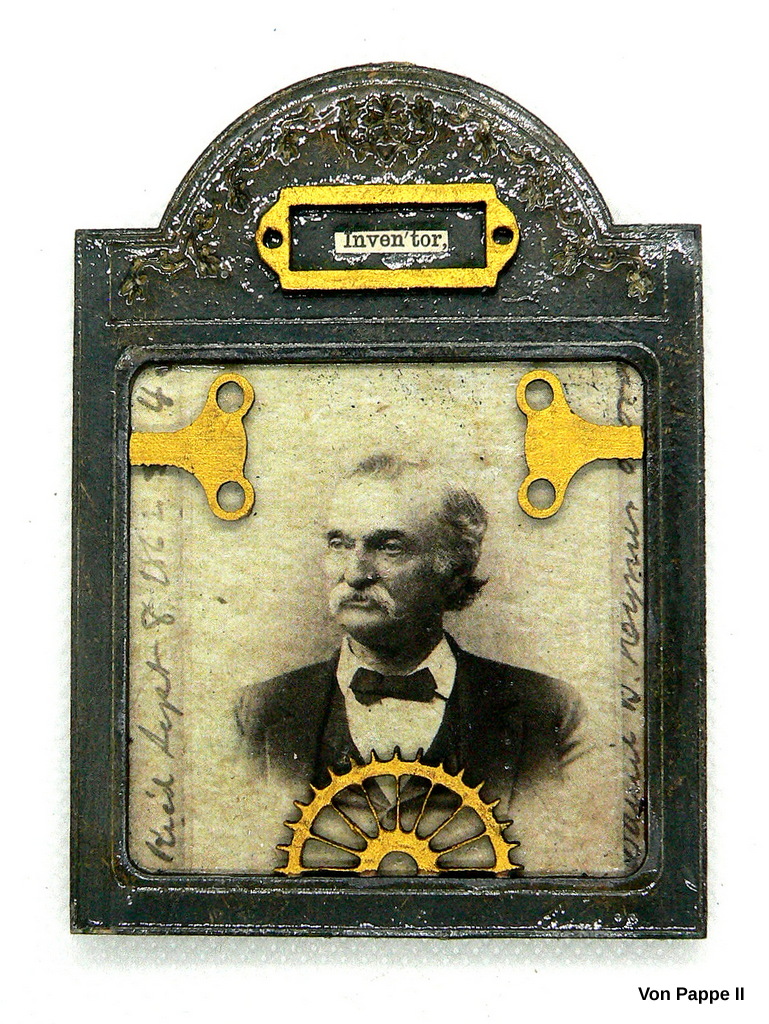
"The Inventor" is my latest ATC from my slowly but steadily growing steampunk ATC collection and it is once more a portrait taken from a paper stash by Tim Holtz that I have used and combined with some Calico Craft Parts and DecoArt paints and products.


To achieve the glossy and dimensional look on the frame I've used DecoArt Triple Thick. I just love that stuff!

But let's start at the beginning of the process! First I cut the portrait to size so it fit into the frame opening. Next I glued that to the backing panel of the ATC frame and the frame on top using DecoArt matte Decou-Page. I like to use cloths pins to keep everything in place during drying times.


Then I applied a thin coat of DecoArt Americana Lamp Black acrylic paint in dry brushing technique to not lose any of the engraved ornaments and lines on the ATC frame.


I used my heat tool to dry the paint before I went in with a generous coat of DecoArt media Titanium White Antiquing Cream.


I made sure the Antiquing Cream got into all the engraved lines and details!


I let the Antiquing Cream cure before I wiped it back with a soft damp cloth.


Using my heat tool again I made sure everything was dry before I added a generous coat of DecoArt Triple Thick to the ATC frame.


While the Triple Thick was still wet I put the little Calico Craft Parts label holder in its proper place and carefully put the cut out "Inventor" word inside - with the Triple Thick still working as a glue.


I decided to go all glossy and added a thinner layer of Triple Thick to the portrait too. This time I added two small wind-up keys and a cut in half cog and painted these and the label holder with DecoArt media Metallic Gold fluid acrylic paint.


All I needed to do then was wait until the Triple Thick had dried naturally. ;)


I love that frame and the symmetry and how the "inventor" word piece sits embedded into the Triple Thick and contrasts the glossy texture with its matte surface! 

I hope you like it too! 
I can't wait to see you play along and enter your makes too! 
See you over at SanDee&amelie's Steampunk Challenges! Simply click HERE to get to our challenge blog! 

Hugs and happy crafting!
Claudia 
xxx


Monday, 27 April 2020

Dreaming Myself Away Creatively in Times of Corona

Hi, servus and how is everyone doing these days?

Austria is taking first steps at getting back to a "normal" everyday life; "normal" meaning as normal as possible with the Corona virus still out there. Face masks, keeping one to two metres distance to everyone who is not living with you in the same household and special time tables for school kids will be staying part of that "normal" life (with schools and kindergardens and shops reopening again) for quite some time I guess. No one knows how summer holidays will look like and if these can be spent the way we usually do....

...so I decided to at least do some fantasy holiday travelling creatively on my desk and go to the beach!


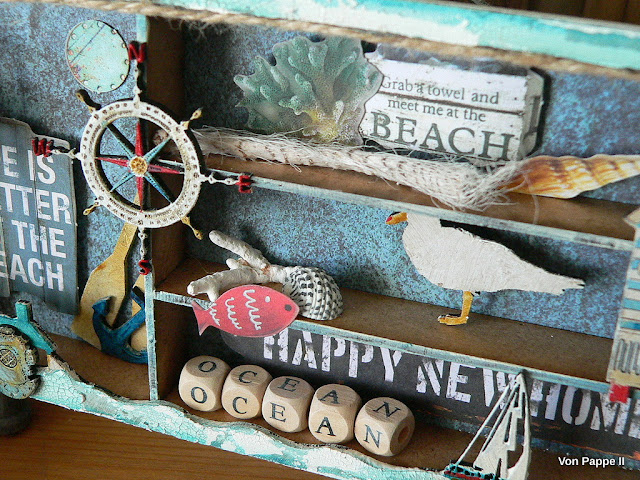
Using one of Calico Craft Parts' printer's tray kits and other craft parts from their amazingly wide range of maritime and seaside themed wood shapes and combining these with stickers and designer papers and some DecoArt media goodness was great fun and creating my shadow box was a lovely relaxing time spent in my studio.

To see which Calico Craft Parts I have used and how I made my Beach-Holiday-Tray simply click HERE to get to the according blog post.

Stay safe and keep creating!
Claudia 
xxx


Friday, 24 April 2020

Monochromatic Rainbow - StencilGirl Creative Team BLOG HOP


Hi, servus and welcome to the "Monochromatic Rainbow" StencilGril Creative Team Blog Hop, dear friends!

The team was challenged for this Blog Hop to pick one colour and use that with just the addition of black or white to create a stencil fun project. I chose my favourite colour - which is orange. As yellow, orange too gives murky tones when being mixed with black. Yellow is even more special as mixing black and yellow gives a dirty green! And as orange is a mix of red and yellow it behaves quite same-ish.


But the result wasn't as mucky as I had feared and trying to use as many various mixes that add different amounts of black to the orange paint as possible helped with still having my "orange" project look quite lively and not too sinister.

I once more went for one of my favourite themes - beetles - to create an ATC trio. But I've made my ATCs double-sided, so you can chose between a "bug-side" and a "Seth (Apter)-side" (as I have used some of Seth's stencils to create the other sides). A list of the stencils used can be found at the bottom of this post (including the links to the stencils in the StencilGirl online store).


I started my ATC trio by cutting six ATCs from black cardstock using my guillotine. ATCs measure
2 1/2 x 3 1/2 inches (that's about 6,5cm x 9cm). My plan was to create three double-sided ATCs.
I picked some of the fab StencilGirl ATC backgrounds stencils and as many different orange acrylic paints as I could find in my DecoArt paints stash.


Starting with DecoArt Americana "Jack-O' Lantern Orange", "Snow White" and "Lamp Black" acrylic paints I did the backgrounds for my "Seth-ATCs". I used a mix of the Jack-O' Lantern orange with the Snow White and stencilled the whole ATC using a cosmestic sponge. Then, while the paint was still wet I went in with pure orange and then mixes with black from the bottom and mixes with white from the top to create an ombre effect.


I did the same with the other two ATCs - here's a picture of the stencilled base colour which is the mix of white and orange. I did that to make the colours I was going to add on top pop from the black background.


For the ATC sides with the beetles I used plain white as a base to work on. As you can see I didn't pay attention to just stencil on the shapes of the one bug I had picked. You will see why I did that a bit later.


On top of the white stencilled base colour I went in with a layer of stencilled on DecoArt Chalky Finish paint "heritage" (which is a beautiful vintage orange tone and is also very opaque).


While the beetles were set aside to dry, I continued working on the Seth-side ATCs. As you can see I used the same stencil twice on each ATC - only with moving it lightly to the right and down for the second layer. To intensify the orange look I added a stencilled layer of DecoArt multi-surface Neon "orange" on top.


For some additional texture I used the Neon orange with a different background pattern on top of the previously stencilled one.


Next I added some stencilled words using one of Seth's fab stencils. I stencilled two words in white and one in black and outlined the letters in contrasting colours (or more precisely "not colours" as black and white aren't considered to be colours as they either absorb no or all light and therefore do not have specific wavelengths like the colours do).


Time to have a bit of beetle-painting fun with different tones of oranges - mixed by adding various amounts of black or white.
I used a detail brush and added patterns to the ones that were already there from the design of the beetles stencil.


I also took a picture of my palette so you can see how the orange "behaved" with white and black.


The final touch for my beetles was to add a thin wash of the Neon orange across the whole ATC.
That helped with make the orange tones pop from the black background even more.


I wanted to add a textural element to my ATCs - maybe because I thought of tiny hairy bugs' legs - or simply because I felt my ATCs needed a visual frame. ;)
I cut four pieces of frayed burlap ribbon each for an ATC to build a kind of frame with frayed edges and glued that to a piece of cut out cardboard (from packaging left overs). Once that had dried I glued the finished ATCs to both sides of the "framed cardboard ATC blanks".


I loosely stippled some DecoArt media "Pyrrole Orange" media fluid acrylic paint to the burlap fringe for a finishing touch.


Done!


The starring bug guys: 


Roland
(who is often feeling uncertain)


Percy 
(feels incomplete)


and 

Walter 
(luckily got found by a lovely bug girl) 


The "Seth-sides":
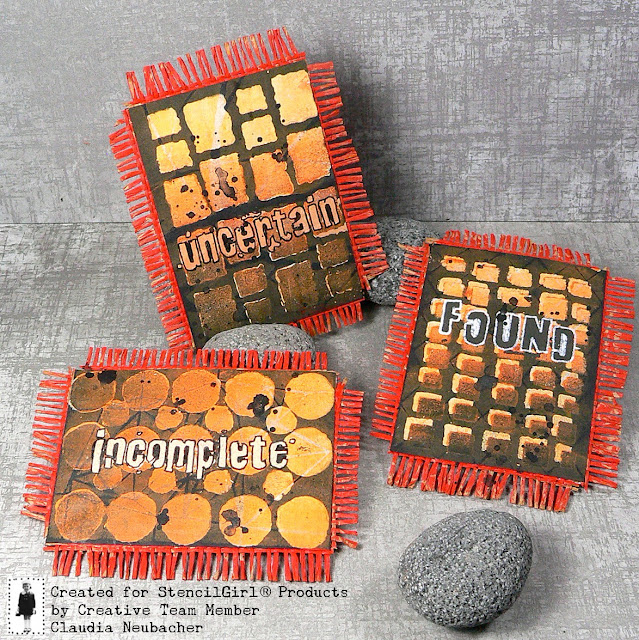


The "Bugs-sides":


Check out all the wonderful artworks in our Creative Team Monochromatic Rainbow Hop:


Shel Cee – Violet


Peg Robinson – Purple


Sue Plumb – Blue

Linda Edkins Wyatt – Green

Jennifer Gallager – Yellow

Claudia Neubacher (this blog here)Orange

Carol Baxter – Red

Sunila Mahajan & Aditi Mahajan – Gold

Natalie May – White/Black

Debi Adams – Indigo


Comment on the blogs for your chance to win one of the $25 gift certificates for StencilGirlProducts.com.

Contest ends April 27, 2020, at 11:59 p.m. Central Time USA. Winners will be contacted via email the 28th.


List of stencils used on my project here:

- ATC Mixup 1 stencil by Mary Beth Shaw
- ATC Mixup stencil by Seth Apter
- Scarab Beetles stencil by Margaret Peot


Hugs, good luck and happy hopping!

Claudia
xxx