Showing posts with label GlimmerMist. Show all posts

Tuesday, 23 May 2017

Quickly Customized Gift Box - for Canvas Corp Brands

Hi, servus and welcome to a quick and short invite today over to "The Creative Studio" from Canvas Corp Brands.

I sometimes create jewellery to give away for birthdays of good friends - and most of the time I don't have a wrapping at hand that matches the gift properly. So I hoard little cardboard boxes of all sizes to decorate them when in need for a new gift box.

This time I used several of Tattered Angels' mists and paints and a broken left over piece of an old plaster cast (really...I just cannot through away anything - not even a plaster cast that went wrong...lol) on an old business card box.


And of course I had to use one of my newly bought Tim Holtz design tapes on it! It just went perfectly well with the necklace that I gave away with the box (as it had self made paper beads from old dictionary pages - the tutorial on how to create that can be found over HERE).


To see the full (but quite short) tutorial, please, head over to the Canvas Corp Brands Blog. I hope you will like it!

Thanks for stopping by!
Hugs and happy crafting!
Claudia
xxx


Thursday, 9 March 2017

A Canvas Tag and a Flower


Servus, hi, thanks for stopping by and welcome to my little creative spot!
It's been a long time since I last made a paper flower...but once in a while a project just screams for one and I have to admit: I had such fun creating it! I used the fab "Tattered Florals" die from Tim Holtz (which is the only flower die I have and one of my very first items I bought when starting this hobby).


The challenge for my latest DT project for Canvas Corp Brands was to work on one of their canvas tags from the "Canvas Shapes" line. It's a large, stitched tag made from pure canvas - so paints and mists and other media behave a bit differently on it than they do with paper. So I experimented a lot - with Gesso, aquarellable pencils, scraped on paint, sprayed and sprinkled on Glimmer Mists....and they all turned out just amazingly!


And of course my tag had to have a jute cord loop! 


If you want to see the finished tag and a detailed how-to with steps images over at the Canvas Corp Brands site (alongside another tag that was done by my crew mate Alicja - one canvas tag - two totally different outcomes) just hop over by following the link:


Hope to see you over there!
Hugs and happy crafting!
Claudia
xxx

Wednesday, 18 September 2013

Art Journal Cover

Well, finally I made it and dived into art journalling! It took me quite a while to find the appropriate approach for me without feeling that this is not "me" but "art journalling as it is done". I admire so many art journal artists, who do a lot of colourful painting and drawing and doodleing... but "my style" is different and it took some time to unravel it from all my impressions found in blogland.

But now that I feel confident with what I do, I dared buy an art journal to work in!!! And today I created the cover to turn this wonderful empty piece of card art into my piece of art. (And by doing so I understood my pupils' fear of plain, white paper for the first time *lol).


Yes, you are right - it's the awesome art journal from finnabair's collection! And it is such a well thought-out design - with all its pockets, the manila and card pages, the envelopes and bags! Just brilliant!


I went for a rather reduced colour scheme and covered the cover with a thick layer of white Gesso for a start. I also coated some metal embellishments with white Gesso for later use.

I used a scrap from a journal page that I had overdone and therefore cut to scraps for use with a different project. Sometimes these cut out pieces look so much better than the whole page you cut it from!

I glued it to the cover after some heavy spritzing and playing with some Mr. Huey's and Chalk mists and also some diluted acrylic colours.

The wire stamp is from BoBunny (love it!). It is from the "Distressed Textures" clear stamps set and also available at SimonSaysStamp over here.

Why do I tell you this? Because by doing so I can enter their actual Simon Says Stamp Wednesday challenge where "Stamp-tember" is celebrated with a group blog-hop!


The "inspire" quote was applied through one of my new awesome Red Lead stencils!

I just love their stencils as they are perfect for art journalling!

I also rubbed some DecoArt Metallic Lustre "Gold rush" onto some areas of the gessoed cover, creating kind of stripes with my finger.


The washi tape is from a sale at a home decorations store.


I also applied some white and gold decorating paste through a stencil for more texture.
To add some more texture I stamped a border onto the cover's edge, using the lovely leaf stamp from 3rd Eye!


I also enter this cover to Artful Times' challenge "Scrap Art" as the center piece of my creation is a scrap from a journal page that I messed up and cut to pieces.

Did I mention that I love to use scraps from messed up paintings or pages? ;)

Thank you for staying with me this far and I hope you enjoyed your visit!

Hugs and happy crafting/journalling/... !

die amelie x

Sunday, 15 September 2013

All about changes

No, you haven't clicked the wrong button, dear readers, friends and followers! This is still me..."die amelie" and her (still quite messy) projects.

Only I felt that it was time to do some "cleaning up" and give my blog a more reduced appearance - so the focus is turned to the projects more easily. (Well, maybe we are speaking of "growing up" here too... ).

My latest projects after the holiday break were not too numerous (most of the recent projects that came up on my blog recently, were prepared in advance - even my DT make for Our Creative Corner's "Forgotten Things" challenge - , because I knew that it would become quite hectic after our return, with school starting again, a lot of laundry and flat cleaning to do and getting back to normal.) and I missed that "flow" - which was definitely interrupted by our holiday.
Believe me - I was frustrated by repeatedly sitting down at my workdesk and waiting for that special "initial spark" - which just didn't happen!

Witch Myrtle's Travel Case was a happy day crafting, but it is something different than creating - I hope you know what I mean... crafting and creating are slightly different things to me at least. Even though I love both. But the first needs more logical thinking and fiddling and the latter is something that almost "creates itself" - through me. There's an inner voice then, leading the way and my hands just do what the soul tells them to.

Those who have been following me for a while now, know that I don't do any art journaling. I tried once or twice, but was never content with the outcome, because what I had created then never felt like a piece of "me" - even more like trying  to be too hard what I simply wasn't.
And so I let go... I continued enjoying to create tags and also some canvases and altered objects....but art journaling was something I admired with other gifted people out there....

...until yesterday, when I sat down at my crafting desk after I had discovered a very old note book I bought about twenty years ago on my trip to New York (how time flies!). It has a binding that enables you to remove and add pages...which I discovered is perfect for art journalling as you can remove (and re-add) pages and can do them without having to pay attention not to spoil the rest of the journal. And that was the start of....well, I am not too sure of what exactly... ;)

But I know it is something I dare show you.... so see for yourself:


For this page I used white Gesso, ribbons, Glimmer Mists, a lot of my 3rdEye stamps, which are great for creating backgrounds, some Red Lead and Crafty Individuals stamps too (which I also love for their versatility) and texture paste with some stencils.

I had a really joyful play and the page almost built up on its own. Maybe you know that feeling too: seeing something that you have just finished and feeling about it as being foreign AND familiar with you at the same time.


My guess is, that when it feels like that, you have arrived at a new level on your creative journey and just freed something in you that has always been there - but you had just not been ready for it before.


My main fear - of overdoing the page as usual - just didn't come up at all. I redid some
of the areas where I had applied too much colour - and thus the page became even more "alive".

Well, maybe some of you think "I could have told you that much earlier!" right now, but even if you had (and I have some books about art journalling that tell about it too ;) - I guess I just had to discover that for myself.

Some things cannot be "done as dictated" - they have to be encountered and "lived" to become a truth for you.

But I guess I am boring you with all my "artist's babble"...I simply leave you to some more images and hope you have enjoyed your visit anyway.

I enter The Artistic Stamper's "Autumn" Challenge with this journal page and once more Frilly and Funkie's "Anything Goes" challenge. I also enter A Mixed Media Color Challenge #7 with it.

I would also like to apply for the DT Call over at Stampotique Designers Challenges that way - as this page shows a lot of me actually : my love for texture, for the use of black stamping with almost any of my creations, my love for nature, for a slight gothic (or quirky) touch and old photographs and my more or less "messy" approach to art and creating. (and Mr. Mojo seems to be back too ;). I really would love to get the chance to play with Stampotique's awesome stamps! (Well, who wouldn't... ;). I definitely love my Stampotique (one out of two I own at the moment *lol) stamp which I used with this tag. ;)

If you browse Stampotique's stamps you will find a great variety of stamps - many of them very versatile and just perfect for art journaling or creating awesome texture. So I do not only love the Daniel Torrente stamps but their whole range actually. 


Hugs and happy crafting,

Claudia - die amelie x


Thursday, 1 August 2013

Matchbox Steampunk - August challenge "chez SanDee&amelie's"

Welcome back for another appetizer for the new challenge over at SanDee&amelie's Steampunk Challenges :)


This month we want you to 
use one or more matchboxes with your projects. 
As always our challenge is "anything goes"
as long as it is Steampunk 
and our monthly theme is incorporated. 

Of course this month we have a wonderful guest designer (with a lot of contageous creativity going on ;) with us again and a prize to give away for this month's randomly drawn prize winner. ;)


I had rolled this theme in my head for quite a long time - having no idea even though it was me who suggested the matchbox challenge... but after I had a long play with some white matchboxes, combining them in multiple ways, stacking them, building a row and whatever you can do with three matchboxes, I came up with a creation that I would call "cubist", as it reminds me of a lot of cubist sculptures that all have in common that the artist had a play with cubes, trying to arrange them to a shape and form that might draw the viewers interest to it ;)

So here comes my "Steampunk Cubism" *giggle:


It also reminds me of geometry drawing one learns at school ;)

I first covered a piece of crumpled and then again unfolded brown paper with random brushes of white DecoArt Gesso and after that had dried I stamped some Kaisercraft "dicitionary meanings" and IndigoBlu adverts on it with black archival ink. I covered the matchboxes with this paper, cutting off the excess afterwards.

The compartments of the matchboxes were sprayed with GlimmerMist first and then covered with a filmstrip washi tape on the outsides (which also helped to stabilize them).

Then I gave the edges of the boxes a shading with Distress ink "walnut stain" and glued the three boxes together. I also added some torn scraps of the brown stamped paper for more interest:


For the insides of the compartments I stamped three Steampunk images (from Oxford Impressions and Artistic Outpost) onto more gessoed brown paper, cut three pieces to size and glued them to the boxes' bottoms.


Next I stamped the "cube steam punk" onto white card using my HeroArts letter stamps and jet black and sepia archival inks. I cut the letters out separately and glued them to three different areas of my "sculpture". Afterwards I drew a black border around each letter for more depth.


Having all my paper work done I went on with embellishing. I created a handle for one of the compartments using thin black wire.


The second "drawer" got a metal tab on it showing my lucky number: 7.


To this matchbox I fixed a Tim Holtz idea-ology light bulb using wire again. The wire also holds the gear in place.

To the top of the third compartment I glued a Prima butterfly nut that I gave some dabs with alcohol ink "terra cotta", with which I also coloured the bulbs' sockets.


The bottlecap (one of my on-my-balcony-rusted ;) was embellished with a plastic button I coloured in black and gave some metallic rub ons from DecoArt afterwards. I also glued a rusty screw to the side of the "cube" matchbox.


The upright matchbox compartment was glued to the box to stay in place. The other two compartments can be closed and opened (to hide or reveal their "treasures").
I had a lot of fun embellishing my tiny sculpture with Prima-, selfmade- and Tim Holtz idea-ology goodness and I hope you like the outcome too :)


Please, hop over to our challenge blog to see what my dear friend and Steampunk soulmate SanDee1899 and our special guest Candy Colwell (YESSS, THE Candy Colwell ;) have prepared for your inspiration! I thank you for staying with me this far (as it was a quite picture heavy post again), wish you a happy crafting time and look forward to seeing your matchbox creations soon entered with our challenge at SanDee&amelie's Steampunk challenges. You always enter such a lot of creative awesome stuff - I can hardly wait to see what you come up with next!


I join the challenges over at SimonSaysStamp - "Anything Goes", Fashionalbe Stamping Challenges - "Script/Books/Pages/Print" , Divas by Design - "Favourite Color Combo" (I LOVE black and white combined with browns!), Out of a Hat Creations - "Numbers" (my lucky number 7 appears two times on my project) and Lady Anne's Challenges - "Monochrome" with this project.


Hugs,

die amelie x

Tuesday, 2 July 2013

Show us your metal!

This fortnight's challenge over at Try It On Tuesday invites you to

"Show us your metal!"

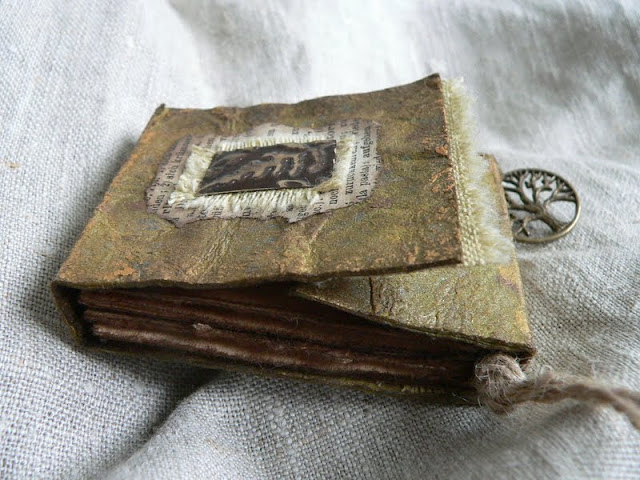
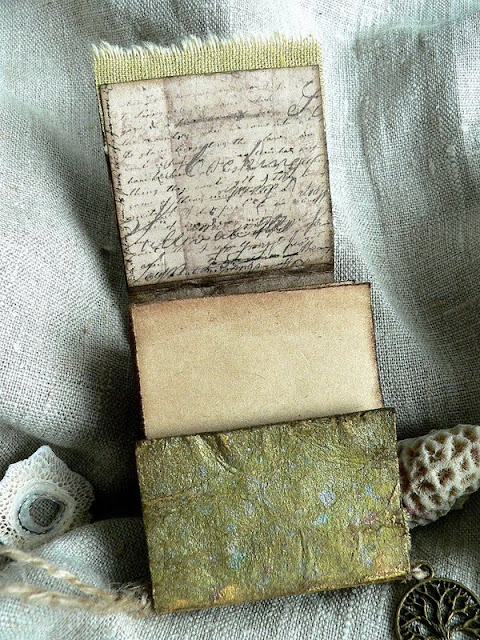
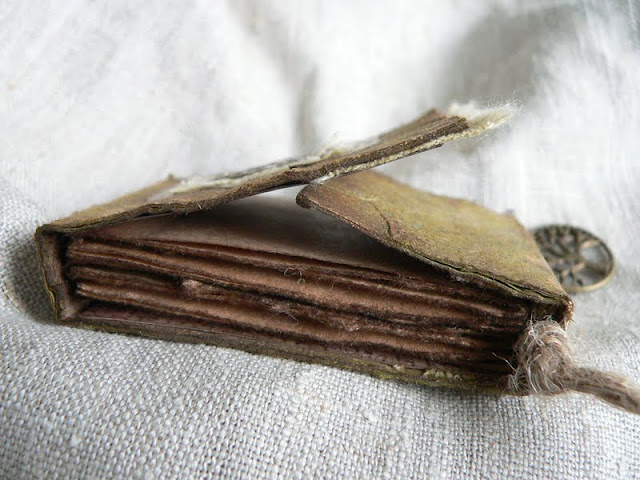
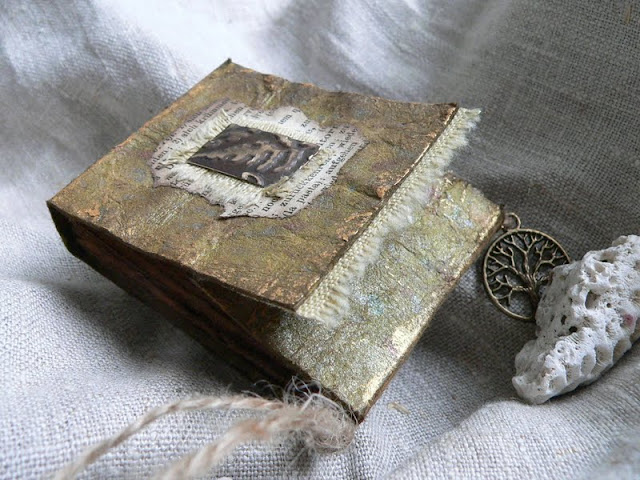
This inspired me to create a tiny booklet, encouraged by highly talented Ana K. and her indredibly beautiful selfmade books. So I tried book binding for the first time and made a sewn binding mini (about matchbook size) note book.


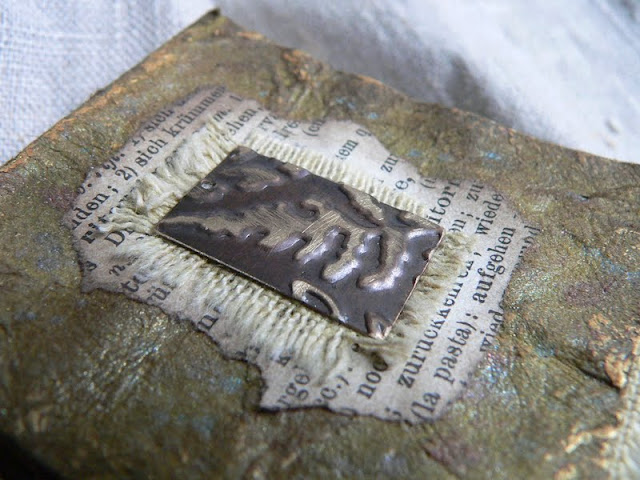
The metals I used with my project are a lovely tree embellishment that I was given to by lovely SanDee1899 and a tiny embossed metal plaque made of a Vintaj copper pendant.

I also used metal effects spray colours on the piece of kraft I used for the book's cover.


I cut a strip off the kraft and treated it with the awesome Tim Holtz "Wrinkle Free Distress Technique", combined with Perfect Pearls and Distress stains. When the piece was soaked I crumpled it in my hands,  carefully unfolded it and dried it using my heat tool.  Afterwards I also added some spreckles of metal tones of  Perfect Pearls Mists and Glimmer Mists.


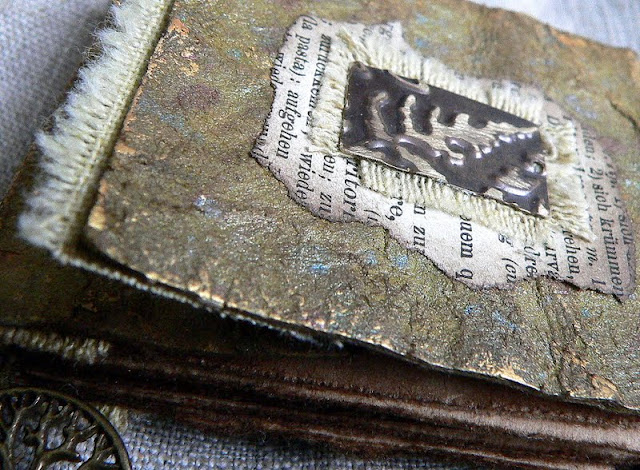
A view of the back of my booklet maybe shows a little of the spreckles and the effect of the Perfect Pearls powder that I mixed with the Distress stains. I also rubbed some Inka Gold onto the edges and some of the bigger wrinkles.

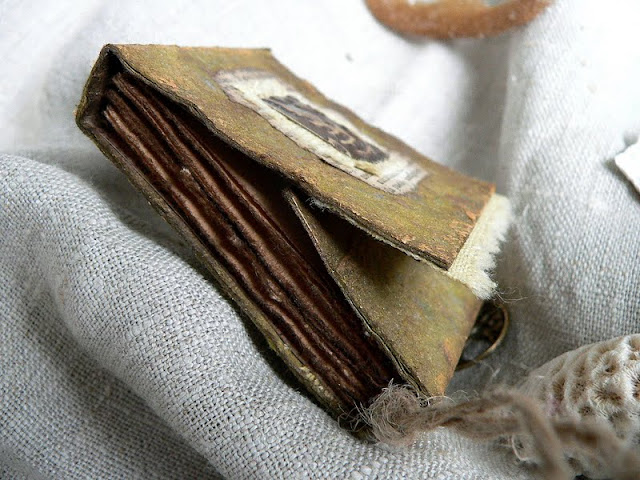
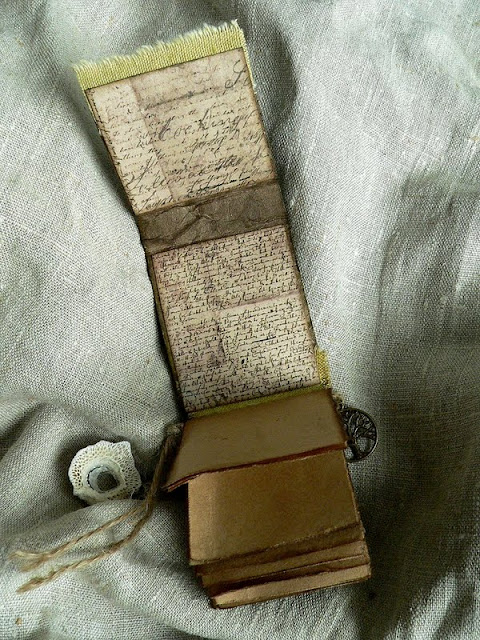
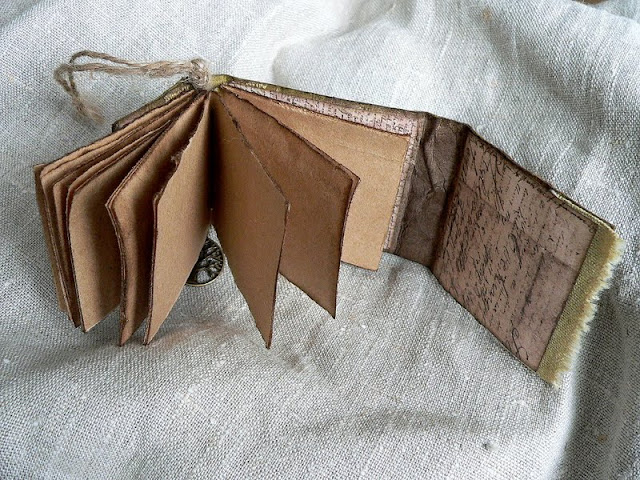
For the pages I tore some strips of brown paper along the edge of a steel ruler, folded them into halves and thus created four bundles, which I sewed to a piece of rough linen.

I distressed and blended the edges of the page bundles with DI "walnut stain" before sewing them to the linen.

Then I glued the left and right overlaps of the linen to the inside of the book cover and covered that with some cut to size pieces from a sheet from the Prima Engraver paper stash.


Using a long sewing needle I fixed the tree embellishment with some rough cord to the inner of the book's spine. 


I ran the Vintaj metal pendant through my Sizzix using one of the lovely metal embossing folders, sanded the raised areas and glued it to the front of my booklet on top of some torn to size scrap from a dictionary and a piece of the same linen that I used for a border and the binding.


I am quite content with the outcome of my first try and as it says "Try it on Tuesday" maybe you also want to try something that you haven't done before... ;)
But of course you can do  whatever is your favourite as long as you show us some metal!!!

I leave you with some more close ups ( I admit that this project was rather tricky to photograph and I hope I have at least captured a tiny bit of the aged feel and the metal sheen of it) and hope you enjoyed your visit with my blog! Hop over to our challenge blog to see what my fantastic teamies made for your inspiration!!!!


I look forward to seeing your entries over at Try It On Tuesday soon!
I enter this project to SimonSaysStampandShow's "Anything Goes" challenge.

Hugs,

die amelie - Claudia x