Thursday, 1 May 2014

Let's Get Scrappy Again - Our Creative Corner's May Challenge

Servus and welcome back to my creative little corner East of the wonderful Alps ;)
Art journaling time again....and time to show you my make for the May challenge at Our Creative Corner!


I was very happy that after Linda's challenge "Let's Get Scrappy" was cancelled in March due to some general issues that needed to be fixed and the break, we now were asked to use our hoarded and beloved scraps again and redo that wonderful challenge! And in my case it led to this art journal page!


Linda says: "use your scraps and left overs from previous projects, pieces of paper, scraps of ribbon, embellishments made and never used.  If you are like me and can't bear to discard all those yummy scraps, you'll have a variety of possibilities to use for this project.  Let's put some of them to use!"


And a variety of possibilities to choose from I had! I finally decided, while cleaning up my studio and re-organizing that lovely watchmakers cabinet I got for X-mas, that I wanted to use the fallen off watch glass labels and tiny pieces of wrapping papers I had collected (because I simply couldn't throw them away...you know what I am talking about, don't you?).


You can see the labels on the watch glasses? When I received the cabinet I took out all the glasses and stuff and dusted off all the drawers...finding a lot of crumpled paper pieces in those tiny compartments that were stuffed in to protect the watch glasses edges. First I put them aside to throw them away, but then....well, I guess I am not alone with being a scrap hoarder *lol

May also is a special month over at Our Creative Corner as wonderful Laura celebrates her first anniversary as the blog owner! There will be a lot of birthday specials and even an additional special surprise give away! Please make sure that you don't miss any of it and of the information over at our challenge blog!


As you can see I used some of the round labels, but there were also oval and square ones that looked a bit like tiny letter stamps - all of them with numbers on them that maybe indicate the size of diameter, thickness or watch series they were made for...as I am no watchmaker I honestly don't know for sure what the numbers stand for. ;) But I love this feeling that there is a "code" on them that I cannot decipher. A bit of mystery....oooooh!


I also used scraps of a magazine page I used on a previous project. The issue I tore the scraps from dates back to 1938 and is all about literature, book recommendations, reviews and latest publications.


For more depth and texture I added some stamping - using the fab Tim Holtz stamps from the "classics #6" set. The fab numbers stamp is from Ditzie Designs.


I also used black and white watercolour pencils to draw circles and activate the pigment with a water loaded brush. Oh, and with some spots I used the pink watercolour pencil too.


I especially love the colour of that bleached red paper scrap! As soon as I had glued it to create my background I had a clue for a colour scheme. So I was very happy that with some of the magazine scraps there was this red print too!


I loved glueing all the various scraps with the bleached and aged paper tones, the blues and reds to the page and it was exciting and surprising even for me to see how a certain colour scheme and design started to form by only preparing the background doing all the collaging!


My quote was printed on heavy printer paper, glued to the stamped and collaged page and blended in by shading the edges with Distress markers (and smudging the outlines with my fingertip).


I really think that "scrap" often is the wrong word for left overs and found or forgotten things....as they all are evidence of some action or event they were involved in. By taking a closer look at those scraps, touching them, finding traces of time and usage, we can do a little "timetravel" - not with precise ideas of what it is that we see, but with that hint of incidences or meaning that these scraps once were part of.


I hope you like my journal page and will have a lot of fun using some of your own scraps to turn them into something new and give them a new purpose! Can't wait to see what you will enter to Linda's challenge!


There's a prize to win too - this month sponsored by Crafty Individuals! Yay! So what are you waiting for! Hop over to Our Creative Corner to learn more about challenge details and also see the fab inspiration my team mates created for you!

Lovely Susi froebelsternchen told me my page would also fit the actual "Circles" theme over at Art Journal Journey - so thank you for the hint, Susi! Of course I enter my page gladly to your wonderful art journalling collection over there! 
I also enter it to Simon Says' Wednesday Challenges, where "Anything Goes" this time and to Vintage Stamping Challenges - "Anything Goes" challenge as well.
And last but not least: the very first challenge over at the new "Crafting At The Weekend" challenge blog, where they start with an "Anything Goes" challenge too. 

Hugs and happy crafting,

Claudia xx

Monday, 28 April 2014

CC3C - Challenge 01 - Paint Marbling

Servus, dear readers, crafting friends and creative folk out there!

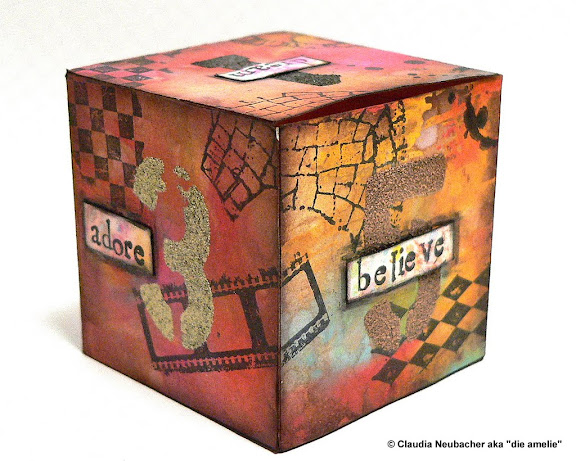
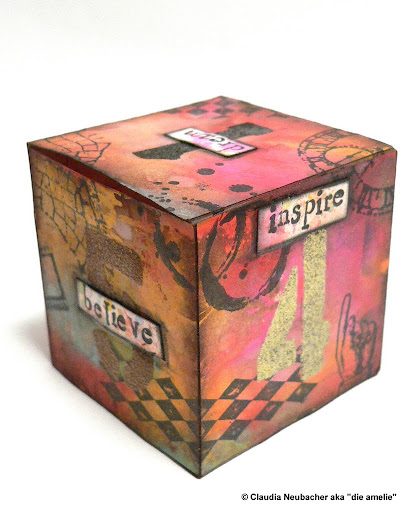
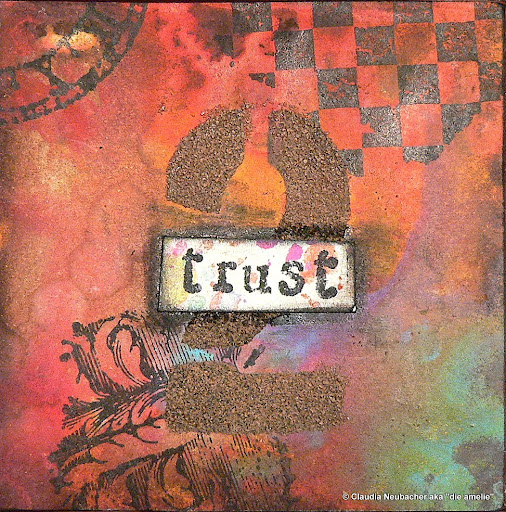
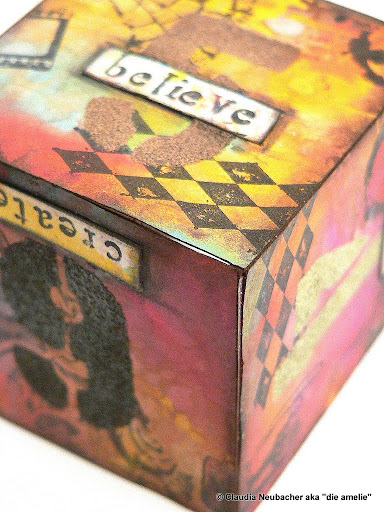
Today I finally managed to do my first ATB (Artist Trading Block). I haven't got the much celebrated Eileen Hull die, but it wasn't too complicated to create my own template as it just needed a bit of measuring, calculating and drawing.

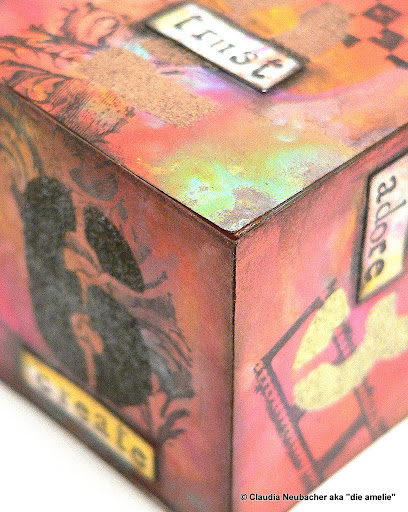
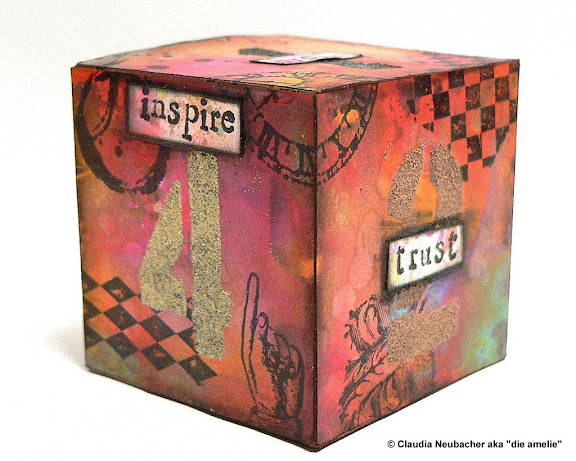
I love the distress paint marbling effect and I thought I would use it on my first ATB and see how heavy distress paint marbling in vivid colours might look like when displayed as a cube...

...and as the fabulous "Compendium of Curiosities Challenge Vol. III" - hosted by Linda Ledbetter - just started, this was the perfect occasion to join in the fun!


There's a prize sponsored by 

http://www.inspirationemporium.com/

this time! Yay!


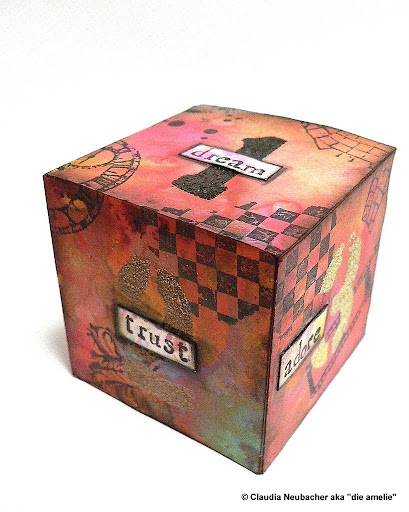
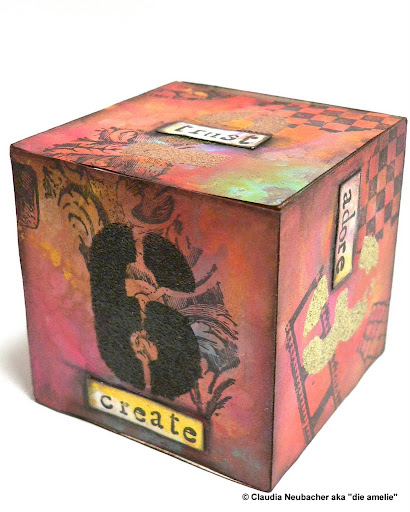
As it is a cube I thought I might create an "artist's die"...a die to roll in case of loss of artistic confidence or mojo. It tells you what to do to get back on track ;)


This time the distress paint marbling went really well and I was excited to watch the distress paints do their magic on the once white card!


It was fun fiddling with the right sides to put together while stamping so the designs would run around the corners and edges!


The numbers were heat embossed using one of the TH stencils and various distress embossing powders (walnut stain, brown puffs, tea die).


Before I put the cube together I blended all edges with DI "gathered twigs". The six encouragement words were stamped onto a scrap on which I used the left overs from the paint marbling, cut out and glued in place. I blended them in with Distress markers.

I had a lot of fun messing around today and I hope a bit of it shows with my encouragement artists die! Thanks for stopping by!

Hugs and happy crafting,
Claudia x

Tuesday, 22 April 2014

Hot Glue Gun Masking and Stamping

I recently had a nice chat with lovely Lisa, the owner of That Craft Place store, and I mentioned a technique that included stencils made with the hot glue gun. She asked me if I would do a tutorial for her (and of course especially the readers and players over at her Natter&Chatter facebook group and the challenge blog).

Well, actually it became a five-in-one tutorial as I couldn't stop experimenting once I had started - it is so much fun! The five tags shown below were made with simple and easy to do circle and heart shaped masks I did with the hot glue gun - I used them not only as masks but also stamped with them to create these five grungy, artsy tags for your inspiration:

(enlarge image by clicking on it).


Materials you will need:

- hot glue gun
- non stick craft sheet
- colour sprays/mists
- distress inks (for stamping)
- acrylic bloc
- tweezers
- white card/tags (or white card plus a tag die and your die cutting machine)
- spray bottle with water

All of this can be bought at That Craft Place of course - either the (bricks and mortar or online) shop or the facebook shop group.

First I created my masks with the hot glue gun. I did some rather doodly circles and a "messy" looking heart. All it takes is applying the hot glue to your non stick craft sheet - doodle, try criss crossing, meandering,... - and let it harden and cool down. You will find that you get there after some practice.

Don't try to remove the hardened shapes too soon or you might tear them! I put the shapes I did onto some white card so you can see them a bit better (sorry that my "white" appears rather green-blue-ish, but I forgot to adjust the white balance):


As there was some colour residue on my craft mat the heart mask took on some of it, but that didn't affect any of the stamping or using the mask later.

Well, of course I started with the most simple way to use them: masking.


Put the masks in place. Spray with first colour:


Change position of masks and put them over the already sprayed circles (trying NOT to line up with your first images of the circles):


Spray again with a different colour...


...which in my case was turquoise, so I got three colours from two goes plus the white from the background card (yellow, turquoise (where the second spray paint hit the white card that had been masked when I applied the yellow spray paint, and green - where the yellow and turquoise had blended).

I used this for a tag I finished off with some word tiles I had stamped on some white card and glued in place:

I had also tried some circles using red spray paints but didn't like them too much...so I put those aside.


But I found that one of my messy circles shapes looks a bit like a rose, doesn't it? I didn't use the background I created with the vibrant reds for a tag, but I used the red and still wet spray paint on the hot glue gun masks to create a different effect. Let me show you how I did it with the heart shaped mask (as I forgot to take pictures of the circles in process *lol):


As you can see the paint is still wet on the mask... so I laid it on another piece of white card and gave it some really heavy spritzes with water from the spray bottle.


See the water pooling on the white card and in the gaps? You can leave it to dry slowly or help a little with the heating tool...but only lightly and very carefully, because you might overheat the hot glue and melt your mask! If you want the colours to be a light shade only you can also use a cloth and dab some of the excess off (as I did). The result from the heart shape looked like this afterwards...


...and my three circles produced this after I had wetted them with water:


As the colour (that sat on top of the masks before spraying them with water) gets soaked between the masks and the surface they are sitting on, it creates a kind of blurred "print" with a lovely watercolour effect (as you maybe can see with this picture from the experiment with the black spray mist):


I used a pair of tweezers to remove the hot glue gun masks. Once you have dried your print the sharper edges start getting visible! Love that effect!

As I said I also tried it with black spray mist (see how it is still wet on the hot glue masks?)...


...and I loved that grungy result even more:


See those light shades of gold? I had used the masks for a different experiment later and had some gold spray residue on them...so I placed them over the (dried) black circles again and sprayed again with water so the gold colour would run down and seep into the white card around the edges of the circle shapes. 

The finished tag from this experiment:


But back to the heart! I had sprayed over the mask with some red colour sprays first,


which is the simplest way to use the hot glue masks. From the residue on the mask I created the watercolour effect heart I have shown you before: 


But as I thought it was too subtle, I tried some stamping with the hot glue mask too. I inked the mask with Distress ink "black soot" (to do so I placed the mask on an acrylic bloc  - which made inking it a lot easier). Then I used the tweezers again to put my mask/stamp in place (face down) and pressed using my fingers mainly. Keep in mind: as our hot glue mask hasn't got an even surface, using your fingers will help make a print from all sections of your hot glue shape - not only of the raised areas. I tried both sides of the mask - the flat one and the bumpy one. You can see the result from the bumpy one (using an acrylic bloc to press down) to the left and the result from the flat side being and stamped inked to the right (where I stamped on top of the watercolour heart shape).


 I liked that effect, so I tried it with the circle (or spiral) shapes too!

Ink the mask/stamp:


 Put it in place (face down) using tweezers and fingers (as it doesn't stick to the acrylic bloc):


Press with your acrylic bloc (or use your fingers if you want more lines to show):


 Voila! 

I did this with all three circles, stamping with Distress ink "barn door" first and then "black soot". 


The finished tags from these experiments:


For the other heart I held the card with the stamped on heart in one hand (so the water could run down) and sprayed it again with water from the bottle...as the Distress ink will react again when getting in contact with water, this created some awesome grungy drip lines:


Then I dried the image and finished off the tag with a stamped word tile from a Red Lead stamp:


I hope you like my messy approach to using selfmade hot glue gun stencils, masks and/or stamps! Don't be afraid if things look messy at first - a lot of the really cool effects start showing as soon as your "experiments" have dried! Be daring! Try out different shapes and textures! It is a lot of fun and sooo inexpensive! 


Hugs and happy crafting! 
Claudia xx